ABPanda
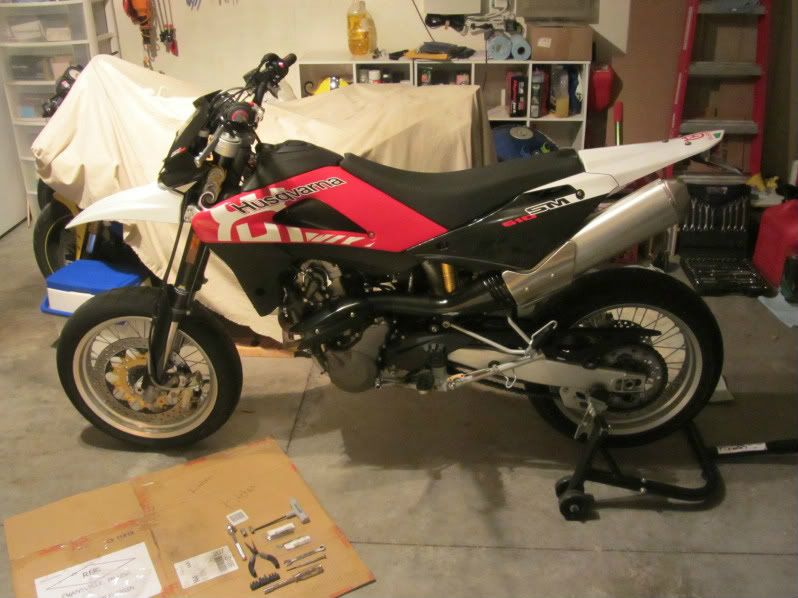
Husqvarna
I checked my valves for the first time today and decided to document the process so perhaps others cold use the info.
This was my first time doing anything like this. I've ridden mostly street bikes where the maintenance intervals were less demanding. This wasn't to bad as I am semi mechanically inclined.
I've heard/read where people say it takes around an hour. I would say for me, being my first time, the adjusting part itself took about an hour. The rest of my time was spent figuring out what had to come off, or what i needed to move out of the way.
1st
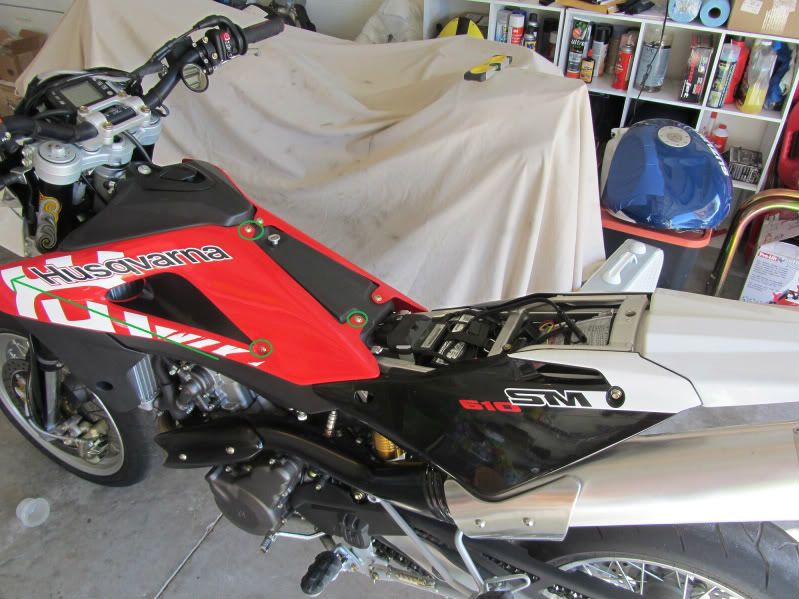
I pulled off the necessary panels to gain access to the tank(It's been brought to my attention on here and SMJ that it isn't necessary to remove the side panels to remove the tank. Thanks Rattletrap). The arrows in the pic show the screws that had to be removed. There's an additional one on the front that goes in to the front of the tank. I found a #3 phillips worked best loosening the screws holding the panels on.
next I pulled the bolt holding on the tank just behind the steering stem along with the panels on the radiators. The bolt holding the tank on took a #5 Allen wrench, and the rad panels where a combo, of the #3 phillips again, and an 8mm socket.
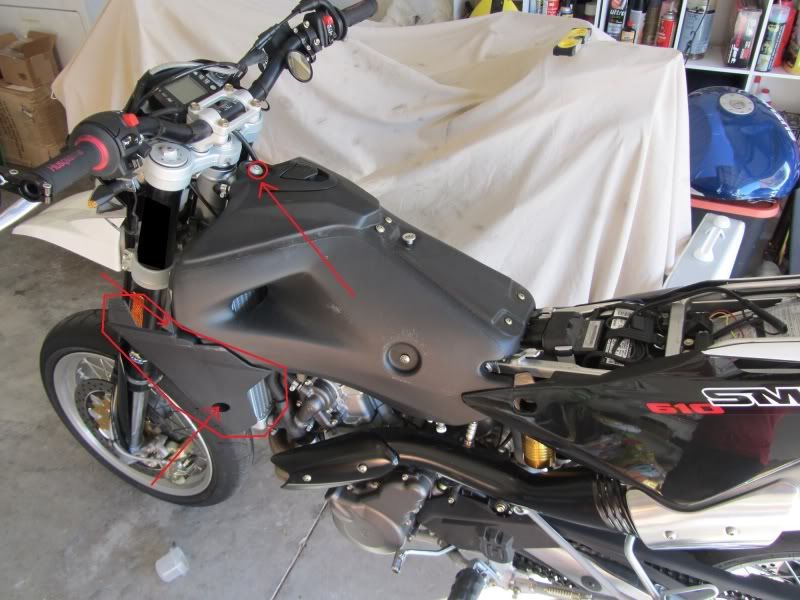
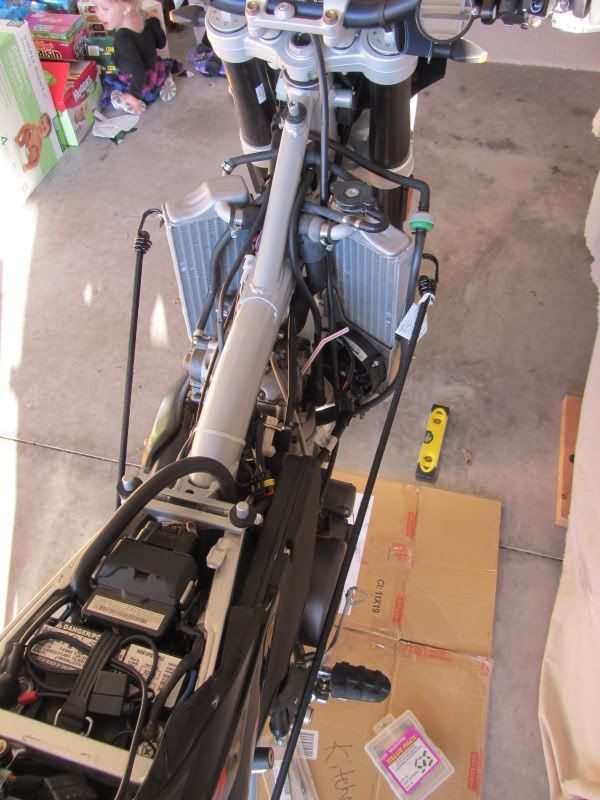
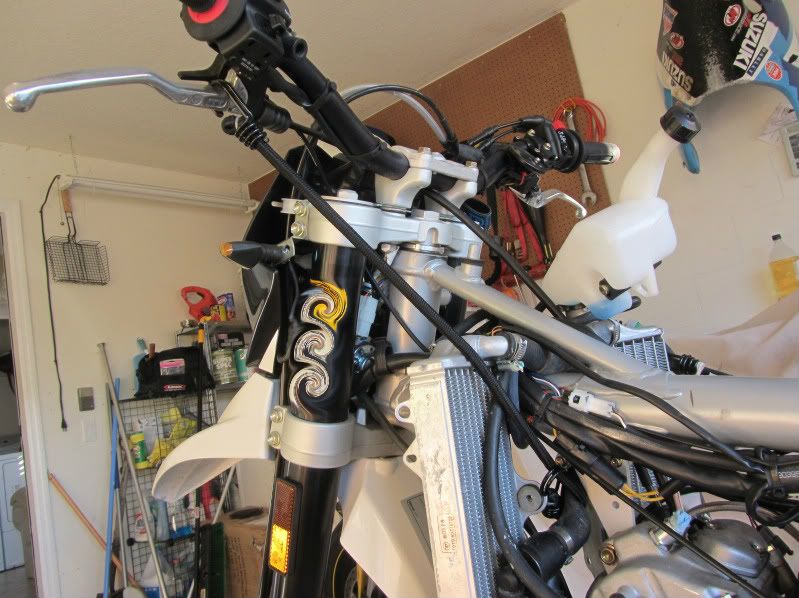
I was then here. At this time I started looking around under the tank and figuring out what I needed to move out of the way and how it could be done. This included several connectors, fuel lines, some coolant lines,etc. It's all pretty flexible so I just disconnected some things and shoved/tucked others out of the way.

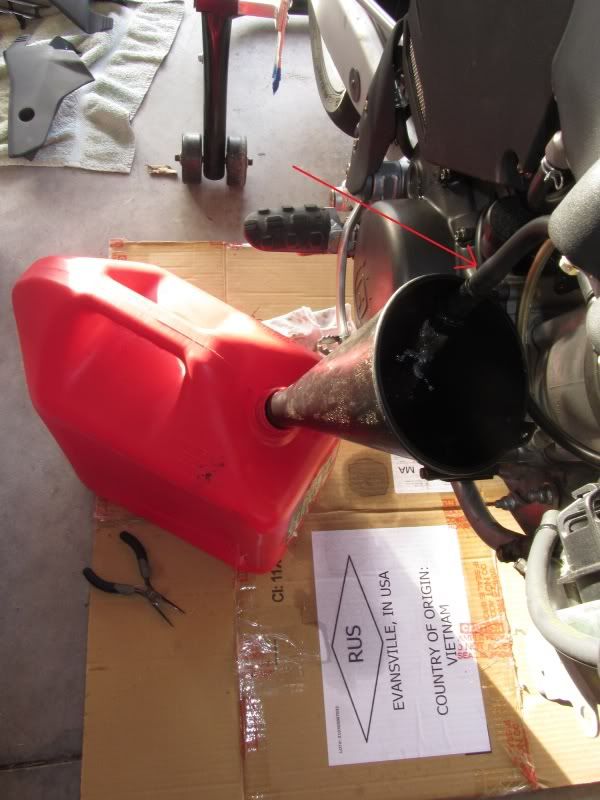
To pull the tank, obviously the fuel lines need to be disconnected,and the fuel pump connection, as well as a couple breather lines up top toward the front of the bike. I don't have a pic unfortunately, but the line that comes off the white elbow (shown below) has another connector a little further down the line closer to the crank case where it does a 90 degree bend and goes to the other side of the bike. I disconnected the line lower down which allowed me to drain the tank in to a gas can with a funnel. I still got some gas on my hands, the bike, and the floor, but most of it went in the gas can.
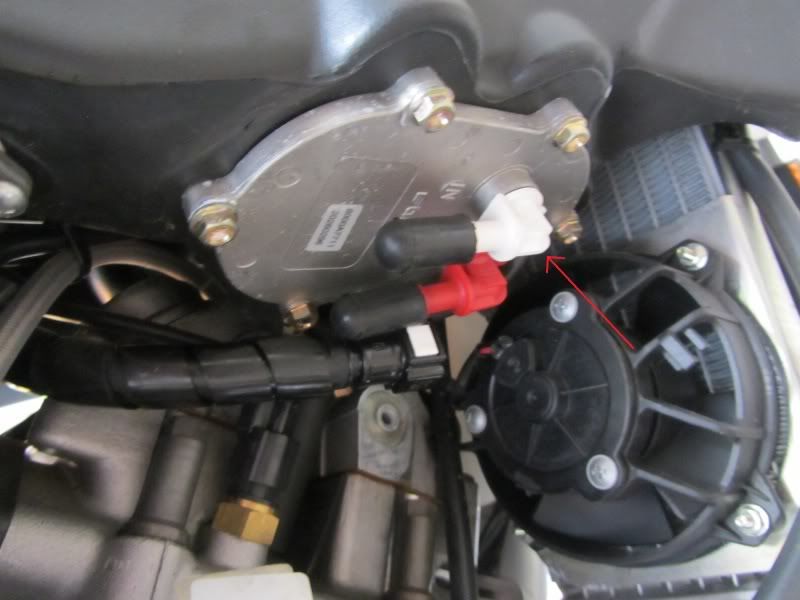
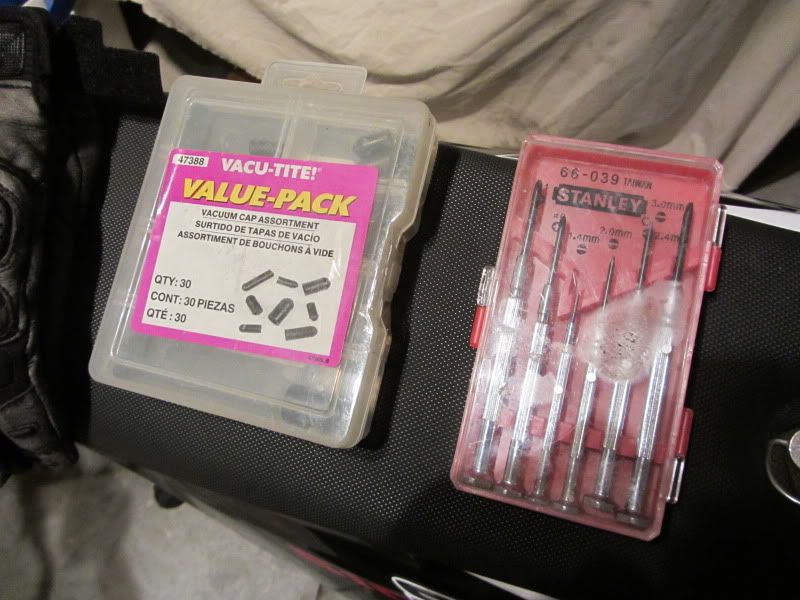
This pic shows the two elbows on the underside of the tank. I'm not sure which line is the feed and which is the return, but once the gas was mostly drained from the tank, the red elbow leaked a lot less than it would have if the tank was completely full. In this case the rubber caps were very helpful. You can buy a box of these in assorted sizes at most auto parts stores. The arrow is pointing at the white elbow I was referring to above.
Once the tanks was off and I'd moved things out of the way it was time to get to the valve adjusters. I removed the cover for the valve adjusters which was held on with two bolts. they required a 8mm socket.
I bought a set of motion pro angled feeler gauges after reading of other peoples success with them on here and SMJ and I can definitely see how it would have been a PITA with straight feelers.
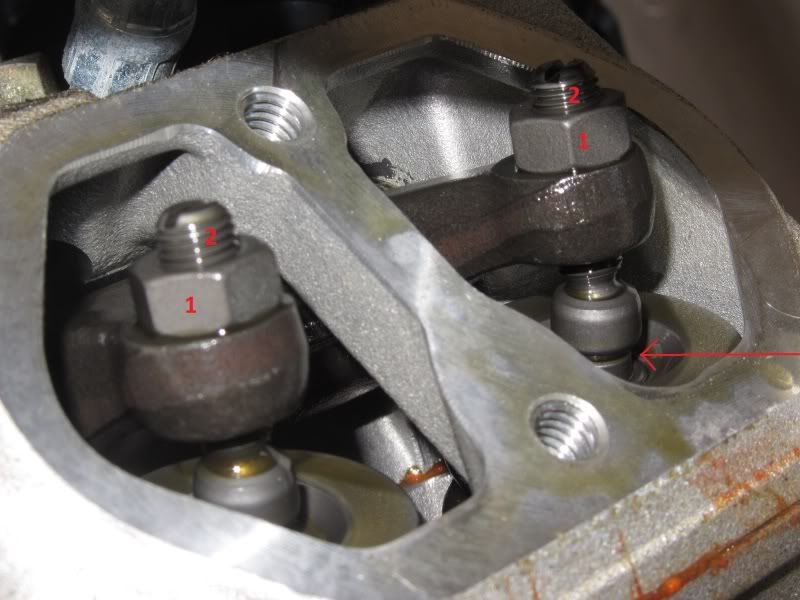
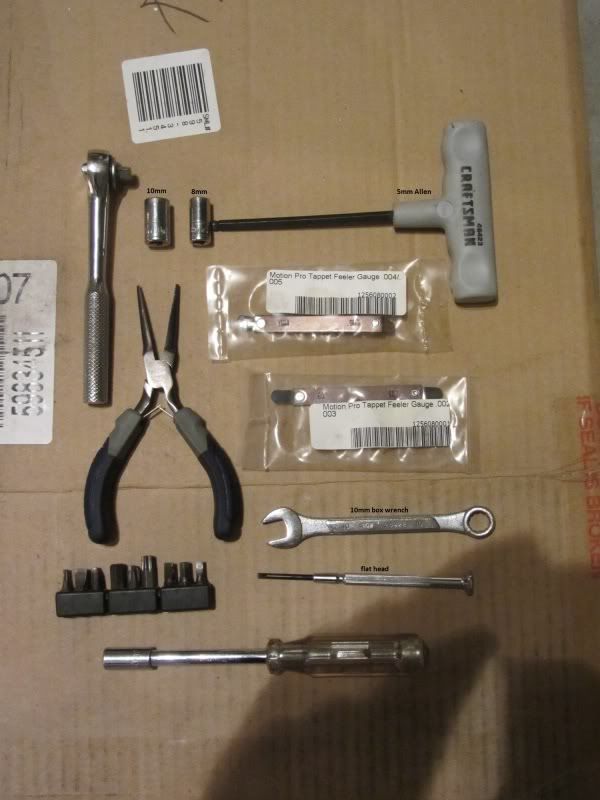
The #1 is on the locking nut that holds the adjustment screw in place. The nut took an 10mm box wrench without any problem. The #2 is on the adjustment screw. The screw itself is standard (flat head). I used a small standard screwdriver from a jewelers kit and it worked perfect for the minute adjustment required.
The arrow below the nut and bolt is pointing to the area where the feeler goes to check the gap. Mine were pretty far out. I checked them up to .005 as that's the biggest I had and they were gapped more than that.
I forgot to mention that prior to adjusting the valves I'd placed the bike on a rear stand to allow the rear wheel to spin freely. I then slotted the bike in to 6th gear and used the straw in the spark plug hole method to find TDC.(It was mentioned to me on SMJ that a small screwdriver could be used in lieu of a straw, as there's no need to feel the piston all the way through to the bottom of the stroke, only at TDC. Just be careful to not knock/scrape any hard deposits in to the cylinder)
Here's a thread explaining an alternate method to find TDC
http://www.cafehusky.com/threads/lashing-them-valves.22648/#post-201664
I personally found TDC by rotating the rear wheel until I saw the intake valves open and close.Once closed I continued to rotate the wheel until the straw rose to the top, and stopped just before it went down and held the wheel there. Hope she holds up. The thread linked above sounds more authoritative, so do it whatever way you feel comfortable. I ran the bike and it ran fine afterward, but perhaps I was just lucky.
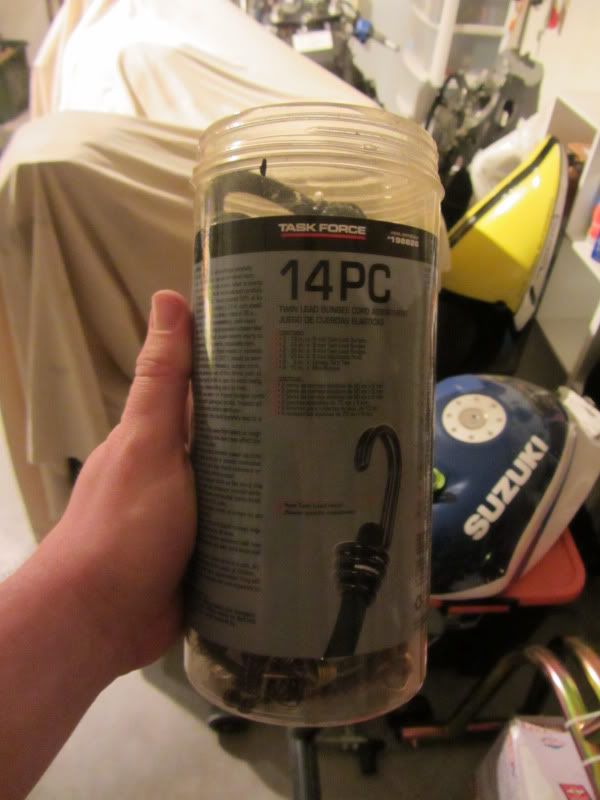
Adjusting the front/exhaust side is the same process as the rear/intake side but it's a little more cramped. I ended up using the bungee method to pull the radiators to the side and back out of
the way and using a bungee to pull one of the coolant lines out of the way. The radiators were firmly in place but the lines had plenty of give and made them easy to pull out of the way. I also pulled the coolant reservoir out of the way through a gap in between the radiator and the frame. It took a little wiggling but it eventually came out. There are a couple of bolts that hold the radiators in place. Two on the front, and one long one that actually connects them together that runs through the coolant reservoir. The two bolts on the front require a 8mm (seeing a pattern here), and the long bolt requires a 10mm on one side, and a 5mm Allen wrench on the other.
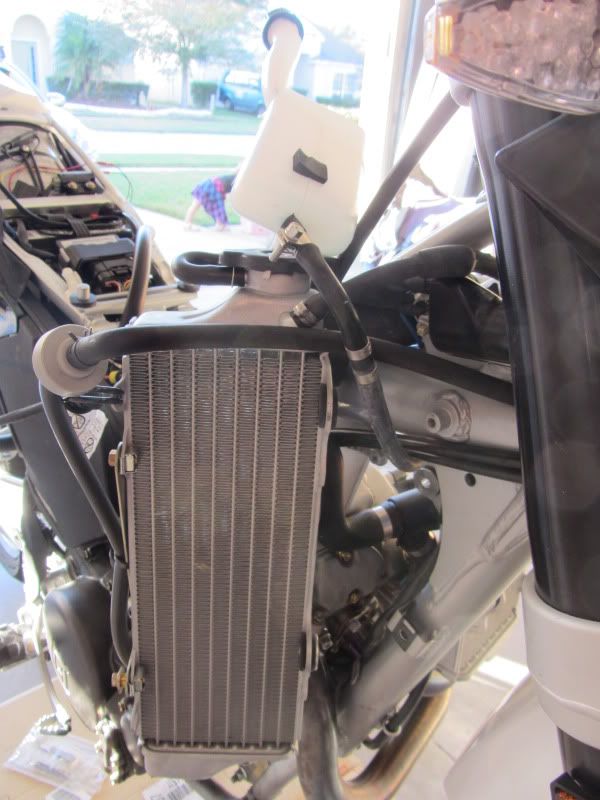
Below are pics of rads pulled back out of the way, and the coolant line bungee'd out of the way as well. I actually didn't need to keep the left rad pulled back when the coolant bottle was out of the way, but this pic shows before I pulled it out.
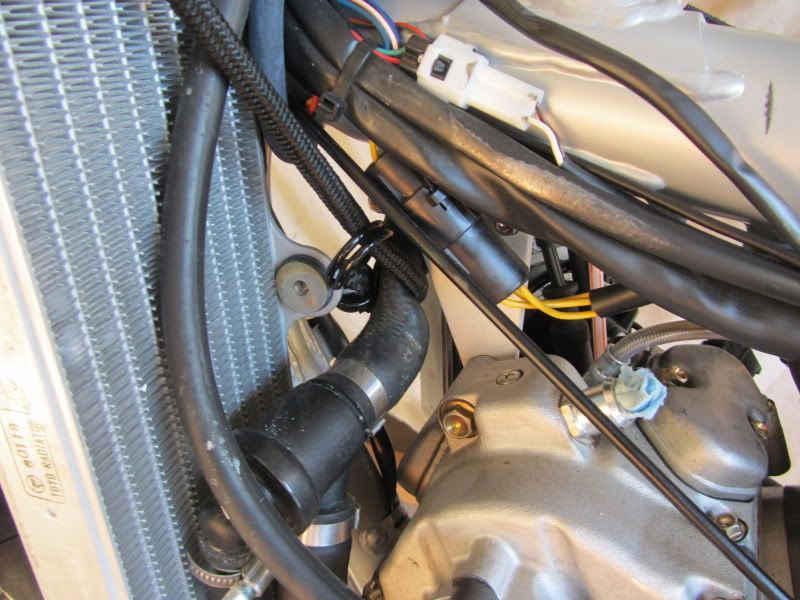
Here is your work area for the exhaust side
Once you get through here, button everything back up in reverse order and take her for a spin.
*I want to add that I reused the valve cover gaskets in this case. I guess I'll find out soon if that was a big mistake. I've heard others say Permatex RTV ultrablack, or Permatex Anaerobic gasket maker work well. If these gaskets fail, I'll be using the ultrablack I have,but they looked good when I pulled the caps off. I took her for a spin after getting everything done and she ran great, and didn't show any leaks. I guess we'll see what happens.
Below are some of the tools I found most useful during the process
Hope this helps!
This was my first time doing anything like this. I've ridden mostly street bikes where the maintenance intervals were less demanding. This wasn't to bad as I am semi mechanically inclined.
I've heard/read where people say it takes around an hour. I would say for me, being my first time, the adjusting part itself took about an hour. The rest of my time was spent figuring out what had to come off, or what i needed to move out of the way.
1st
I pulled off the necessary panels to gain access to the tank(It's been brought to my attention on here and SMJ that it isn't necessary to remove the side panels to remove the tank. Thanks Rattletrap). The arrows in the pic show the screws that had to be removed. There's an additional one on the front that goes in to the front of the tank. I found a #3 phillips worked best loosening the screws holding the panels on.
next I pulled the bolt holding on the tank just behind the steering stem along with the panels on the radiators. The bolt holding the tank on took a #5 Allen wrench, and the rad panels where a combo, of the #3 phillips again, and an 8mm socket.
I was then here. At this time I started looking around under the tank and figuring out what I needed to move out of the way and how it could be done. This included several connectors, fuel lines, some coolant lines,etc. It's all pretty flexible so I just disconnected some things and shoved/tucked others out of the way.
To pull the tank, obviously the fuel lines need to be disconnected,and the fuel pump connection, as well as a couple breather lines up top toward the front of the bike. I don't have a pic unfortunately, but the line that comes off the white elbow (shown below) has another connector a little further down the line closer to the crank case where it does a 90 degree bend and goes to the other side of the bike. I disconnected the line lower down which allowed me to drain the tank in to a gas can with a funnel. I still got some gas on my hands, the bike, and the floor, but most of it went in the gas can.
This pic shows the two elbows on the underside of the tank. I'm not sure which line is the feed and which is the return, but once the gas was mostly drained from the tank, the red elbow leaked a lot less than it would have if the tank was completely full. In this case the rubber caps were very helpful. You can buy a box of these in assorted sizes at most auto parts stores. The arrow is pointing at the white elbow I was referring to above.
Once the tanks was off and I'd moved things out of the way it was time to get to the valve adjusters. I removed the cover for the valve adjusters which was held on with two bolts. they required a 8mm socket.
I bought a set of motion pro angled feeler gauges after reading of other peoples success with them on here and SMJ and I can definitely see how it would have been a PITA with straight feelers.
The #1 is on the locking nut that holds the adjustment screw in place. The nut took an 10mm box wrench without any problem. The #2 is on the adjustment screw. The screw itself is standard (flat head). I used a small standard screwdriver from a jewelers kit and it worked perfect for the minute adjustment required.
The arrow below the nut and bolt is pointing to the area where the feeler goes to check the gap. Mine were pretty far out. I checked them up to .005 as that's the biggest I had and they were gapped more than that.
I forgot to mention that prior to adjusting the valves I'd placed the bike on a rear stand to allow the rear wheel to spin freely. I then slotted the bike in to 6th gear and used the straw in the spark plug hole method to find TDC.(It was mentioned to me on SMJ that a small screwdriver could be used in lieu of a straw, as there's no need to feel the piston all the way through to the bottom of the stroke, only at TDC. Just be careful to not knock/scrape any hard deposits in to the cylinder)
Here's a thread explaining an alternate method to find TDC
http://www.cafehusky.com/threads/lashing-them-valves.22648/#post-201664
I personally found TDC by rotating the rear wheel until I saw the intake valves open and close.Once closed I continued to rotate the wheel until the straw rose to the top, and stopped just before it went down and held the wheel there. Hope she holds up. The thread linked above sounds more authoritative, so do it whatever way you feel comfortable. I ran the bike and it ran fine afterward, but perhaps I was just lucky.
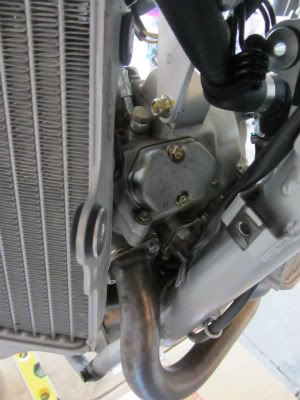
Adjusting the front/exhaust side is the same process as the rear/intake side but it's a little more cramped. I ended up using the bungee method to pull the radiators to the side and back out of
the way and using a bungee to pull one of the coolant lines out of the way. The radiators were firmly in place but the lines had plenty of give and made them easy to pull out of the way. I also pulled the coolant reservoir out of the way through a gap in between the radiator and the frame. It took a little wiggling but it eventually came out. There are a couple of bolts that hold the radiators in place. Two on the front, and one long one that actually connects them together that runs through the coolant reservoir. The two bolts on the front require a 8mm (seeing a pattern here), and the long bolt requires a 10mm on one side, and a 5mm Allen wrench on the other.
Below are pics of rads pulled back out of the way, and the coolant line bungee'd out of the way as well. I actually didn't need to keep the left rad pulled back when the coolant bottle was out of the way, but this pic shows before I pulled it out.
Here is your work area for the exhaust side
Once you get through here, button everything back up in reverse order and take her for a spin.
*I want to add that I reused the valve cover gaskets in this case. I guess I'll find out soon if that was a big mistake. I've heard others say Permatex RTV ultrablack, or Permatex Anaerobic gasket maker work well. If these gaskets fail, I'll be using the ultrablack I have,but they looked good when I pulled the caps off. I took her for a spin after getting everything done and she ran great, and didn't show any leaks. I guess we'll see what happens.
Below are some of the tools I found most useful during the process
Hope this helps!
 ) Also check that road dirt has been cleaned off the valve covers very well before opening - your bike looks spotless but I needed to take an old toothbrush to mine before I was happy!
")
