• Husqvarna Motorcycles Made In Sweden - About 1988 and older

  • Hi everyone,

    As you all know, Coffee (Dean) passed away a couple of years ago. I am Dean's ex-wife's husband and happen to have spent my career in tech. Over the years, I occasionally helped Dean with various tech issues.

    When he passed, I worked with his kids to gather the necessary credentials to keep this site running. Since then (and for however long they worked with Coffee), Woodschick and Dirtdame have been maintaining the site and covering the costs. Without their hard work and financial support, CafeHusky would have been lost.

    Over the past couple of weeks, I’ve been working to migrate the site to a free cloud compute instance so that Woodschick and Dirtdame no longer have to fund it. At the same time, I’ve updated the site to a current version of XenForo (the discussion software it runs on). The previous version was outdated and no longer supported.

    Unfortunately, the new software version doesn’t support importing the old site’s styles, so for now, you’ll see the XenForo default style. This may change over time.

    Coffee didn’t document the work he did on the site, so I’ve been digging through the old setup to understand how everything was running. There may still be things I’ve missed. One known issue is that email functionality is not yet working on the new site, but I hope to resolve this over time.

    Thanks for your patience and support!

1985 CR500 Project Bike by Husky 37

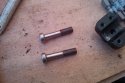
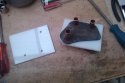
Adjuster snapped in Swinging Arm

I haven't had chance to take a picture yet but I thought I would share this with you....

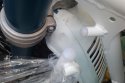
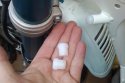
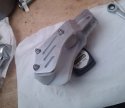
I have a local guy that I use when I need bearings pressed out... as with the swinging arm because they are being replaced. Well to cut a long story short because he can talk the hind leg off the back of a donkey (great guy full of knowledge)..... I asked if he could extract the remainder of the sheared off adjuster screw...

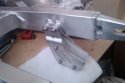
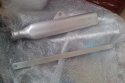
He said he had some acid that would eat away the steel and leave the Ali alone... sure enough I picked up the Swinging arm today with no trace of the screw... job done!

He said the acid will not touch stainless only steel so any snapped studs in Ali castings etc where it could cause damage drilling it out....

Just PM me if you need his name and number (this may only be relevant to those based in the UK)
 
Good info.

Here's a similar trick, which I know we've discussed before, but I think it's interesting because it's essentially the same thing... in reverse:

If you seize a bike with an aluminum piston and Nikasil or simliar plated cylinder (which includes virtually any bike made in the last 20 years), you can melt the aluminum off the bore with muriatic (swimming pool) acid. It dissovles the aluminum out, but doesn't hurt the bore. Often, the bore looks SCARY BAD until you start getting the aluminum out. Then, often, the bore's fine because it's SO much harder than the aluminum piston.
 
Update:

There has been a lull in my progress..... this has been mainly due to waiting for parts that need to be fitted before the next stage.

I have decided that as the Swinging Arm is probably going to be fitted with it's last set of bearings I would pay out and have the Arm Vapour blasted to bring it back to new condition and then have it 'Clear' anodised to protect it.

I am tinkering/fussing about making sure that I have all the bolts, plastics etc. Hopefully this is the lull before the storm......
 
It's been a while since an update....

Progress has been slow since I damaged the cyatic nerve as it exits the spine on my right side..... couldn't walk more that 50 feet or stand for any length of time (going for the sympathy vote here :))

Any way a couple of pictures to keep things moving along...

New Nylon plugs for the end of the sub frame and fork stops. I bought the Nylon bar and supplied my mate with an old one and he machined me some new ones which really do finish off the clean frame.

I have some more bits on the go so I hope the next update will not be too long away.
 

Attachments

  • Plugs - in sub frame and fork stops - CH.jpg
    Plugs - in sub frame and fork stops - CH.jpg
    30 KB · Views: 70
  • Plugs - new - CH.jpg
    Plugs - new - CH.jpg
    28.8 KB · Views: 67
Hope your back gets better by riding season. I too am familiar with back pain. Spent all January dealing with it.
Nice white plugs - looks great.
 
Thanks Long Range. Back is fine it's just the pain down my right leg which seems to be hanging around. I will miss the first event I was planning on but that's life....

Anyway more important matters.... Update:

The fork clamps came with Fat bar mounts which are OK but not in keeping with what I am trying to achieve. Picture 1 is a reminder.

So I started to play with my existing bar mounts and found that the thread in the top clamp match the thread in my mounts. Picture 2 shows some bolts that I had machined so that the shank diameter was less thread than the thread.

Picture 3 shows these 'Captive' bolts in place.

Picture 4 shows bars mounted.

The good thing is that it's close to the works bike, I haven't modified either the top clamp or bar mounts so they stay original and I have saved some money (which at this momnet in time is only a good thing)

Stu
 

Attachments

  • 1984 Works Husky - Leif Persson 3.jpg
    1984 Works Husky - Leif Persson 3.jpg
    96 KB · Views: 97
  • Original Clamps - machined shank - CH.jpg
    Original Clamps - machined shank - CH.jpg
    48.2 KB · Views: 78
  • Original Clamps - Bolts from underneath - CH.jpg
    Original Clamps - Bolts from underneath - CH.jpg
    91.8 KB · Views: 89
  • Original clamps - Bars - CH.jpg
    Original clamps - Bars - CH.jpg
    38.9 KB · Views: 94
Lower and upper Chain Guides

The beginnings of the refurbishment of the Lower and Upper Chain Guides.

Picture 1: The before. To be fair there was not much to salvage apart from the ali plates and a few spacers....

Picture 2: Refurbished parts plus new Nylon rollers with bearings and the blank channel ready to make a new bracket.

By the way does any one know why the bracket that holds the top and bottom rollers has been cut the way it is?

The new channel (1 1/4 x 3/4 x 1/8) is the closest I could get to the metric original (30mmx20mmx4mm) in the UK. Now somebody is going to pop up and say so-and-so has that size channel :)

I am also making new Nylon rub plates for the Lower guide. You'll see those in the assembly photos.

Stu
 

Attachments

  • Lower Chain Guide - Refurbished - CH.jpg
    Lower Chain Guide - Refurbished - CH.jpg
    39.6 KB · Views: 53
  • Lower Chain Guide - Before - CH.jpg
    Lower Chain Guide - Before - CH.jpg
    37.9 KB · Views: 55
Husky37;84272 said:
The beginnings of the refurbishment of the Lower and Upper Chain Guides.

Picture 1: The before. To be fair there was not much to salvage apart from the ali plates and a few spacers....

Picture 2: Refurbished parts plus new Nylon rollers with bearings and the blank channel ready to make a new bracket.

By the way does any one know why the bracket that holds the top and bottom rollers has been cut the way it is?

The new channel (1 1/4 x 3/4 x 1/8) is the closest I could get to the metric original (30mmx20mmx4mm) in the UK. Now somebody is going to pop up and say so-and-so has that size channel :)

I am also making new Nylon rub plates for the Lower guide. You'll see those in the assembly photos.

Stu

If it's a single shock bike, I believe the cut out was to achieve maximun clearance between the lower shock linkage- that's the case on my '87.
 
Thanks Hwy I hadn't thought of that as I haven't got to putting the shock or linkage back on... I think that I will replicate the shape just in case.

Stu
 
Lower Chain Guide now complete

Just finished making new rub plates as the NOS I have are now gone brown.

Picture 1: Drilled 3 pilot holes in the new material. I then enlarged them to 15mm and inserted some copper pipe as alignment pegs. The I cut the excess off and ground the curves.

Picture 2: Rub plates finished and shaped ready for assembly.

Picture 3: Chan Guide greased and assembled with nice white (for the moment anyway) rub plates.

Picture 4: Just for the shear hell of it I bolted it to the swinging to see how it would look.

Picture 5: Just a single shot of the Barrel back on.... Head not bolted down because I want to check the timing before I do that..... getting there...

Stu
 

Attachments

  • Rub plates - beginnings - CH.jpg
    Rub plates - beginnings - CH.jpg
    83.8 KB · Views: 68
  • Rub plates - finished - CH.jpg
    Rub plates - finished - CH.jpg
    41.2 KB · Views: 66
  • Lower Chain Guide - Assembled - CH.jpg
    Lower Chain Guide - Assembled - CH.jpg
    81.5 KB · Views: 74
  • Lower Chain Guide - Attached - CH.jpg
    Lower Chain Guide - Attached - CH.jpg
    80.1 KB · Views: 93
  • Engine - Block back on - CH.jpg
    Engine - Block back on - CH.jpg
    33.9 KB · Views: 102
Hwy;85054 said:
Stu,
Nice finish on the swing arm. How did you accomplish that?

Hi Hwy,

Not me.... I had a conversation with 'The polisher' which went along the lines of.... I want to get the swinging arm back to some condition like it was when new/in it's raw form (mine came painted but the works bike was plain Ali)

So he went through the Polishing steps by using various grades of grit on the belt sander until he used a fine one then stopped at the point when he would have started polishing. This meant I had a Satin finish rather than too shiny a finish. It cost less too....

I had the torque arm, lower chain guide brackets and Silencer done at the same time.

Nice and clean with no bling.....

Stu
 
schimmelaw;85241 said:
Stu,
Nice work there. Very sano. Would love to see how the the brake stay and silencer turned out.
Rick

Hi Rick,

Ask and you shall recieve........

Stu
 

Attachments

  • Silencer and Torque Arm - CH.jpg
    Silencer and Torque Arm - CH.jpg
    35.9 KB · Views: 102
Nice and clean with no bling.....

Stu[/QUOTE]

Ya, I think that's a good look for an 80's works bike. Back then the bikes weren't all chrome and Monster Energy stickers. And motocross consisted of two 45 minute motos, and the bikes were more often that not quite thrashed by the end, and "repaired" each week on a low budget. That meant satin, not polished! Good choice.
 
Parts look very cool. On some parts no finish is a cool finish. Meant to give you props for the cylinder and head too. Always been partial to the unpainted top end myself. Very "factory" looking.

Mantra: it will start .... it will start .... it will start .... it will start ...........
Rick
 
schimmelaw;85546 said:
Parts look very cool. On some parts no finish is a cool finish. Meant to give you props for the cylinder and head too. Always been partial to the unpainted top end myself. Very "factory" looking.

Mantra: it will start .... it will start .... it will start .... it will start ...........
Rick

Somebody told me that dancing around a tree naked at midnight on the 3rd Wednesday in the month would help...... All I'm going to say is that it didn't....

Stu
 
Thanks for comments T, Rick and Picklito for your comments. They are much appreciated and gives me encouragement to forge ahead...

Cheers guys.

Stu
 
Back
Top