• Husqvarna Motorcycles Made In Sweden - About 1988 and older

  • Hi everyone,

    As you all know, Coffee (Dean) passed away a couple of years ago. I am Dean's ex-wife's husband and happen to have spent my career in tech. Over the years, I occasionally helped Dean with various tech issues.

    When he passed, I worked with his kids to gather the necessary credentials to keep this site running. Since then (and for however long they worked with Coffee), Woodschick and Dirtdame have been maintaining the site and covering the costs. Without their hard work and financial support, CafeHusky would have been lost.

    Over the past couple of weeks, I’ve been working to migrate the site to a free cloud compute instance so that Woodschick and Dirtdame no longer have to fund it. At the same time, I’ve updated the site to a current version of XenForo (the discussion software it runs on). The previous version was outdated and no longer supported.

    Unfortunately, the new software version doesn’t support importing the old site’s styles, so for now, you’ll see the XenForo default style. This may change over time.

    Coffee didn’t document the work he did on the site, so I’ve been digging through the old setup to understand how everything was running. There may still be things I’ve missed. One known issue is that email functionality is not yet working on the new site, but I hope to resolve this over time.

    Thanks for your patience and support!

73 250WR Rider/Racer Rebuild

toolguy1

Husqvarna
AA Class
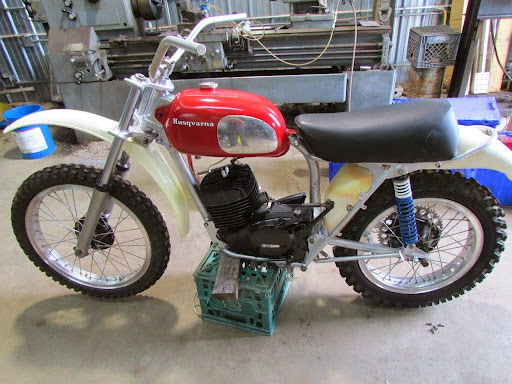
I thought I would post up some pics as I go thru this barnfind 250WR to put it back into a competitive form once again. Here's how she looked when I brought her home, vines and all......haha

IMG_0243.JPG


IMG_0245.JPG


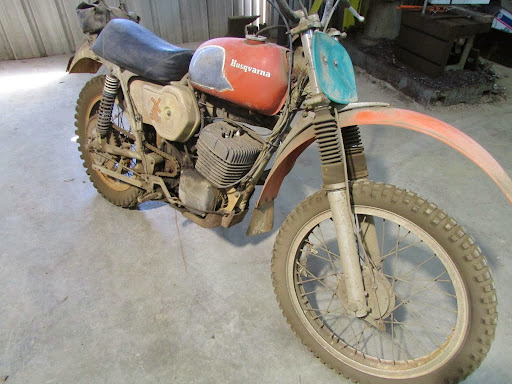
I'm currently in the teardown phase. This bike belonged to an old friend of mine who used to race with us in the mid seventies. He bought this bike new and has kept it for some 40+ years. It last ran 20 years ago and was parked with 1/2 tank of gas still in it...........Here we go!
 
looks pretty complete..it will be interesting to see what the motor is like after sitting..post lots of pics!
 
Got the suspension parts disassembled, cleaned and the rear shocks checked and repainted. I had to build a tool to hold the damper rod in one of the forks to stop it from spinning. Just a quick little "nuisance" job since I have access to a full machine shop. Got the new seals ordered, just need to clean up the legs to get ready for paint now.

IMG_0266.JPG


Here's a sample of the goodies that came with the ol' girl........
Most still in the original packaging...........

IMG_0257.JPG
 
Also got the frame sandblasted, sanded and cleaned. Then 3 coats Duplicolor Aluminum paint.........looks really nice as compared to a few days ago.........

IMG_0269.JPG


IMG_0268.JPG
 
dang look at the goodies... i miss Preston Petty 14 bucks for that head light boy dont you wish you could buy that 2 day 4 that:lol:
 
Back to work on the '73. This is how the wheels looked prior to cleanup/polish and hub repaint..........lots of years of neglect.

IMG_0258.JPG


The new seals, decals and air filter came in from Vintage Husky. Also received a new seat cover for the project. Forks have now been rebuilt, painted and remounted and the new seat cover installed. Got her to the "roller" phase now.


IMG_0270.JPG


IMG_0271.JPG
 
Thanks!........Moving along pretty good and enjoying the project. It's fun seeing the old girl start to shine like she should.
 
I had a seal leaking on the shifter so I removed the clutch cover after draining the tranny oil. Surprisingly the old oil looked very good. No sign of moisture after 20 years of sitting and hardly any residue in the oil. Removing the clutch cover revealed a very clean clutch and other internals.

IMG_0274.JPG


Knocked out the old shifter seal and replaced it with a new one. Removed the head to find a nice clean bore and everything in spec for a standard bore! Great news there. Buttoned everything back up and finished up the prep for engine paint and applied 3 coats of Duplicolor Semi Gloss Black engine paint.
I completely sanded and prepped the gas tank for paint. Then using 3 coats of etching primer and 4 coats of Duplicolor Cherry Red the tank turned out pretty darn nice. In the pic I still haven't polished the chrome panels or done the white pin stripes around the chrome. Anyway, this is how the paint looked.............

IMG_0278.JPG


Waiting on carb parts from Bing to come in. Almost ready to fire the old girl up..............
 
amazing how the internals of that motor look like the 80s bikes..or even the later four strokes..that husky dna ran pretty deep. just keep evolving the same design and refining it. pretty cool
 
Ok, I'm still waiting on a couple of parts from Bing to come in but I couldn't resist a few shots of the finished results. I gotta admit I'm pretty proud of her as I have never tried this level of rebuild before.


You've got to remember, this is where I started........


IMG_0245.JPG


IMG_0284.JPG


IMG_0289.JPG


IMG_0286.JPG
 
Finally got the carb parts in from Bing today. Two hours later and after only 3 kicks she roared to life after twenty years of sitting silent. It ran perfectly, good power and shifts thru all the gears easily. The only thing I didn't realize is the old drum brakes don't stop nearly as well as the discs on the 449. haha
 
"That is a cool bike. Please do something with the front fender. It detracts from the bike"

And zip ty the preston petty front light/number plate on it....

Team WR
 
I would definitely use the clear coat, I'm not sure how the paint would hold up without it. So far mine is holding up nicely but I am careful filling it and hardly ever get gas on the tank.
 
Back
Top