• Husqvarna Motorcycles Made In Sweden - About 1988 and older

  • Hi everyone,

    As you all know, Coffee (Dean) passed away a couple of years ago. I am Dean's ex-wife's husband and happen to have spent my career in tech. Over the years, I occasionally helped Dean with various tech issues.

    When he passed, I worked with his kids to gather the necessary credentials to keep this site running. Since then (and for however long they worked with Coffee), Woodschick and Dirtdame have been maintaining the site and covering the costs. Without their hard work and financial support, CafeHusky would have been lost.

    Over the past couple of weeks, I’ve been working to migrate the site to a free cloud compute instance so that Woodschick and Dirtdame no longer have to fund it. At the same time, I’ve updated the site to a current version of XenForo (the discussion software it runs on). The previous version was outdated and no longer supported.

    Unfortunately, the new software version doesn’t support importing the old site’s styles, so for now, you’ll see the XenForo default style. This may change over time.

    Coffee didn’t document the work he did on the site, so I’ve been digging through the old setup to understand how everything was running. There may still be things I’ve missed. One known issue is that email functionality is not yet working on the new site, but I hope to resolve this over time.

    Thanks for your patience and support!

77 WR250 back from the dead

Eric is correct. All the "inner" parts are clamped together with the swingarm nut. Check your pivot bolt for wear by running your finger along it. If there is a step in it replace it with another one. Don't forget the shim washers that go between the frame and the swingarm !
 
Eric is correct. All the "inner" parts are clamped together with the swingarm nut. Check your pivot bolt for wear by running your finger along it. If there is a step in it replace it with another one. Don't forget the shim washers that go between the frame and the swingarm !
hahaha, i always see the shims on the outside of the frame. and then the frame is worn...:(
 
Ok I understand the clamping side load theory but I still think there will be relative movement between the bushings and bolt. I'll see when it goes together.
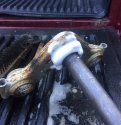
Here's my pivot bolt. It does have some wear but I think it's reusable.
My large washers were pretty worn so I had replacements made out of 304 stainless.
After the ID and OD were cut on the lathe they wire EDM'd to the .040" thickness so they are flat within .001"
I'll make sure they go back in the correct stack up.
 

Attachments

  • IMG_3561.JPG
    IMG_3561.JPG
    201.1 KB · Views: 28
  • IMG_3563.JPG
    IMG_3563.JPG
    238.3 KB · Views: 27
  • IMG_3564.JPG
    IMG_3564.JPG
    175.9 KB · Views: 28
To change to subject a little does my shift lever look like it was hit or is it supposed to be less than 90 degrees to the mount?
 

Attachments

  • IMG_3559.JPG
    IMG_3559.JPG
    102.6 KB · Views: 28
I would use that bolt too. Shims look great & shifter looks normal to me...just kidding, I'd straighten it before riding.
 
Yea I thought it didn't look quite right. I'll prolly just heat/straighten now and put a folding one on for safety later.
 
Yea I thought it didn't look quite right. I'll prolly just heat/straighten now and put a folding one on for safety later.
safety i guess, but will stop bending and greatly reduce stress/damage to shift shaft, seal, and the case.
 
Tons of aftermarket options work, lots of metric bike manufacturers, not that many options for shaft size. I've got a motorcycle salvage place nearby (they also sell new Emgo stuff, and a few other aftermarket, NOS and discounted things, nothing directly marketed for Husky though). For something like a shift pedal, with the original in hand I can usually eyeball what fits. To be sure, look for a bike on the lot that matches the model on the package and fit your original onto it. Or go the other direction, wander around the lot looking for bikes with the stock shift pedal already removed and see which ones your pedal fits onto. Make sure to pay attention to how the pedal is secured to the shaft.

Aftermarket stuff at the salvage yard is frequently cheap and of questionable quality, so if you don't feel good about what you see walk away with new knowledge of cross-brand compatibility. Of course, sometimes the quality of something you buy online isn't as good once you've got it in hand as it looked on the site, so I guess you've got a catch-22 there. I may or may not have an OE part or two from a non-Swedish manufacturer on my Husky, you never know (just don't tell the purists).
 
Here's update pics during the resto of the triple clamps.
 

Attachments

  • image1.JPG
    image1.JPG
    111.6 KB · Views: 54
  • image2.JPG
    image2.JPG
    59.3 KB · Views: 56
VDO Enduro Speedometer with reset-able trip meter. OEM for Husqvarna until replaced by the Nippon Denso we see on our single shock WRs
 
Thanks, was it an option and is it resettable to 0?
I can only turn it and move the numbers up/down.
 
Started the reassembly this weekend.
I'm going to clean up and redo the forks this winter but want to get everything together now.
Question on height of the tube over the top triple clamp. In the manual the picture looks to be about 20mm but there's no measurement given.
 

Attachments

  • image.jpg
    image.jpg
    206.7 KB · Views: 43
  • IMG_3612.JPG
    IMG_3612.JPG
    74.9 KB · Views: 38
depends on where your riding, fast desert stuff, have the tops just out of the triples, if your tight woodsy riding, slip them up ~20mm or so, makes a big difference in how they slot into a corner.
 
depends on where your riding, fast desert stuff, have the tops just out of the triples, if your tight woodsy riding, slip them up ~20mm or so, makes a big difference in how they slot into a corner.

So tailor it to the type of riding by changing the rake angle, makes sense.
Is there a factory general setting to begin with?
 
I wouldn't worry about it until you have the front end all assembled including wheel with tyre and the front fender. Then, pop the top of the tubes and lift the front wheel up until it stops. See how much gap you have between the fender and tyre. Minimum would probably be 3/8". That will be your maximum that you can go with your fork tubes in that direction. Make a note of it so that when you start to play with it later you will know exactly how far you can drop the forks before you wipe out the front fender ! Alot will depend on what length of fork tubes and length of damper rod.
 
Back
Top