• Hi everyone,

    As you all know, Coffee (Dean) passed away a couple of years ago. I am Dean's ex-wife's husband and happen to have spent my career in tech. Over the years, I occasionally helped Dean with various tech issues.

    When he passed, I worked with his kids to gather the necessary credentials to keep this site running. Since then (and for however long they worked with Coffee), Woodschick and Dirtdame have been maintaining the site and covering the costs. Without their hard work and financial support, CafeHusky would have been lost.

    Over the past couple of weeks, I’ve been working to migrate the site to a free cloud compute instance so that Woodschick and Dirtdame no longer have to fund it. At the same time, I’ve updated the site to a current version of XenForo (the discussion software it runs on). The previous version was outdated and no longer supported.

    Unfortunately, the new software version doesn’t support importing the old site’s styles, so for now, you’ll see the XenForo default style. This may change over time.

    Coffee didn’t document the work he did on the site, so I’ve been digging through the old setup to understand how everything was running. There may still be things I’ve missed. One known issue is that email functionality is not yet working on the new site, but I hope to resolve this over time.

    Thanks for your patience and support!

How to change the TR650 air filter

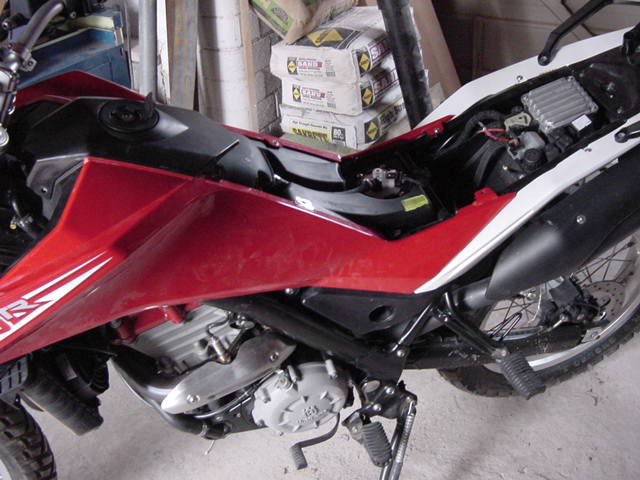
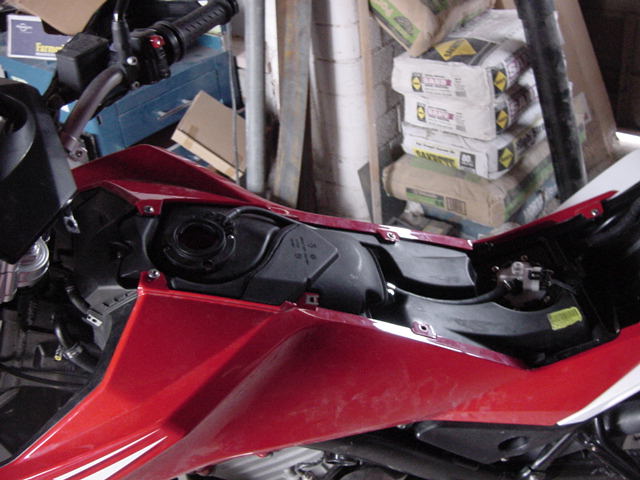
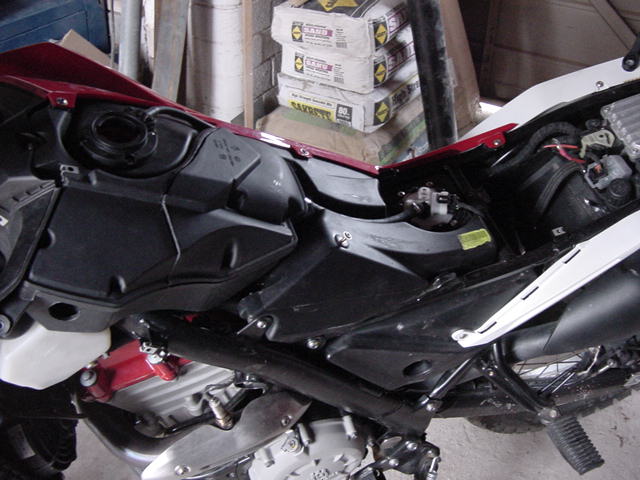
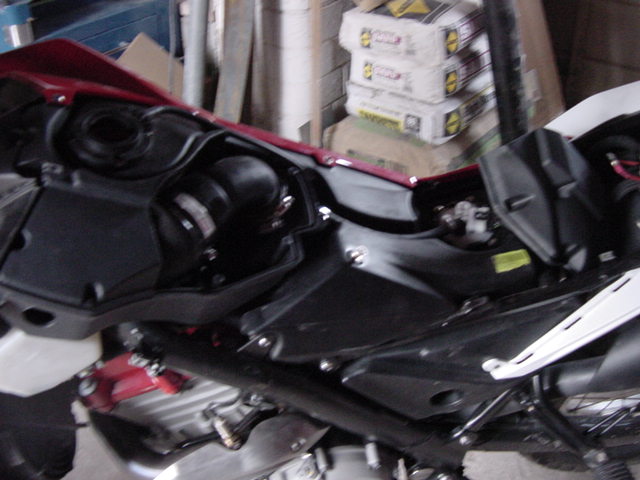
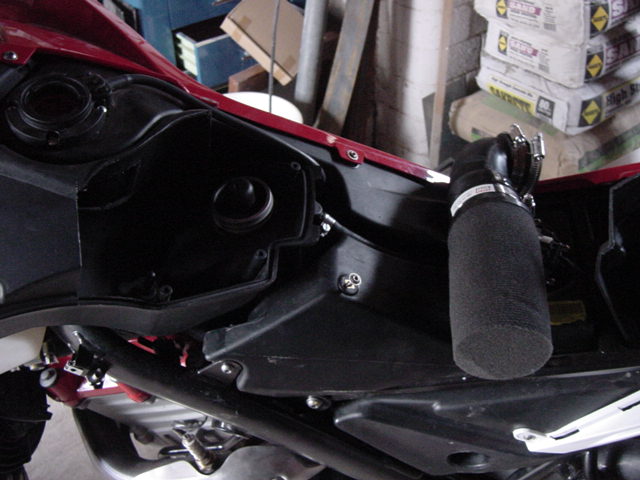
To quiet the intake and add a prefilter I added a small piece of perforated metal and a scrubber pad. I tossed a little oil on for fun.

The scrubber is real coarse, so it does not restrict the air much at all, if any.

On the ride today, it made a significant difference in intake noise reduction, when cracking the throttle.

DSC08043.JPGDSC08044.JPGDSC08045.JPG

This would also work to keep the stock crankcase vent with cleaner air, for those who worry about that.
 
A huge thank you to all of you that have figured this out and especially to Mag00 for the videos. I'm assembling the parts needed to do this but I really don't understand the crankcase filter. Where does the the air go that it filters? I see the barb going into the plastic but what's on the other side of that wall?
 
I haven't done anything to my vent/breather. It really does not draw or push air, so to speak. It just pulses as the piston goes up and down. The air in the case may contain vapor that is fed back to the engine intake for burning, emissions thingy. The filter would prevent any possible dirt from entering the crankcase as the piston goes up. As the piston goes down, it will expel the 650cc of air, and as it goes up, it will intake the 650 cc of air. That is the theory, but in actuality air compresses, so 650 cc never really moves through the vent hose or the filter in the airbox.

If you get a chance, tie a partially filled balloon to the end of that hose. Might make a good video.
 
After a few concerns about the crank vent I finally went and got some proof for those who may be concerned. I have not been concerned using the stock vent and media in the airbox, nothing changed in respect to that. The media in the airbox above the connection is not to filter dirt from getting in, but rather to collect any oil residue that may be sent into the airbox. This vent is to send the vapors of the crankcase into the engine for burning, vs dumping to atmosphere and polluting.

Here is the vid, yeah not well planned out and I am somewhat embarrassed about it. It's hard for me to watch without falling over. Sorry in advance :eek:

 
Good video Dave. As mentioned over on ADV, I wasn't sure why people were moving the crankcase vent, but moved mine anyhow because I had the parts on hand. At least the filter will ensure that I'm not blowing lots of oil into the air box.
 
Like you RD I kinda knew it was a useless endeavor yet I did it. At least the blow back oil will have a place to accumulate...
 
The stock iteration is fine. It has that coarse material. It reminds me of the aftermarket breathers on the valve covers of the V8's.

I know it is not much weight, but it is weight you do not need to add. Also, something you may want to consider, the vent is should be free flow, how much resistance does the filter give? Probably not much. Is it enough to affect blow by? Probably not. But as that filter clogs, monitor its free flow ability.

The balloon shows that you can close off the vent, and it will not explode, but as the engine wears in, how much pressure will develop and to what will extra pressure cause? Minimal? Not enough to worry about?

But... continued 1 psi can make seals leak.

Summary: check your breather filter for restriction periodically. But you already knew that :banana:
 
"Summary: check your breather filter for restriction periodically. But you already knew that :banana:"

The stock filter would have been a bugger to check periodically.
 
The stock filter would have been a bugger to check periodically.

Sure would be, it can be done from the front if you desire. Stock material is of totally different construction and not prone to clog with oil residue. So no worries on the stock stuff. But yeah, with the pod mod, just reach on in from the top when you clean the pod filter. Easy as pie and can be checked every filter cleaning. After a few you will realize it is not necessary.

But since it is on the burner, I am curious as to how much different the flow is from the added filter vs the stock. I doubt if you could tell, when new and clean. And since the bikes are newer, there will be minimal blowby to clog either filter. This would be more of a factor at higher miles, or if you didn't do any mod to the stock breather.

What are the AM/e modders doing? They cannot relocate to that compartment, and still have the same oil and blow by.

Frequent maintenance is a good thing.
 
Pull the seat, pull the gas cap and gas cap panel. Pull the side panel. Remove back airbox cover. Remove filter.


how-to-change-air-filter-tr650


Pull seat, easy enough.
how-to-change-air-filter-tr650-2.JPG


Pull gascap and the panel. This takes four torx screws.
how-to-change-air-filter-tr650=3.JPG


Pull side panel. This is the worst part. remove top screws, remove bottom screws and screws from the front on the inside. The front snaps into place and is the bugger to get apart. A butter knife and some gentle prying as you work the red panel. Then it lifts out of the rear white piece with little effort.

how-to-change-air-filter-tr650-4.JPG


Since an earlier mod to airbox was done, at this point the rear top part of the airbox removes with 3 torx.
how-to-change-air-filter-tr650-5.JPG


Now just undo the hose clamp and remove filter
how-to-change-air-filter-tr650-6.JPG


Clean filter and revers order to install. I haven't tried it, but if I do not put in the front screw of the cover, removing the side panel may not be necessary to change the filter.

I drove it today, without panels and it is loud. Most likely I will seal the seam with some sort of tape. Then with the panels back on it should only be slightly louder. 2 photos up, you can see the extra hole added to airbox for intake.
Hi, do you use the red filter top and do you oiled red filter or that black filter?
 
Do you use pre red filter upmost and oiled? Or without? And how do you wash that foam rubber filter? That have spring inside!
 
Bucket of warm soapy water and just stay with it. Take your time, don't force it.

I do not use the red pre filter, I just use the black and use the uni filter oil in the spray can, some use the red filter as well, and the oil you use is your preference.

I have the scrubby pad pre filter (oiled) that catches alot of dirt. The red filter sock is not needed for me. It would be better probably.
 
My procedure is a bit different than Pauli's method.

1. Pull the seat
2. Remove the gas cap
3. Remove the four screws in the gas tank fascia then remove it
4. Remove the top screws of the left side panel and lean/wedge the side panel out at the top
5. Remove the three screws on the removable piece of the airbox
6. Remove the filter.

No need to remove the side panel at all.
 
After way more hours than I want to admit (and my employer definitely doesn't want to know about) catching up on the advrider thread, I found the 3D printed solution is "complete". (Is anything ever truly complete?)

Details for having the 3D printed Uni filter flange made is here:
http://advrider.com/forums/showpost.php?p=24052015&postcount=3913

I know there are huge advocates for the pod mod, and there is no doubt it allows greater airflow.
But the 3D printed/sealed airbox option has the "factory" finish that I am (and likely others are) looking for.

Just throwing this up on this, as I hadn't seen any updates carry over onto here.

I'm of a similar mind...
 
After way more hours than I want to admit (and my employer definitely doesn't want to know about) catching up on the advrider thread, I found the 3D printed solution is "complete". (Is anything ever truly complete?)

Details for having the 3D printed Uni filter flange made is here:
http://advrider.com/forums/showpost.php?p=24052015&postcount=3913

I know there are huge advocates for the pod mod, and there is no doubt it allows greater airflow.
But the 3D printed/sealed airbox option has the "factory" finish that I am (and likely others are) looking for.

Just throwing this up on this, as I hadn't seen any updates carry over onto here.


Sorry for hijacking the thread but are there any pictures of this 3D printed uni filter flange? How is this to be inserted into the airfilter housing? Is it a complete unit that replaces the OEM air filter bracket? Will it work with a K&N air filter?
 
Back
Top