• 4 Stroke Husqvarna Motorcycles Made In Italy - About 1989 to 2014
    TE = 4st Enduro & TC = 4st Cross

  • Hi everyone,

    As you all know, Coffee (Dean) passed away a couple of years ago. I am Dean's ex-wife's husband and happen to have spent my career in tech. Over the years, I occasionally helped Dean with various tech issues.

    When he passed, I worked with his kids to gather the necessary credentials to keep this site running. Since then (and for however long they worked with Coffee), Woodschick and Dirtdame have been maintaining the site and covering the costs. Without their hard work and financial support, CafeHusky would have been lost.

    Over the past couple of weeks, I’ve been working to migrate the site to a free cloud compute instance so that Woodschick and Dirtdame no longer have to fund it. At the same time, I’ve updated the site to a current version of XenForo (the discussion software it runs on). The previous version was outdated and no longer supported.

    Unfortunately, the new software version doesn’t support importing the old site’s styles, so for now, you’ll see the XenForo default style. This may change over time.

    Coffee didn’t document the work he did on the site, so I’ve been digging through the old setup to understand how everything was running. There may still be things I’ve missed. One known issue is that email functionality is not yet working on the new site, but I hope to resolve this over time.

    Thanks for your patience and support!

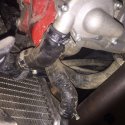
Radiator hose - a tight fit...

Yes the metal spacer got me thinking the same. Its not clear what everyone else has. Between the spacer/thicker washer and the metal tank elbow. It appears they did the work described in the Aussie recall I saw in another thread.

If that is the case, I have Zip Ty spacers and tank elbow to hang on the Christmas tree this year ha.
 
When Zip Ty worked over my 310 we looked carefully at the clearance issues. Danny replaced the hex head and used two front spacers to provide some additional space. They also installed red silicone hoses which cleaned things up considerably. Absolutely no issues now.
 
Kenneth you are indeed fortunate to be in reasonable proximity to Zip Ty! I may need to go back and try one of my Zip Ty spacers. The tank doesn't seem to want to sit down all the way in the rear. Or the fuel line is possibly preventing it form settling. That line sure is tough to try to move around under there once it is connected.
 
Get a few 1/2 inch hardware store spacers at 2mm and ZT ones are 5mm. Each bike is different but you can then adjust easily. Jacked up in back or in front affects how your plastics fit as well so try a few ways. Do check for anything holding the tank from seating...

Check the petcock, temp sensor (can jam on the right radiator), Under tank fuel hose can be routed over the head instead of more forward and hang up on the spark plug. Plenty of wires in back wrap around the frame.

I found you can gain the space for the petcock and radiator hose strictly by raising the front and for me that was w/6mm stack of 3 steel washers + rubber. Rear should be about on the frame and if not the sidepanels don't align well and seat may be harder to engage. Too much lift in front and your shrouds may not engage the tank panels. It is a matter or mm's, but varies with each bike. When you get it right use some goop or silicone to hold the spacers on the posts.

spacer-jpg.26744
 
Spacers were not enough on my 2013 TE310. The bolt on the bottom of the tank still wore a hole in my radiator hose and the added lift on the tank didn't allow the plastic tabs to secure the right hand plastic parts (radiator shrouds) which would eventually come apart and start to rattle, very annoying. I went to my local hardware store and bought some Phillips head metric screws to replace the sharp hex head screws. The Phillips head are also a little lower profile. I used a dab of blue thread lock since I wasn't going to use a lock washer
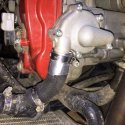
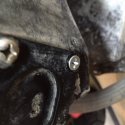
to keep the head as flush to the tank as possible. I also cut a small piece of aluminum landscape edging I had in the garage and wrapped it around the top of the radiator hose, securing it tightly under the hose clamp on the water pump connection. The pressure from the hose clamp causes the other end to flare a bit which keeps it from rubbing on the hose. Now, the smaller Phillips head makes slight contact with the aluminum guard but doesn't make any contact with the radiator hose. I was able to remove the extra tank spacers which allowed the plastic tabs to insert properly. The photo is before I lowered the tank back down. I used a lock washer on the outside screw but not the inside that causes the problems. You can see how much lower the profile on the screw head is than the hex heads. Hopefully this will do it.CAM00007 (2).jpg
 
Strange the right side shroud doesn't have an equal length tab to the left side. It was an issue for me too though I got it fit with acceptably with 1-2mm+ of the tab inserted. The 3mm allen button head screws are slighty lower profile than the Phillips and why I put one over the rad hose.
 
I'm on my 3rd hose on a 14 310. It came with button head Phillips screws with a self tapping thread as opposed to the machine threads on previous pictures I've seen. While they changed to a button head screw, the problem still exits. Gonna try and space up the tank wrap hose with aluminum and try and find a flat head screw that size.

Really tired of breathing in hot antifreeze vapors when I'm struggling up a nasty hill climb and out of breathe. I really hope I can end this. Thanks for all the great posts on this.
 
By the way, while they went to a button head screw, it's still got a pretty thick head on it . Duh!!!
 
I took some aluminum flashing and cut a strip so it wraps around the hose but made sure it is not too wide. You don't want it to dig into the hose where it bends towards the thermostat, I eventually plan on removing.
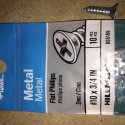
I then went to a big box hardware store and got a flat head #10 x 3/4 sheet metal screw and replaced the offending screw on the tank as well. This screw counter sinks nicely in the tank so it's flush. Hopefully this will finally fix this dumb oversight. image.jpg image.jpg
 
I think in some countries they use the self tapping screws. I used a very low profile 3mm button head/allen as that phillips I saw on others like yours is indeed still too thick. Head to the hardware store and pick up 3 half inch ID washers. They are 2mm thick and 6 mm of lift should do it. Place them on the rubber grommet that is stock and some silicone or goop on top to hold them on. Stock tank bolt still fits and I have no clearance issues now at 3k miles. Your right side shroud should just sleeve into it's slot in the upper tank panel. Don't know why the tab is tall on the left but short on the right but I wanted to get all to fit as stock w/o clearance issues. The right shroud fits the slot with about a mm showing above. I also make sure to mount the lower shroud as high as possible and even slotted the hole where the bolt head sits to get it raised up a trad. I wonder if any of the Poli or UFO shrouds have longer tabs?

WP_20150608_12_52_00_Raw.jpg
 
I think in some countries they use the self tapping screws. I used a very low profile 3mm button head/allen as that phillips I saw on others like yours is indeed still too thick. Head to the hardware store and pick up 3 half inch ID washers. They are 2mm thick and 6 mm of lift should do it. Place them on the rubber grommet that is stock and some silicone or goop on top to hold them on...

John- I did the exact same 'cept for 2 points: I used 3mm thick 1/2" washers (2 at the front, 1 on each side on the rear of the tank), and I put the rubber do-hickey on TOP of the washers. I never considered putting the washers on top of the rubber thingy. Is there an advantage doing it this way?

I did have a chronic problem with my tank bolt coming loose (I used locktite, permagasket) but nothing really worked until I stuck a fender washer under the aluminum collar/washer. Since then- no problem with loosening

you can see how thick these washers are in the pic of the two back mount studs (each has only one washer; and that's a paper towel wadded up in my homemade fuel line)
IMG_4785.JPG
 
I had the tank bolt loosen once so some blue locktite worked for me. As far as the rubber washer, at times it will twist with the screw and then gets wadded up in the slot in the tank so leave it on the bottom and is just a cushion anyway.
 
I use smaller washers, stacked, on the tank bolt, so that it bottoms out on the post. I also use blue loctite for peace of mind.

I found out the hard way when I first put the tank washers on, that it wouldn't stay tight. Noticed it was loose when out riding and thought I just didn't tighten it enough, so I torqued it down. Next time I stopped, it was gone.
 
Back
Top