-
Hi everyone,
As you all know, Coffee (Dean) passed away a couple of years ago. I am Dean's ex-wife's husband and happen to have spent my career in tech. Over the years, I occasionally helped Dean with various tech issues.
When he passed, I worked with his kids to gather the necessary credentials to keep this site running. Since then (and for however long they worked with Coffee), Woodschick and Dirtdame have been maintaining the site and covering the costs. Without their hard work and financial support, CafeHusky would have been lost.
Over the past couple of weeks, I’ve been working to migrate the site to a free cloud compute instance so that Woodschick and Dirtdame no longer have to fund it. At the same time, I’ve updated the site to a current version of XenForo (the discussion software it runs on). The previous version was outdated and no longer supported.
Unfortunately, the new software version doesn’t support importing the old site’s styles, so for now, you’ll see the XenForo default style. This may change over time.
Coffee didn’t document the work he did on the site, so I’ve been digging through the old setup to understand how everything was running. There may still be things I’ve missed. One known issue is that email functionality is not yet working on the new site, but I hope to resolve this over time.
Thanks for your patience and support!
- Husqvarna Motorcycles
- Husqvarna Motorcycles - Sweden
- Vintage/Left Kickers
- Vintage Restoration Projects
You should upgrade or use an alternative browser.
1979/80 CR390 Works Hybrid Project - Passion Inspiration Action
- Thread starter HuskyT
- Start date

Ok.... time to install.... rain is coming down in buckets yesterday and all day today...
First off... you need to run a Dremel with wire wheel through swingarm bearing tubes to remove any powder, rust, corrosion or crap that may be in there.
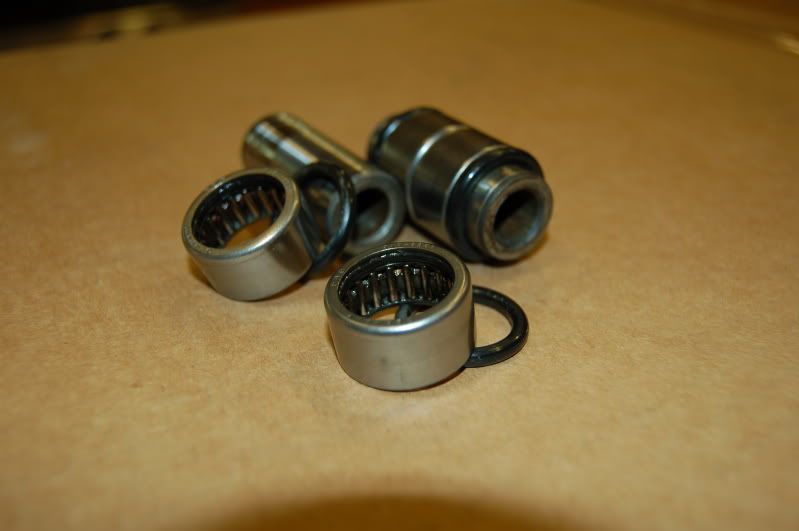
New German Bearings, distans and o-rings ready for install:
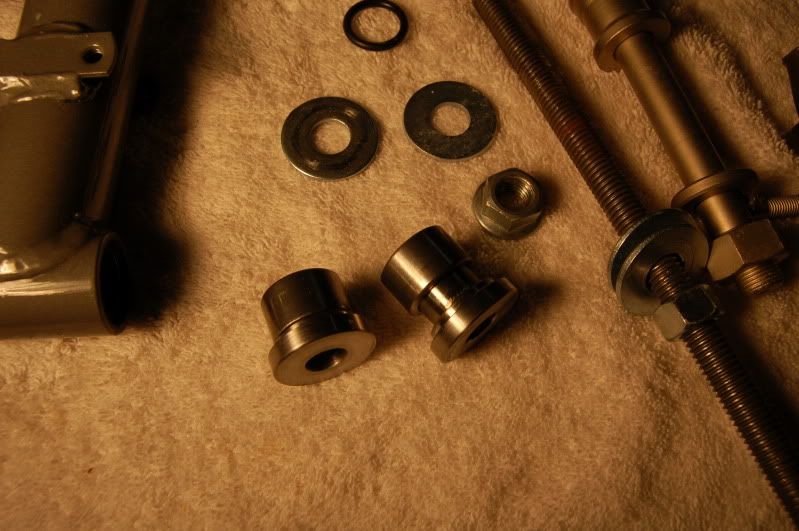
Bearing tool ready ( homemade by me) :

Put bearings on each of the two custom machined spacers with a light coat of grease to hold them in place:
Load one bearing and install spacer onto tool:
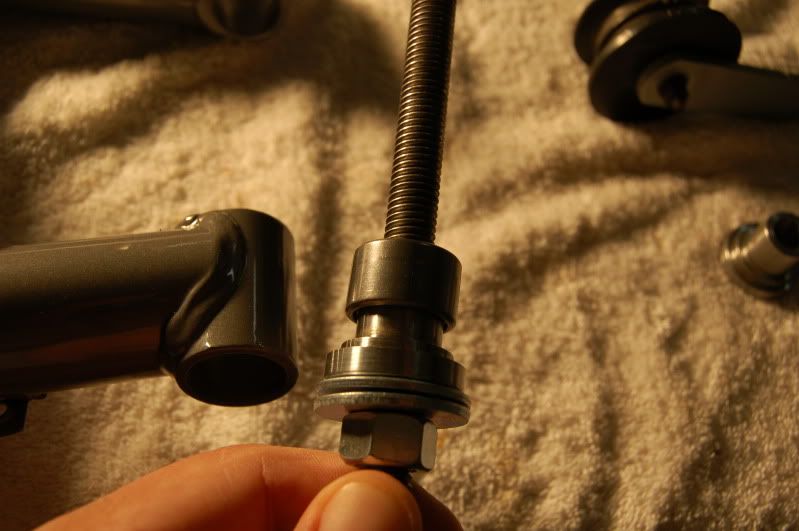
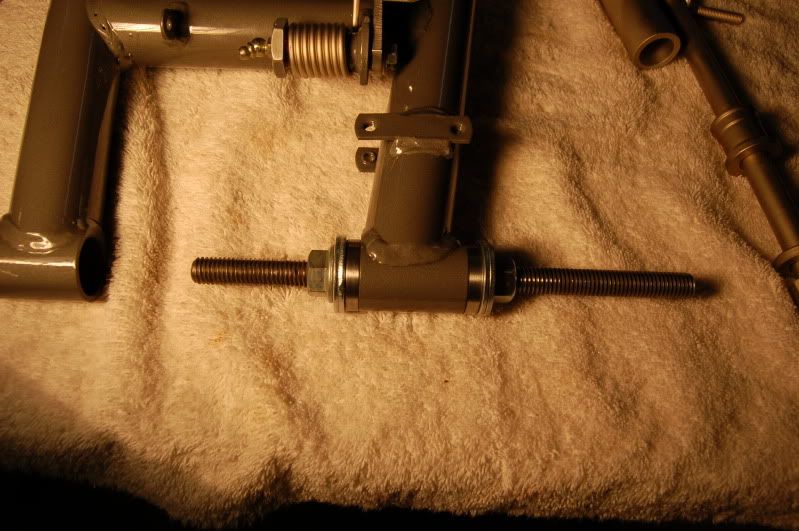
Insert and Load both bearings and install spacers through swingarm bearing tube line up finger tight just starting into edge of hole ... make sure each one is flush and ready to pull in straight:

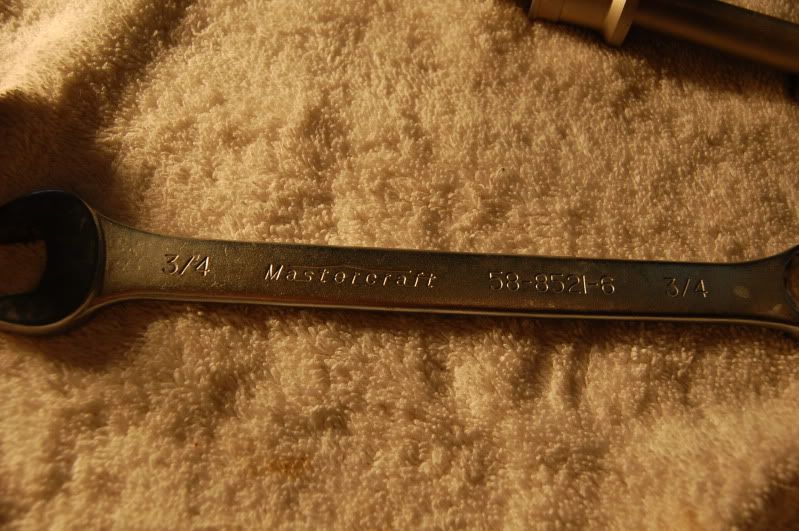
Suck them down with two 3/4 inch wrenches and a little bit of muscle power:
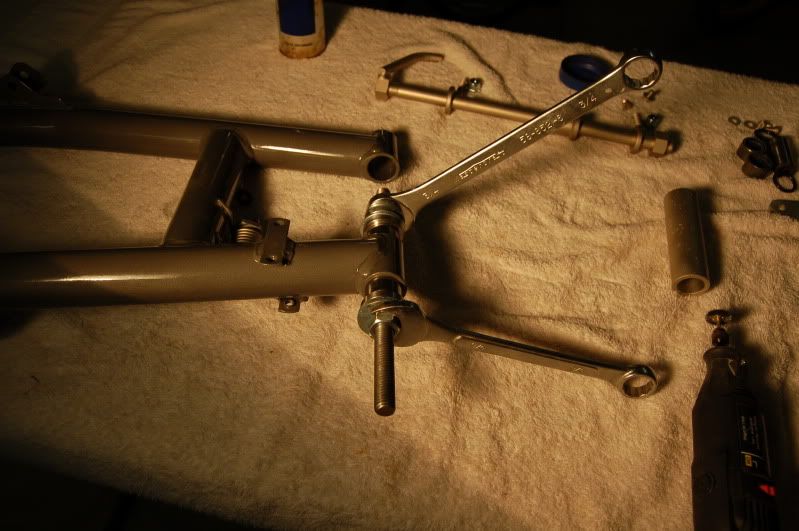
My Canadian roots are showing... Mastercraft wrenches!:
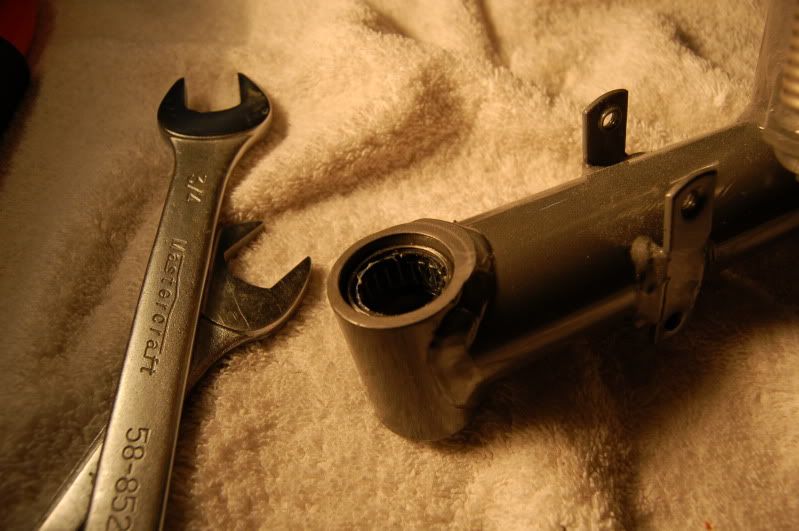
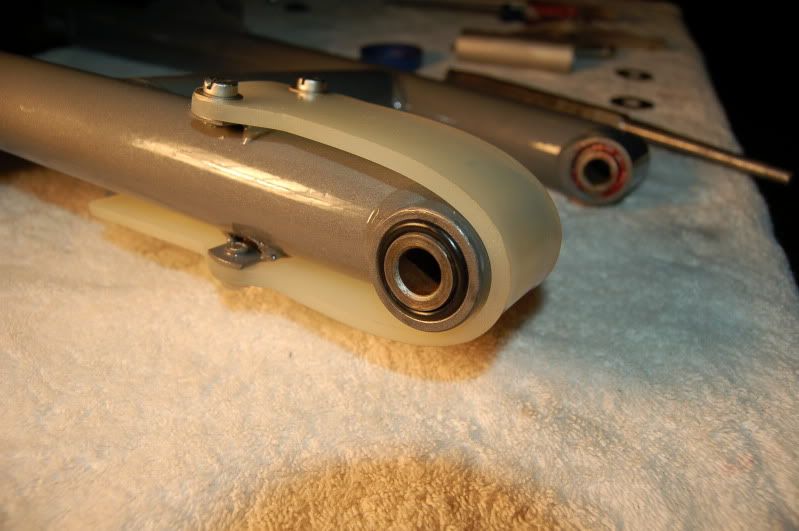
All the way in!... Note that the install spacer has pushed the bearings in exactly 3mm in depth from each side:
After tool is removed... perfect depth!:
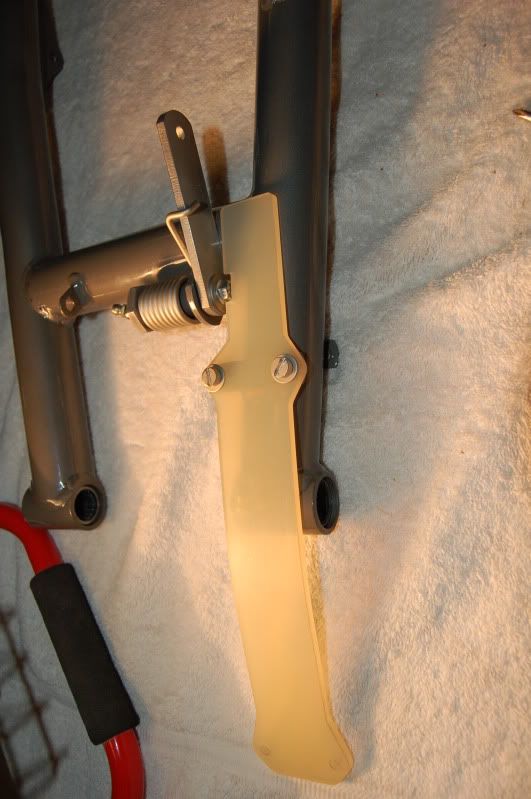
Now Tensioner Spring and Greasable Bushing install... UpTite Style... George is the man!!!:
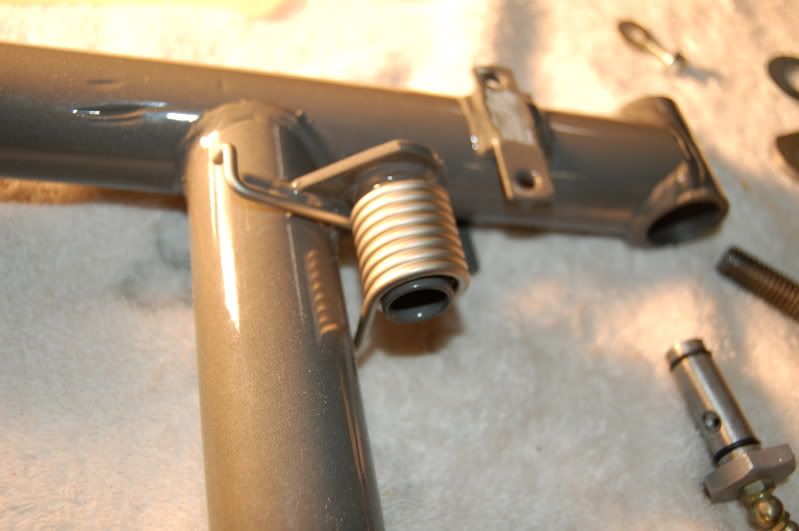
Grease up the Tensioner tube:

UpTite Bushing getting Mobil 1 Synthetic:
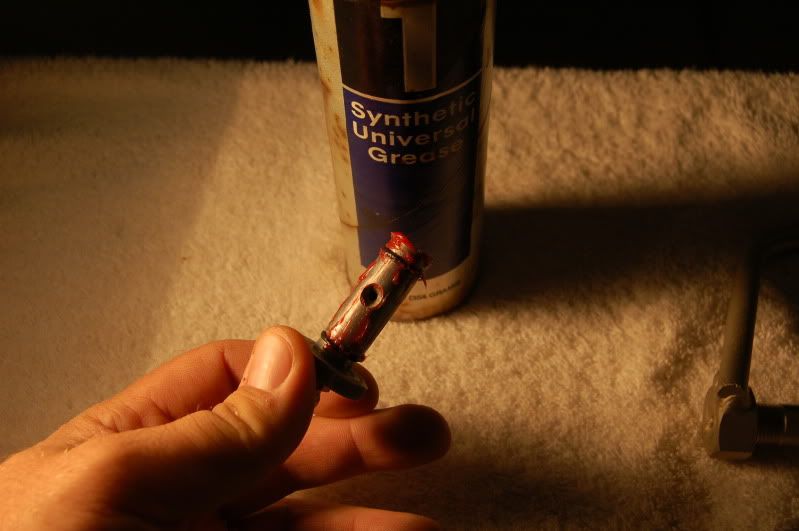
Insert UpTite Bushing:
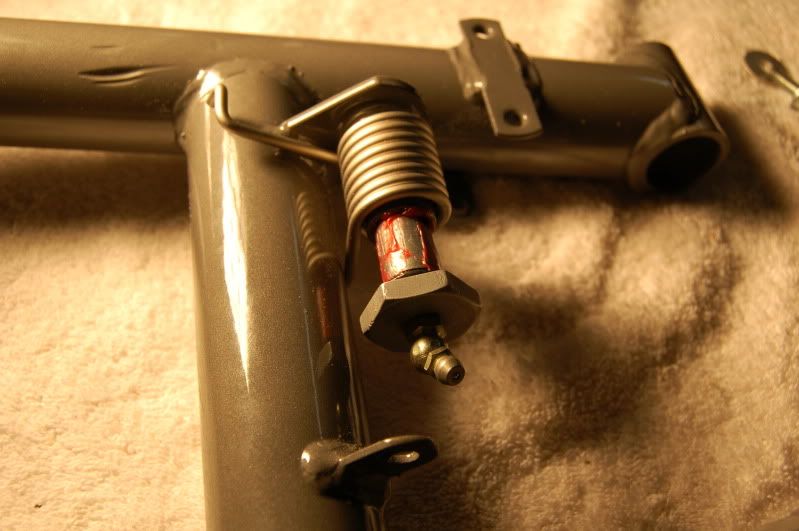
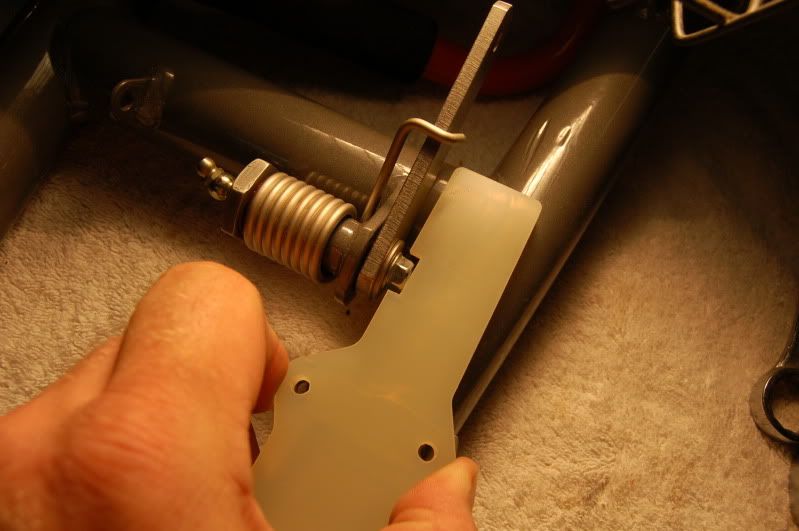
Now Chain friction Pad and tensioner bushing lock bolt... note that the chain friction pad must be cut and notched to allow this to fit... I used a block of 2x4 and a wood chisel.... worked very nicely:
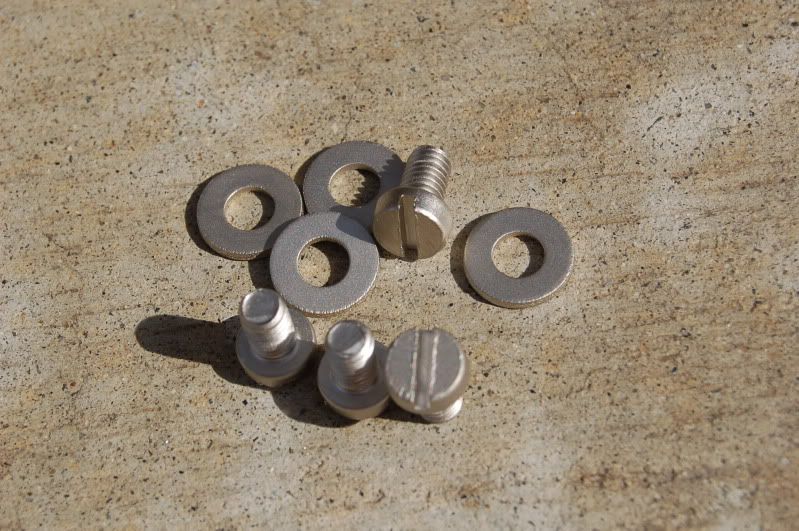
Restored chain tensioner bolts with new dull nickel sulfamate for superior corrosion resistance:
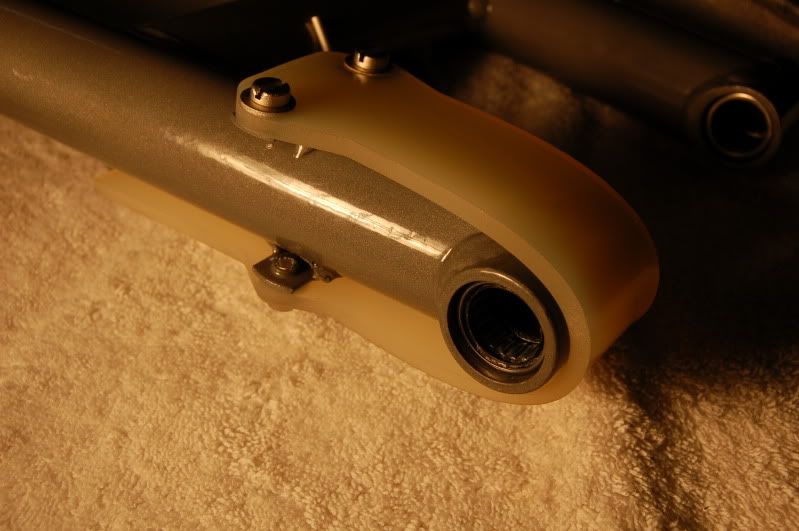
Bottom is now installed .. note brand new chain tensioner bracket SST from Phillip... this is a very nice part Phiilp!!!:
Installed on top.... note that this was a b....tch.... i had to heat the friction wear pad to make it stretch far enough for the top two bolts to go in... was about 2 mm off on the hole patter. Good thing is a little heat will allow this friction pad to stretch... I slowly warmed it under a halogen fllod lamp for about twenty minutes until it became really pliable:
and another view now with grease installed in the swingarm bearings and ready for distans spacers:
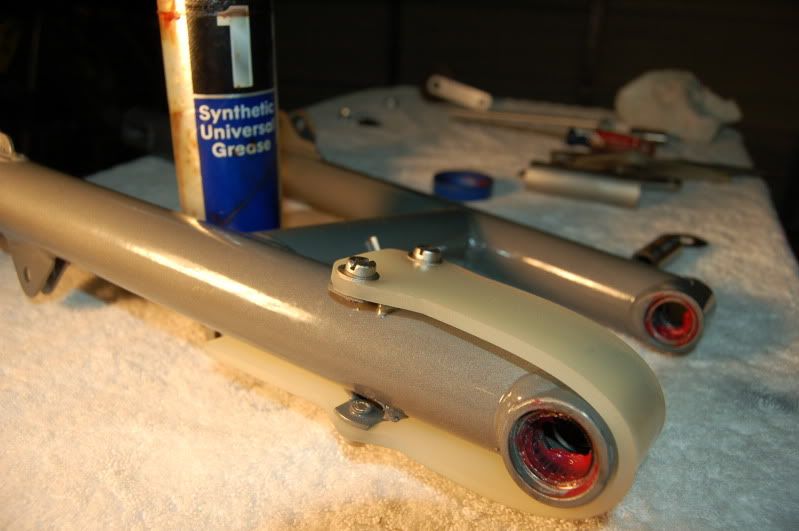
Insert Distans...note.. I found that each one fit differently within the bearings... I rotated them until I found/felt the sweet spot between each of the four bearings and how they related to each distans... time consuming yes ....but they feel like they are in there perfect right now!:
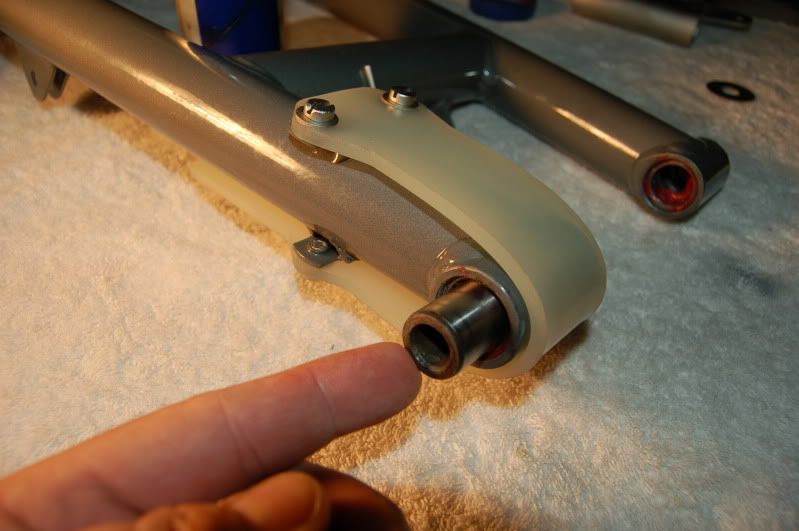
Insert O-rings to proper depth.. they will just be sticking out slightly:
Now ..... fit up the completely restored dull nickel plated rear motor mounts ( I bought four different E-Bay sets before I found a set that was not hammered and hollowed out from wear or beat to crap).....and the spacer tube:
Now to start on the frame prep for the swingarm install.... George told me to sand away the powder and have a nice bare surface.... that is for the next post!
T
flamepainter78
Husqvarna
AA Class
White Husky
Husqvarna
AA Class

schimmelaw
Husqvarna
AA Class
Rick
White Husky;65095 said:Clearly there's a photography competition running sub-plot here too
Like that special lighting on a few of those? Gotta give HWY a run for his money on the photo thing...... JK LOL.... I suck at Photography****************************************
But thanks to HWY for setting the bar much, much higher then I will ever attain!!!
T
fran...k.;65066 said:Are those german bearings old stock? The cagiva replacement had no seal and a lot more needle. The number on them taken to the bearing shop seemed to indicate they would have been a special production run. You can get a few options in those dimentions but not exactly that through the bearing distributor. Clarification, if I recall you can get a few options for the id and od. You have room for other thicknesses.
Fran
FAG German Bearings
http://www.fag.com/content.fag.de/en/index.jsp
German locations of Manufacturing:
http://www.fag.com/content.fag.de/e....OEM&continent_id=39&submitted=&location_id=&
I actually bought this set off of E-bay about two years ago for a 78 CR250 I was working on at that time... have had them packed in grease and sealed ever since... I do not have the number off of the bearing. Forgot to document that before install... Sorry****************************************
Any decent bearing shop should be able to cross reference the FAG number and/or order them for you. They certainly roll very smooth and have a very nice fitment to them.
T
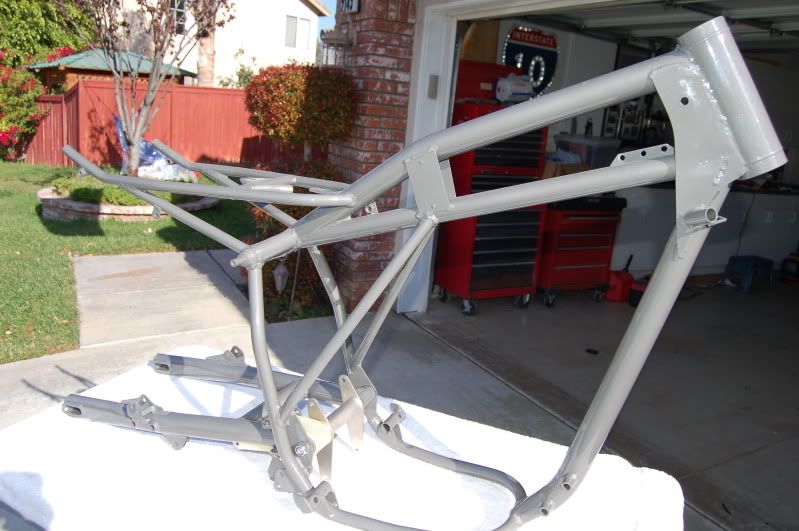
George tells me that I have to remove the powder on the swingarm mount for a couple of reasons... botl hole slop and loosening of the swingarm and the motor mount bolts and also for good grounding on the frame.
This actually makes me sick to have to do this to my perfect "Clear" Powder.... but when George at UpTite tells you how to do something ..........no sense arguing..... !
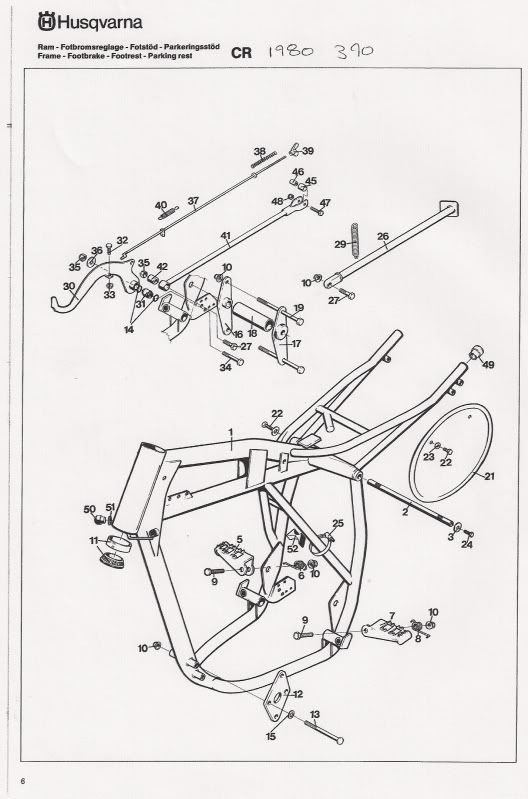
Here is a shot of the general frame assembly PDF. This is supposedly the CR 390 page.... THis shows the general area of the frame where I will be working on... there is a problem with the Husky PDF but I will hit on that in another post....
CR Frame PDF
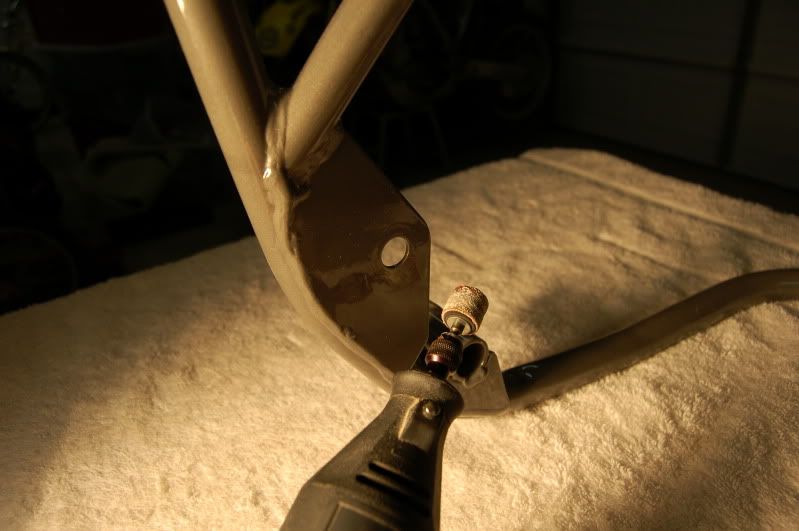
Here is a shot of the inner swingarm bolt hole and a brand new SST wear spacer from Phillip. Wear Spacer lightly clamped into place with a Vise-Grip to mark for sanding / powder removal:
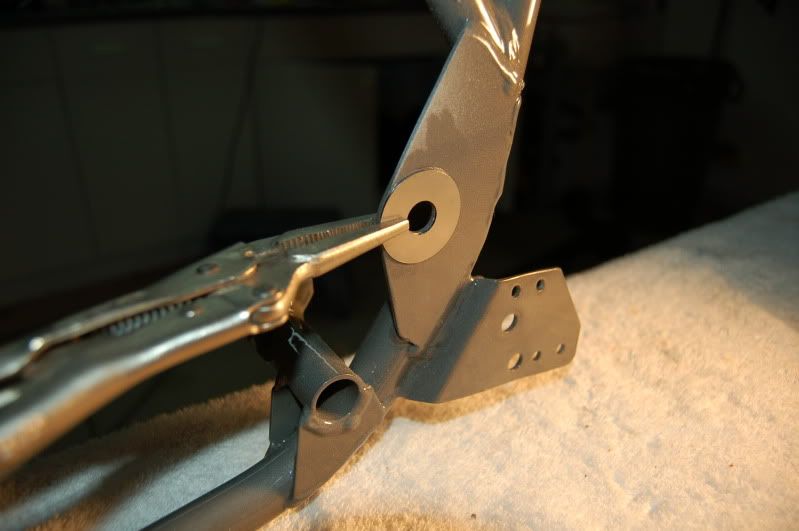
Dremel tool with sanding drum.... this works very quickly!!!
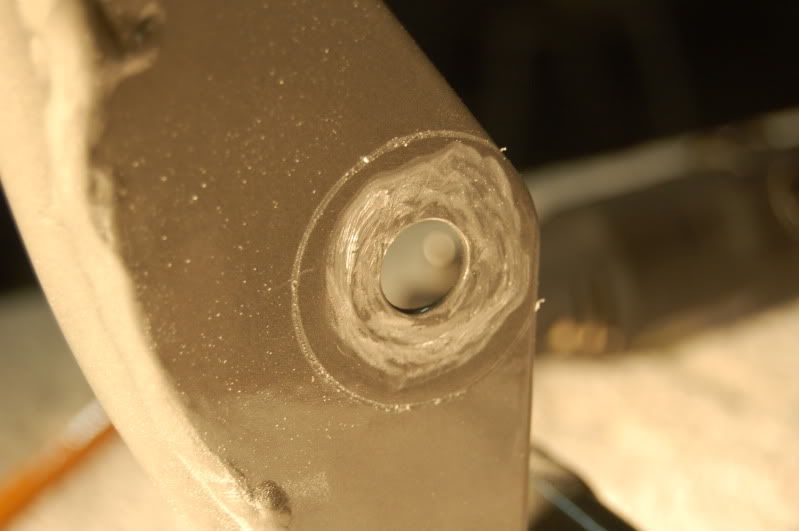
Rough removal showing pattern scribed/marked from SST washer:
Ready for swingarm install.... you can tell the difference here in the "blasted" clear finish as compared to the now freshly dremeled surface with clear coat removed:
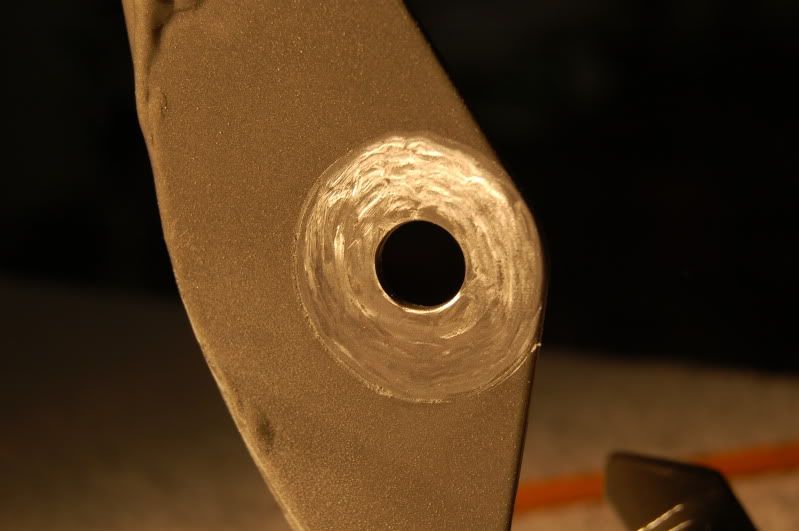
Next up will be swingarm to frame install.
T
Hwy
Mini-Sponsor
HuskyT;65241 said:Like that special lighting on a few of those? Gotta give HWY a run for his money on the photo thing...... JK LOL.... I suck at Photography****************************************
But thanks to HWY for setting the bar much, much higher then I will ever attain!!!
T
That's actually quite good for a single light source, incandescent no less.
Raise light about 6" higher and you're good!

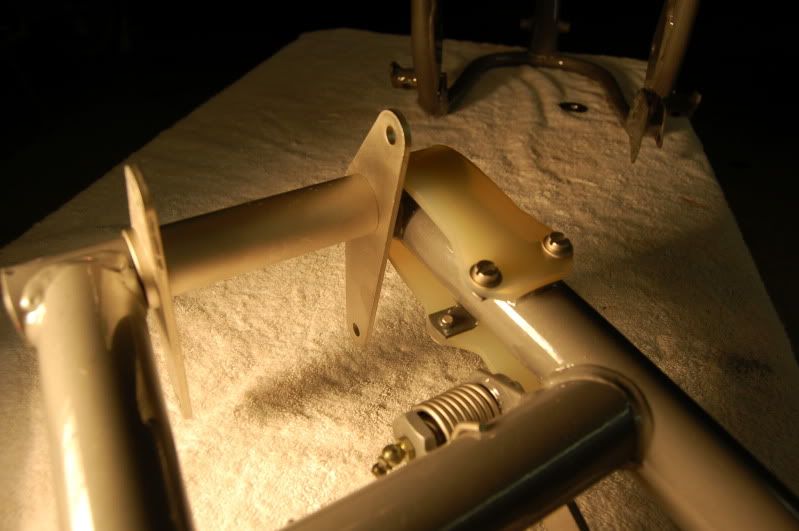
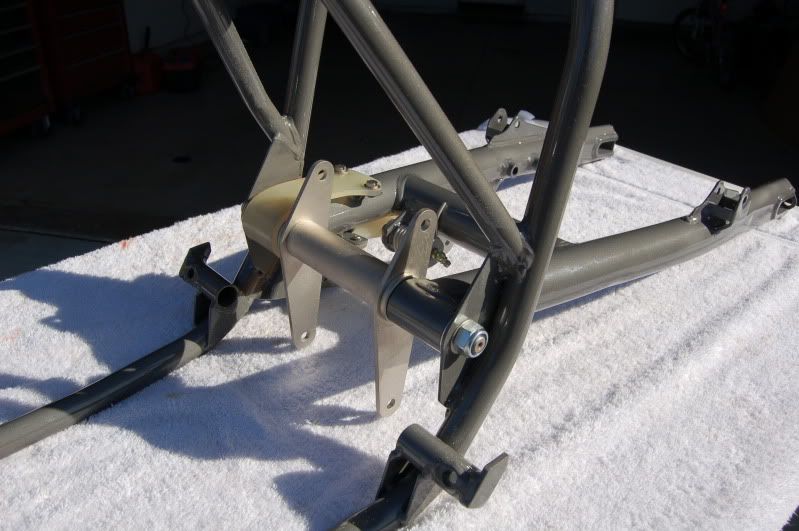
Swingarm is now mounted up****************************************
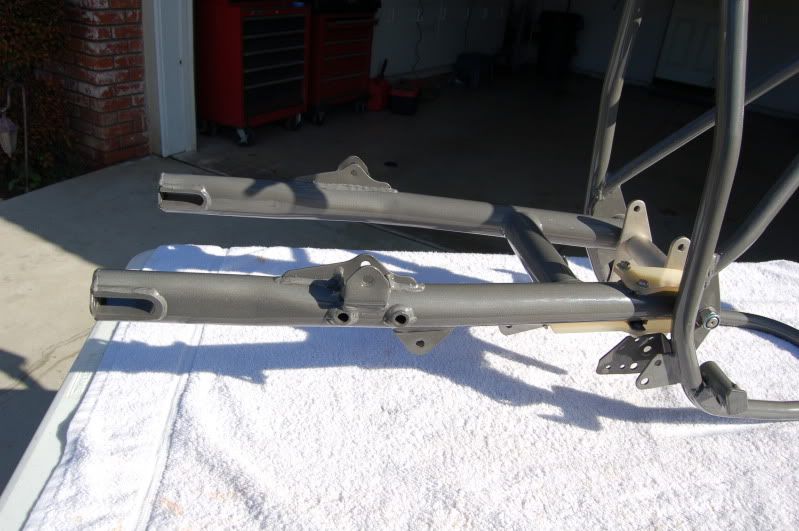
Left side:

Right side:
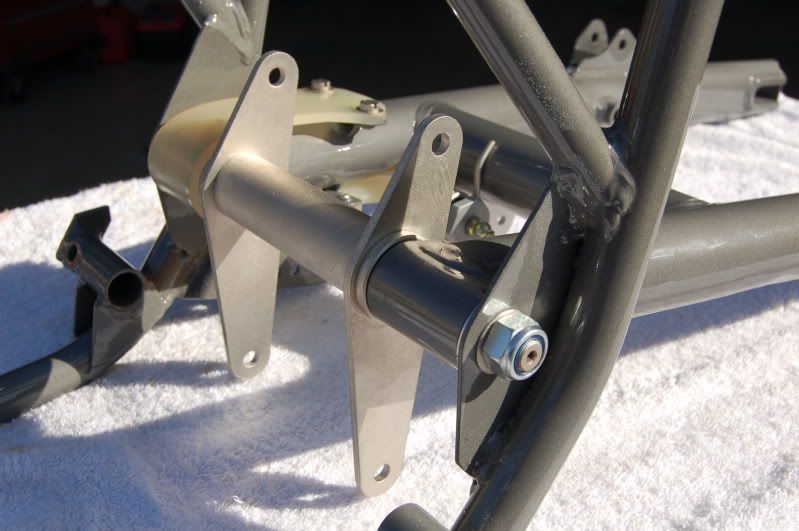
Motor mounts and swingarm assembly:
Motor mounts in Dull Nickel close up with new SST Blue Nyloc Locknuts from Phillip:
Right side Brake and Brake Backer Mounts. I absolutely love the way the "Bead + Media Blasted Clear Powdered Frame" sparkles in the direct sunlight****************************************!:
T
OK. The Husky PDF Error Editor strikes again!
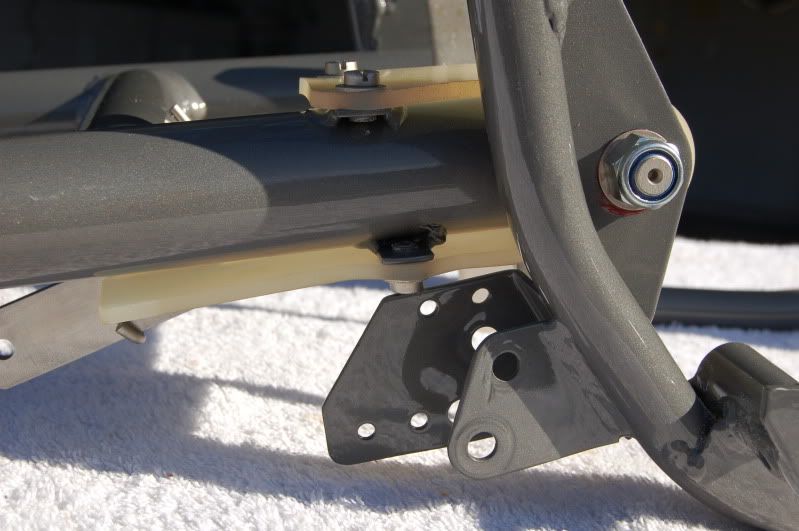
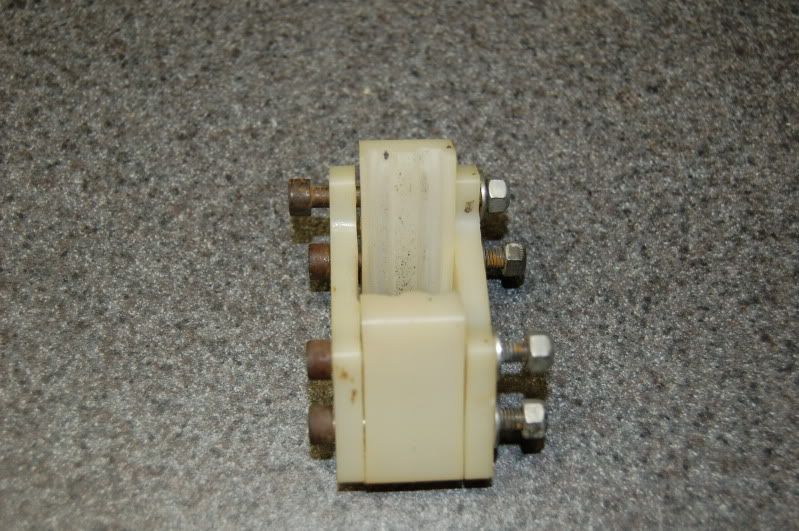
Note that the following PDF calls for the 1980 "CR" to have a long inner brake mount bracket on the right rear down tube of the frame and has six holes ..... see it here.. The outer bracket is short :
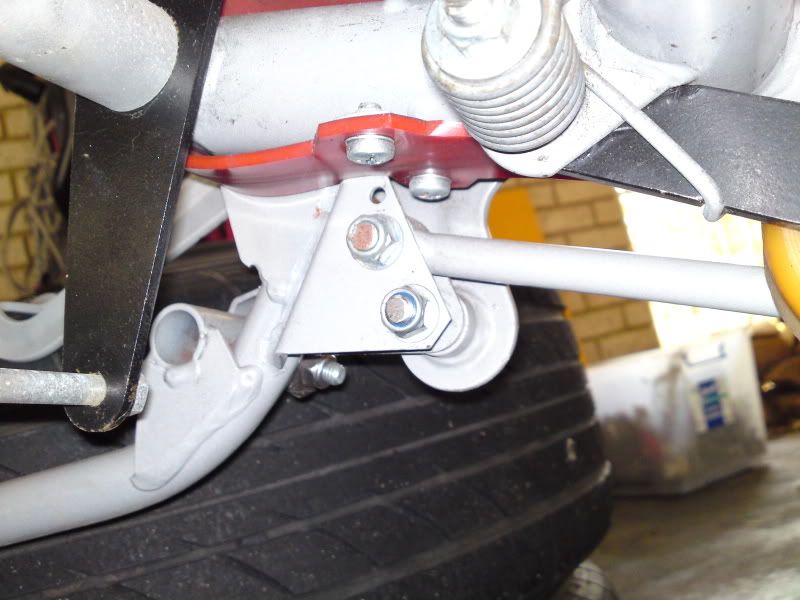
However, there is an interference with it when assembled. The chain friction pad bolt hits it and will not allow the swingarm to travel far enough for shock travel. What gives?
Another view showing the lack of extension on the swingarm due to this bracket:
I have this really nice wear pad to bolt into on this bracket:
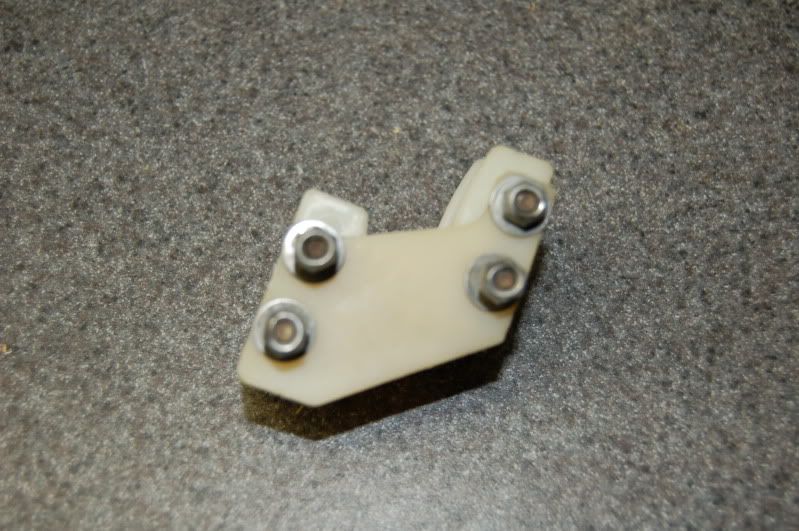
and another view of the same chain guide:
So I called around and sent PM's to Ruwfo, FlamePainter and Moody390 this weekend... John clambered through his garage and moved a car and about 17 other Husky's as well as FlamePainter..... hmmmnnnn? no inner bracket with 6 holes on their CR's????? WTF!


Then Moody390 delivers the final blow ...3 for 3! a perfect picture of his 390 CR taken from underneath his bike... seriously he must have gotten down , laid upside down or something to take this picture......
Moody's CR 390 Inner bracket.... definitely not long and definitely not 6 holes and I guess the Husky Parts Manual Editor strikes again....
Now my frame is a late model Hybrid with MM 1979 numbers... several things have been different about it...Funny thing is it is all CR except for this feature? The brake mount is definitely CR and is not OR or WR. Was this an early production 80/late 79 production test frame? with Short Travel Frame? Another reason to call it a Hybrid...time to get out the Dremel or die Grinder with a cutting wheel. I have some frame mods to do.....Bracket is getting cut down and I have Moody's to pattern it off of!
T
Husq.fleet
Husqvarna
AA Class
714 895 9099
Dull Nickel Sulfamate .0004" to .001" thick.... I send about $100K in plating every year to this shop. They take very good care of me.
Any decent plating shop that can do Nickel Sulfamate ( Old QQN290A Spec) ( usually used for Hi Temp Vacuum Brazing applications) can do this. Don't confuse the process with Electroless Nickel. A lot of p[lating shops only do Electroless Nickel. Electroless is typically much brighter.. almost like chrome but is very thin.
T
highdez1981430cr
Husqvarna
AA Class
That powder coat color you chose is awesome!
Did the company that you used put a clear coat over it?
When i do my frame i am going to use the company that you sent yours too.
BTW your resto. is top shelf.
You should make up some more of the bearing installer bushings for sale,man i miss having a lathe and mill. (santa all i want for Christmas is a Bridgeport and a Hardinge tool room lathe please)