• Husqvarna Motorcycles Made In Sweden - About 1988 and older

  • Hi everyone,

    As you all know, Coffee (Dean) passed away a couple of years ago. I am Dean's ex-wife's husband and happen to have spent my career in tech. Over the years, I occasionally helped Dean with various tech issues.

    When he passed, I worked with his kids to gather the necessary credentials to keep this site running. Since then (and for however long they worked with Coffee), Woodschick and Dirtdame have been maintaining the site and covering the costs. Without their hard work and financial support, CafeHusky would have been lost.

    Over the past couple of weeks, I’ve been working to migrate the site to a free cloud compute instance so that Woodschick and Dirtdame no longer have to fund it. At the same time, I’ve updated the site to a current version of XenForo (the discussion software it runs on). The previous version was outdated and no longer supported.

    Unfortunately, the new software version doesn’t support importing the old site’s styles, so for now, you’ll see the XenForo default style. This may change over time.

    Coffee didn’t document the work he did on the site, so I’ve been digging through the old setup to understand how everything was running. There may still be things I’ve missed. One known issue is that email functionality is not yet working on the new site, but I hope to resolve this over time.

    Thanks for your patience and support!

83 430 Rider Project

I figured I would work on the seat by getting the old cover off. I think when Husky put this thing on they had a sale on staples that week.

Do you guys know what size bolt the rear fender was attached with? Or did they use sheet metal screws. When I got the bike it was held on with tape. There is a lot of mud in them and I can't tell what was in there. I am thinking about tapping for a M5 or M6 bolt. What do you all think.

 
I found the bolts in the parts fiche. Ran the M6 tap through them and I am good to go. I also received my Boyeson Reeds. That is a project all in itself. They aren't what is recommended by a reliable parts source that has been mentioned on here. I will make them work with some mods.
 
Continuing on, I got my electric stapler out that my dad gave me recently. It is an older Craftsman but has a bunch more power than the Stanley I used for my last seat.


Installed the rear fender and set it on the bike. Looks OK.

 
"bunch more power than the Stanley I used for my last seat." damn it need more power Scotty
 
Funny stuff ruwfo since I am called Scotty by my frens. You don't know how many times I have heard that one.

Continuing on with the build I received the reeds that are supposed to work for this bike according to a website that has been mentioned on here as a great source of parts and knowledge. Boyesen 616's as they are the cross reference. I freaked out when I got them.


They are quite different. Here's the stock ones.


So after measuring, scribing and cutting I came up with this. While I was cutting these things I was praying I wouldn't mess them up. I got lucky.


All assembled in the cages.

 
I went ahead and assembled the reed block and the carb. I bought new metric stainless bolts for the motor and reed block and installed them. I should be starting on disassembling the wheels this week.


Uploaded with ImageShack.us

More to come soon.
 
Very nice build!

Such beautiful jugs on these bikes, two bad so many have been marred by those darn dog leg kickers.
 
adam, you should have seen it before I cleaned it up a little. It was hideous.

Last night I improvised a roll around stand to put the bike on. I am getting tired of bending over for everything. While I was at it me and dog cleaned up some of the shop. I still need to put stuff away on the counters.


Chayzed Pilot really good project and cant wait to see how it turns out, if its anything like your yammy rebuilds in earlier posts then the quality speaks for itself, watching this thread with interest.
 
Heck, I love a messy work bench. Means progress!!! Rick

Yes and no on the messy work bench. It is out of hand. A little is OK but, I have Curnutts, Yamaha Thermal flows, Fox Factory shocks, Works Performance and a myriad of stuff laying around. :banghead:

I cleaned it up last night and consolidated a bunch of stuff so now I can really work on something without moving crap around. I have too much stuff which in my case is very good. :thumbsup:
 
I started going through cables and found a real heavy duty clutch cable that come off an 83-84 Husky. It had a kinda somewhat round end on it for the clutch arm. I didn't really trust it so I pulled out my cable end kit I have had for...........a long time. Found the right end and cut a slot in it and soldered it on. I was afraid to take the old one off since I didn't have anything to make a soldering pot out of unless I went to the hardware store. It would take longer to do that than just doing it.


Started working on the front wheel. The spokes were pretty rough as I had to use a different wheel than what came on the bike. The rim was cracked.


Here's a desert porcupine, or the closest we will ever see.


Here's the spokes during clean up. Before, cleaned, and buffed left to right.


All polished out. Took about 8.5 minutes a spoke with nipple.

 
I bought a set of SS spokes from Buchanans for my Penton. I asked them to call me before they assembled the wheels, so I could pick up the spokes and nipples and polish them myself (to save $100.00).
Spent at least 18 hrs polishing, roughly $5.00 bucks an hour? Am I cheap or what?

 
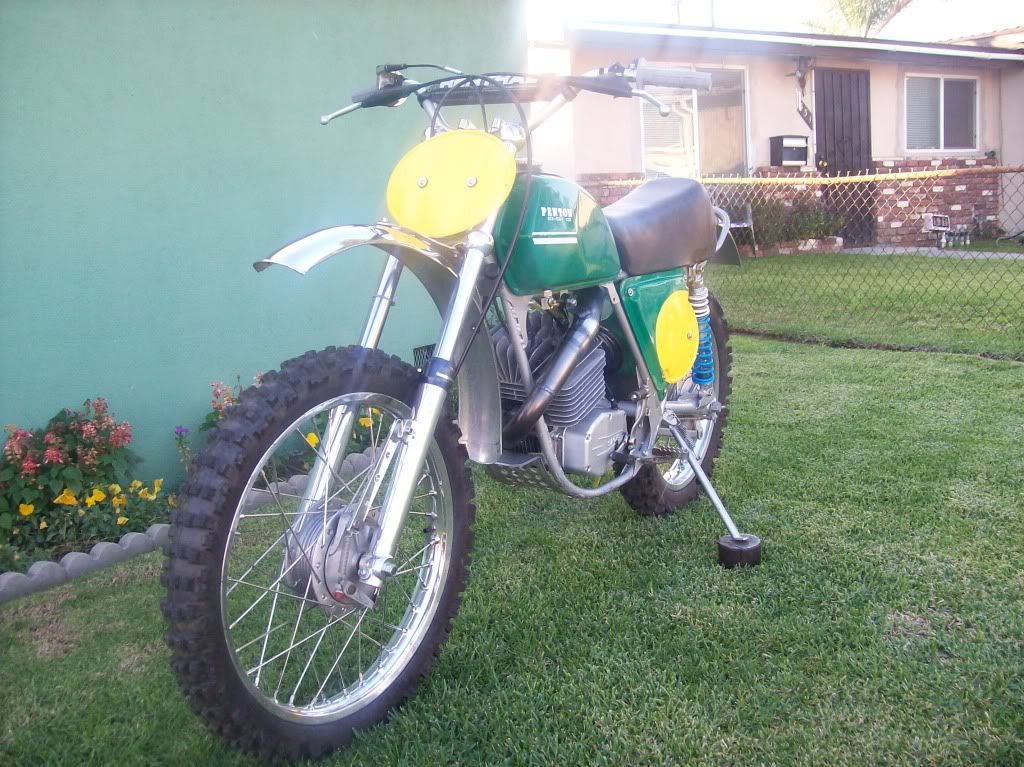
I did a little painting over the weekend and worked around the house, and had the bike out on the back porch in the daylight to see how it looked.


I am cheap and painted the rim with a metallic brass as I like the color. I was going to powder coat or andonize but I have other projects to do. This will get rode anyway.


Started lacing the front wheel, I had never done a Husky wheel before. After taking it apart twice I found Ron's post about lacing them. A call to Ron really helped me out. I was off one hole on the hub. This thing was beating me up. On the bike and ready to go.


More to come hopefully soon.
 
Back
Top