Pottering around...

Discussion in 'TR650' started by glitch_oz, Jan 20, 2014.

  1. engineerk9 Husqvarna
    AA Class

    Location:
    Narrabeen
    Husqvarna Motorcycle:
    Terra 650
    Other Motorcycles:
    Kawasaki ZRX1100
    I was more than impressed with the bike, I was a little concerned earlier with the engine, my road bike is a Kawasaki ZRX1100, Kwaka's are "bullet-proof" - I do think that for adventure riding the flywheel is too light - generally on the dirt kept the motor spinning between 3,000rpm & 4,000rpm - in 3rd or 4th - below 3,000rpm the motor "chugs" too much, above 4,000rpm the rear tyre (Heidenhau K60) was breaking traction on the loose stuff
    I was riding solo & wanting to preserve my tyres
    The bike was willing to do 140-160kph on the gravel - I wasn't !!
    I had hoped that the Safari tank would have been only a single tank - However their easiest option was to make 2 side tanks - Which works for me, although I did add preload to the front forks, after several "nip" punctures & the forks bottomed out
    I've never run with all 3 tanks full (32 litres = 700+ klms) 25litres being the most I've ever carried

    Over the next month or so I'll 3D scan & see if there's a neater solution to the Pod, I purchased a spare airbox earlier this year to mod, however never got around to it - Doing the Pod mod now
  2. glitch_oz Husqvarna
    Pro Class

    Location:
    AUS
    Husqvarna Motorcycle:
    Strada
    Being one of the dying breed of the "Ancients".... the no-Spot, no-GPS, no-Ipod, paper-map fossil...a big map-pocket is important to me.


    None better and less complicated around than the SW-MoTech Bags Connection Quicklock Tankbag type with the optional clip-on map pocket.

    Using their "Engage" model for sloping tanks on the other bikes, I'd hoped to, ideally, fab some setup for the Husky to swap the bag (and later purchases?) from bike-to-bike.
    Not needing a 12V powered version (those bags and attachment mechanisms come as plain or powered), I can run power from the previously installed socket in the "wing" of the left body panel, if ever needed.

    Checking the little top-panel for rigidity, I'm pretty sure that the fairly complex profile of the PP-panel provides enough strength to carry a tankbag...after all, much of the weight of the bag will rest on the top part of the seat and the bag will only carry a handful of bits, the heaviest and biggest being a P+S camera.

    After years of playing in the "bike-cave", there are plenty of leftover bits...
    The tankring mounted to the V-Strom tank is the Suzuki version with the wider legs to suit the Zook's filler cap stud pattern.

    Having a spare of those proved, that the Husky's filler cap is slightly bigger and those "legs" have to be thinned down.
    (just found out yesterday that there's a perfectly fitting tank ring for the BMW GS1150 GSA around....fitting in ID and OD that is....the bolt-holes might still have to be plugged before re-drilling in the correct position for the Husky).

    [IMG]


    Roughed the flip-side, plastic bracing of the ring, then filled every nook and cranny with JB-Weld epoxy to make this a solid affair and allow me to place holes anywhere they're needed.


    [IMG]


    Smoothed the bottom and dremel-ed/ filed away the extra material to narrow the "legs" to a uniform thickness to comply with the size+shape of the tank cap.

    [IMG]


    Now for the tricky bit of fabbing a spacer to comply with the weird "teardrop" shaped raised bit around the filler cap/neck of the Husky panel.
    Some 15/20mm (5/8- 3/4") high-density EVA sheeting (see your shoe-repairer for a piece of that) is perfect for it. Super-light, very firm but not hard or brittle, waterproof and chemically impervious, machinable, drill-able etc etc.

    Pre-shaped it, then contact-glued it to the tank-ring for a final skim and trim.

    [IMG]

    [IMG]


    [IMG]

    [IMG]
  3. glitch_oz Husqvarna
    Pro Class

    Location:
    AUS
    Husqvarna Motorcycle:
    Strada
    As the pics show, there isn't much "wall"-material at the bottom seat to drill a hole through...
    and the position of the 4x 4mm SS countersunk bolts has to be checked very carefully to make sure that the nyloc-nuts protruding out the bottom of the panel do NOT sit on top or touch the tank/airbox material, as well as staying clear of the hose-connection at the filler neck.

    Thankfully there's a recess in the tank-shape which gives some leeway regarding depth and clearance.

    [IMG]


    A bit of double sided tape to trial fit and mark out.


    [IMG]


    Yo, happy with that


    [IMG]


    Drilled and fitted...if there's any doubt about stability/ strength, fabricate a thin (1/16th) alum ring to spread the load of the 4 screws to the overall area around the neck. I can't see the need unless a BIG and/ or heavy tankbag is used.


    [IMG]

    The most crucial bolt of the 4...NO touching anywhere!
    Countersunk heads to keep the surface flush and not interfere with the counterpart-ring that's part of the tankbag and slides over the top.

    [IMG]


    [IMG]
  4. glitch_oz Husqvarna
    Pro Class

    Location:
    AUS
    Husqvarna Motorcycle:
    Strada
    Last job...a test-"sit" to check for clearance and "room-to-move" in the saddle + standing up.
    While this particular bag is a touch too big for the Husky (just by proportions), it all fits like a glove and even looks like it was designed for it in the first place.


    [IMG]


    Check....lock-to-lock clearance.
    No killswitch touching the bag, hurray!


    [IMG]


    Ergos? Fine...nothing in the way sitting or standing


    [IMG]


    An old "City" model bag that's given up the ghost years ago, provides a spare "bag"-mechanism, the top half of the "click 'n go" tankbag principle.
    If/ when I come across a neat, small bag of any brand/ construction, I can use a thin piece of plastic sheeting as a floor stiffener, then bolt the spare bag-ring to it to make it a "Quicklock" bag.
    AFAIK, SW has now decided to sell those rings separately as well, making it possible to convert most tankbags out there to the Quicklock system.


    [IMG]
  5. duibhceK Husqvarna
    AA Class

    Location:
    Chapel of the Well, Belgium
    Husqvarna Motorcycle:
    TR650 Terra
    Other Motorcycles:
    TRX850; WR450F; XT660Z Tenere
    Nice solution, Glitch!

    I had a brief look at the option of putting an SW quick-lock tank bag on my girlfriend's Terra, as she still had one lying around from her FZ6. But I mainly considered creating a bracket like they exists for the G650GS. But in the end I just got her a Famsa bag which straps to the tank and used the SW map compartiment on that.
  6. glitch_oz Husqvarna
    Pro Class

    Location:
    AUS
    Husqvarna Motorcycle:
    Strada
    :) Yo, same here. Made a pattern, cut the alloy....but the required shape is fairly complicated (particularly around the front, towards the steering head) which made the bracket pretty big and cumbersome.
  7. glitch_oz Husqvarna
    Pro Class

    Location:
    AUS
    Husqvarna Motorcycle:
    Strada
    While Touratech offers foldable-tip versions of the gearlever, there's nothing around for the other side....a foldable-tip brake lever.


    Recently stumbled over this:

    http://www.warp9racing.com/billet_brake_pedals.html

    Scroll down the page and find the replacement tips for their levers @ $25 each.
    And with a little metalwork, they fit just about ANY brake lever out there.
    Silver has been superseded and replaced with black.
    Email them first as for availability/ colours!!

    Anodized alum with stainless steel, screw-in spikes for grip.
    Pivot/spring and other hardware = stainless.

    Nice bling, too :thumbsup:


    [IMG]


    After removing the profile that clips into their proprietary levers....the first bit of the metalwork mentioned above.


    [IMG]

    A black one mounted to the Husky after a slight re-shape of the lever profile itself (the other bit of the metalwork).

    A couple of neat S/S bolts to bolt it up...


    [IMG]
  8. glitch_oz Husqvarna
    Pro Class

    Location:
    AUS
    Husqvarna Motorcycle:
    Strada
    One issue I've skirted for weeks now, despite having all essential parts laying around, was the brake-light switch replacement with a pressure switch.

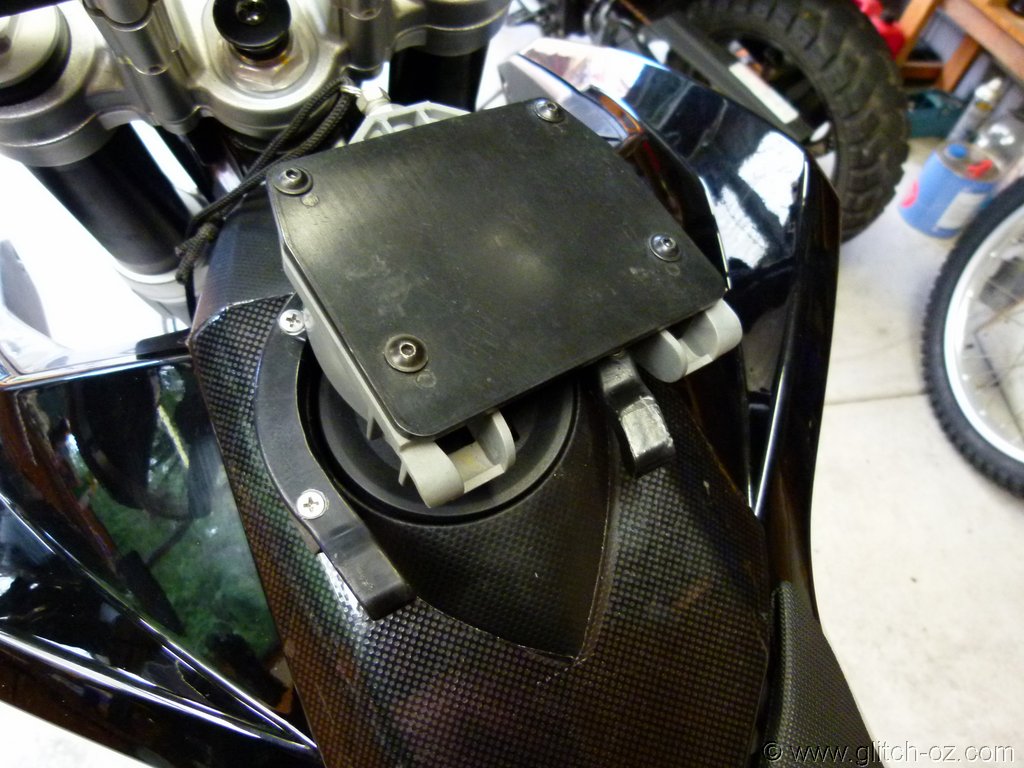
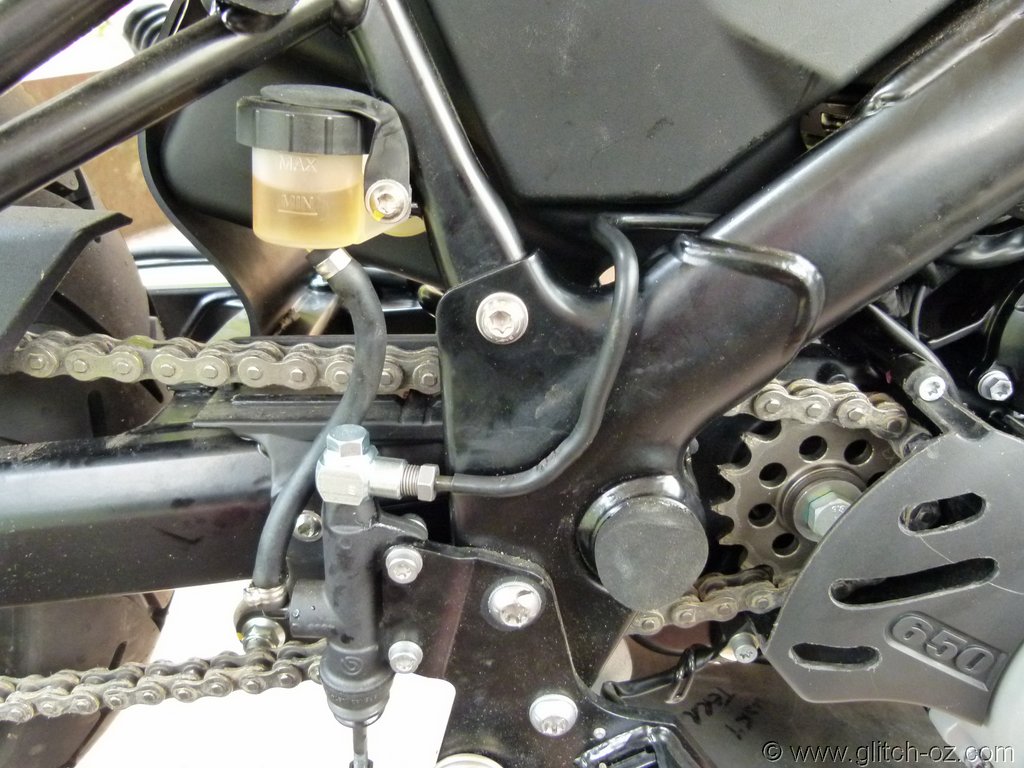
    While things are easy on the Terra (the brake-line finishes in a banjo and is fixed with a banjo-bolt into the top of the rear master cylinder)....things are different on the (ABS-) Strada.
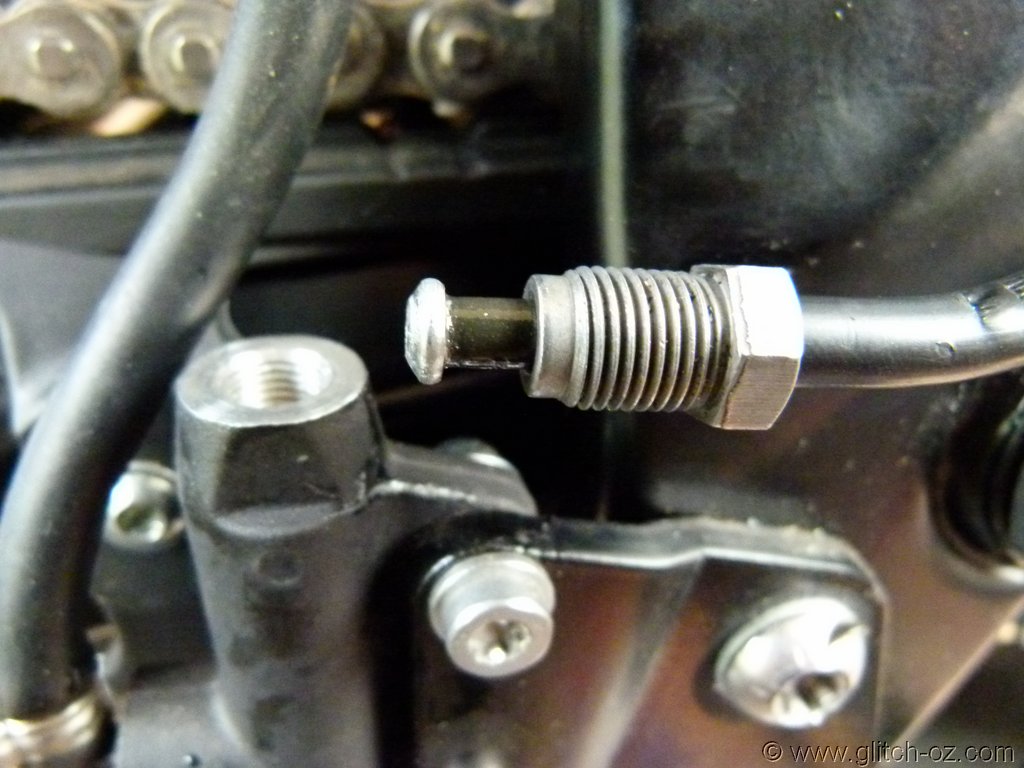
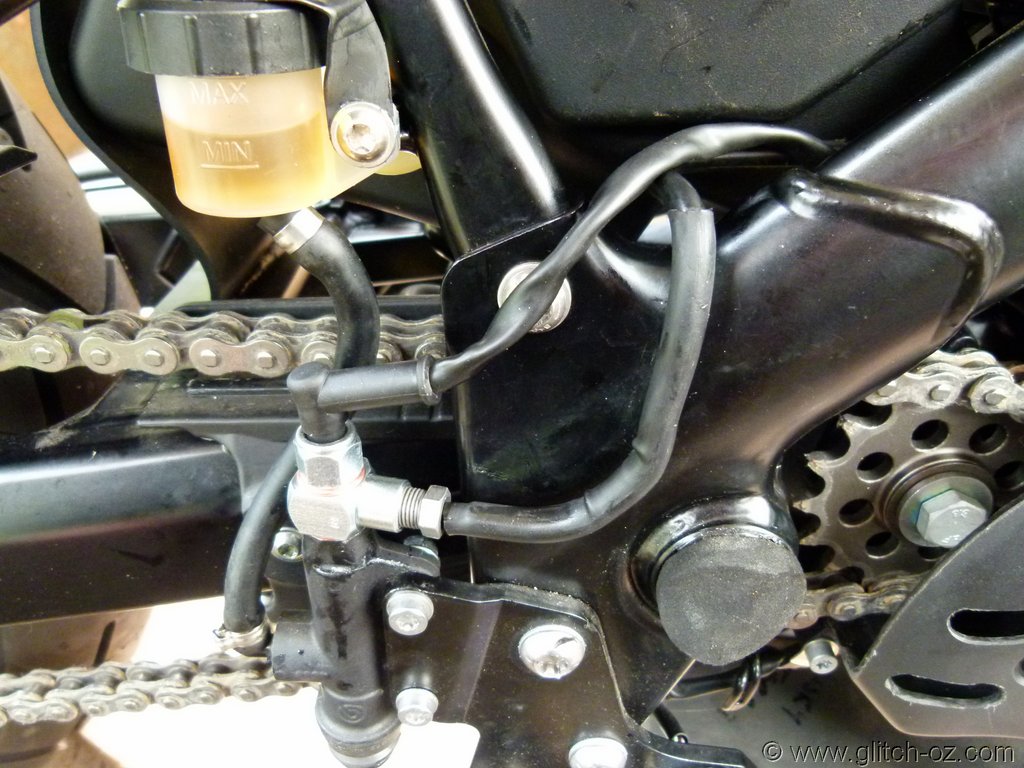
    The brake tube runs straight into the top of the master cylinder via a ball-flared end and a 10x1mm nut into a dished seat for a good seal.

    Tinkering away at night, the brake-tubing also seemed to be 6.5mm O/D, quite massive for the application, but who knows, it's Italian, so anything goes.

    Not having a banjo fitting at the end, there's no way to attach both the brakeline AND the pressure switch!

    Scouring Ebay, Alibaba, Google, Gumtree for weeks to find a Y-piece/ T-piece/ SOME piece!! with a male 10x1 and twin female ends of the same size to somehow share the master-cylinder thread, things dragged on and on. Nothing around !
    Either the fittings are some weird, non-compatible threads or the ends are set up for braided lines with olives and/ or compression fittings....the choices are endless, but NOTHING FITS!!

    Next: cut the nut + flare off, shorten the tube and re-attach a 90degree banjo fitting.
    Not having the flaring tools I saw the local brake-service.
    "Take the line out and we'll do it...or make a new line, it's usually quicker. It's just normal 3/16" , mate....the rest is a plastic sleeve!"

    Too right!! So there IS something normal on that bike, hoo-bloody-ray!

    No way! I'm not taking half the bike apart to get to the banjo.....BANJO!!!-fitting on top of the ABS unit and underneath the tank, just to take the line out.
    And NO, it can't be done on the bike, nor can a different end be welded on, it's too close to the frame, the line barely 3" long.

    "You can bend the line quite easily though...just be careful, if it kinks, it's cooked!!"
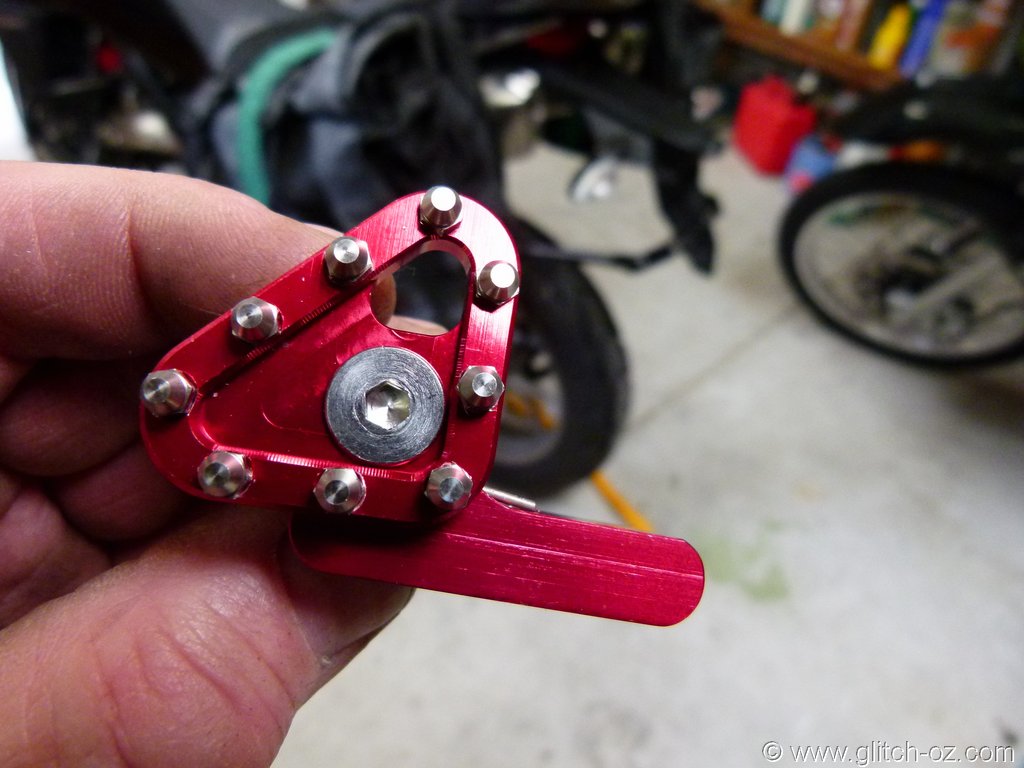
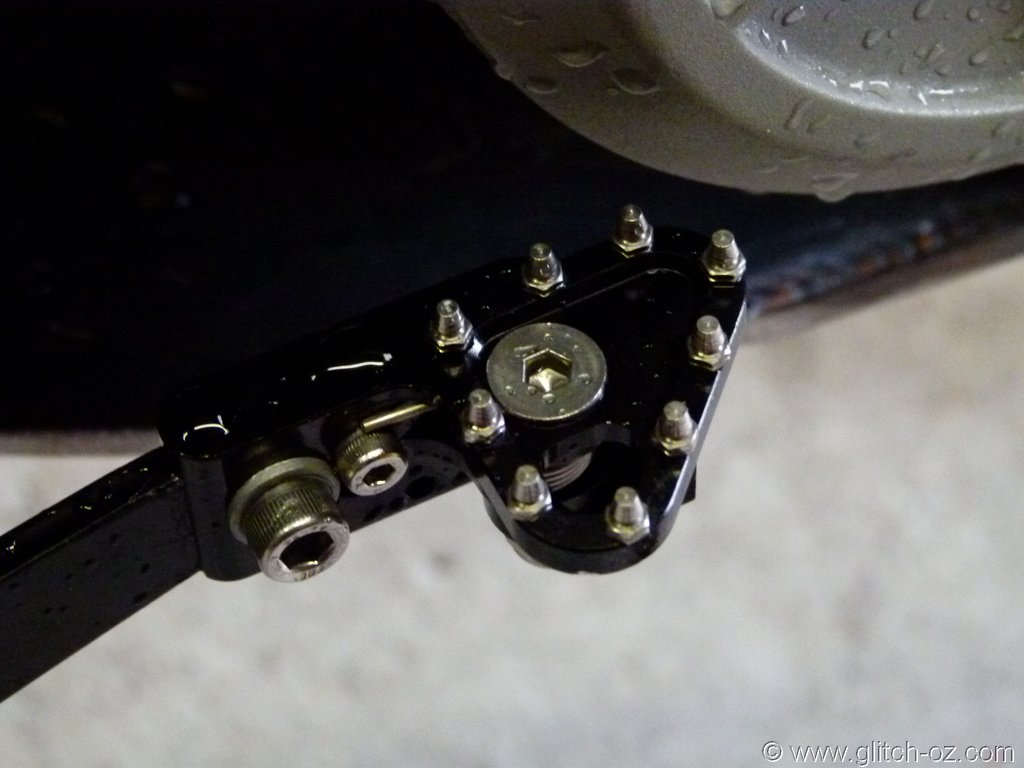
    They sell me a 10mm banjo fitting with a 10x1mm thread from the side and a banjo-bolt to line it all up without having the wiring of the pressure switch getting in the way through all those trial-fittings.

    HMMMM....pondering the advice and the facts, it's another 3 weeks of "looking into the pot and smacking the lips..."

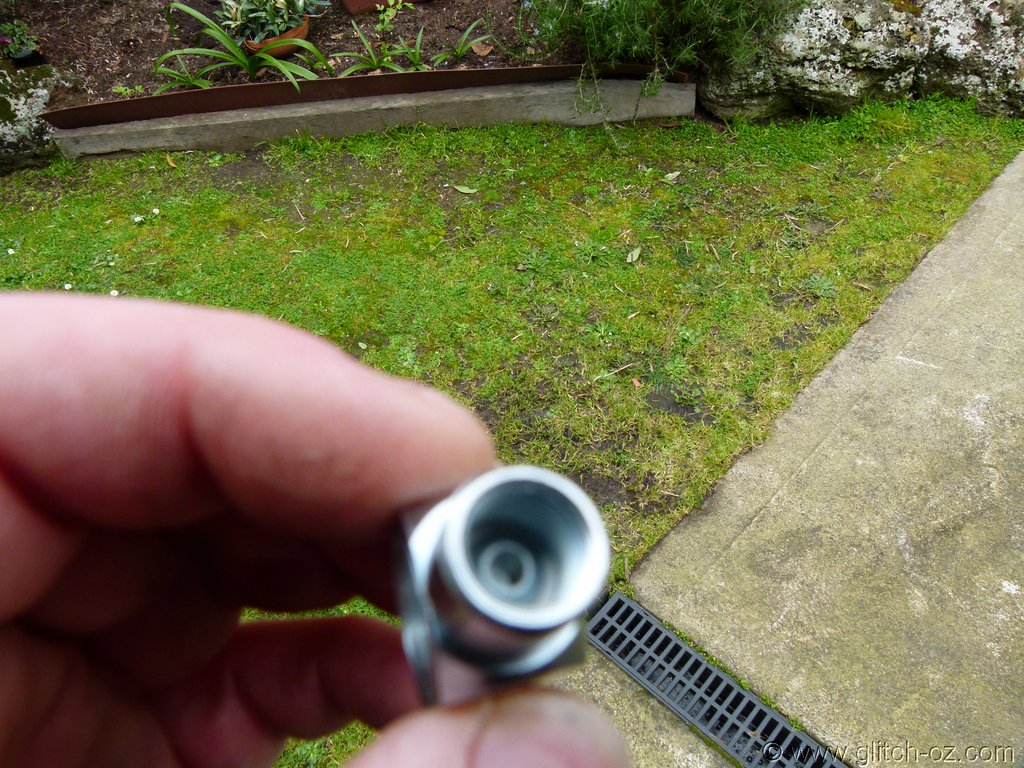
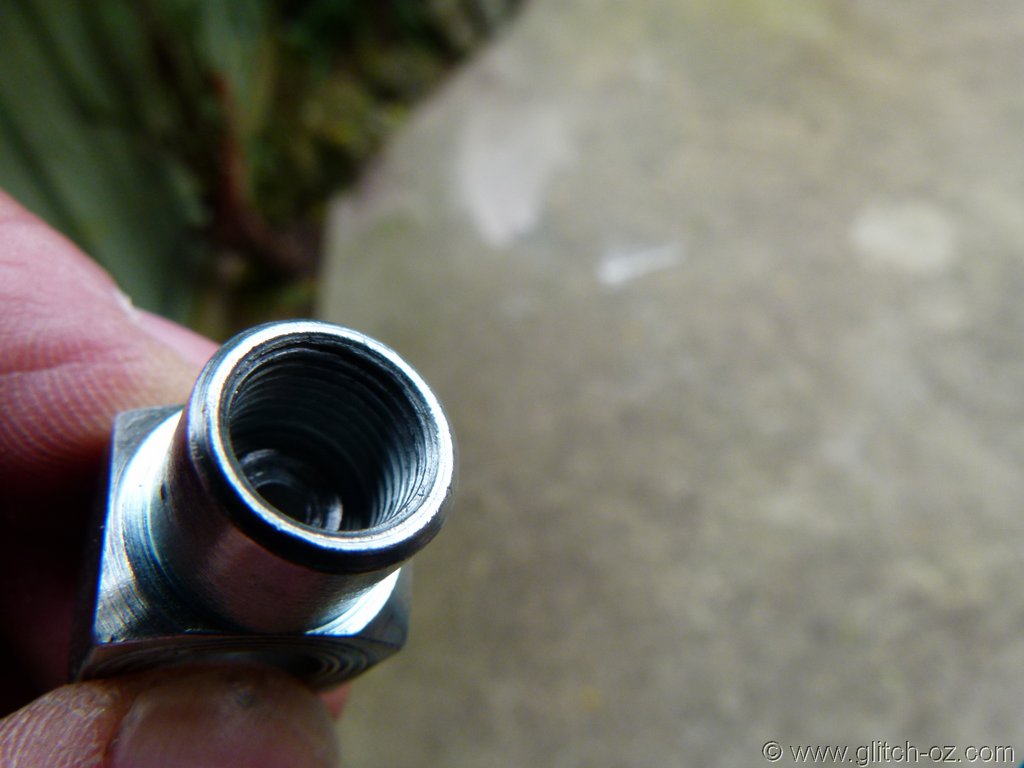
    I fondle that little metal blob a 100 times, the thought of stuffing it up, the tubing finishing up short or too long and not reaching the fitting in the end....or kinking that line... and there's another problem. Inside that 10x1 female thread sits a ~3mm raised bit of tubing/ spout, onto which the line apparently needs to be fitted somehow...

    [IMG]


    Time to pull the finger out or throw up my hands...
    Trailering the bike back to the brake shop, the "oldie" of the place shuffles out of the rear workshop and quickly runs through the same options again....then looks at that banjo-blob that the sales guys have given me...and comes up with a plan. The beanie is twitching, the coke-bottle glasses pushed back up that huge honker every 20 seconds, eyes twinkling.

    "You ever put a knot in a fart??
    Here's how it's done!"

    1) Remove brake tube with clip from behind frame-tube (push up line firmly and jiggle until clip is free).
    2) Use piece of flat metal/ timber to straighten out the factory-bends.
    3) Use 1/2"-1" tubing/ timber doweling/tool-handle or such to slowly bend line around.
    The line needs tucking-in harder/ sharper bends etc. up around the frame-tube area...otherwise it's about 1-1.12" too long.


    Getting there

    [IMG]


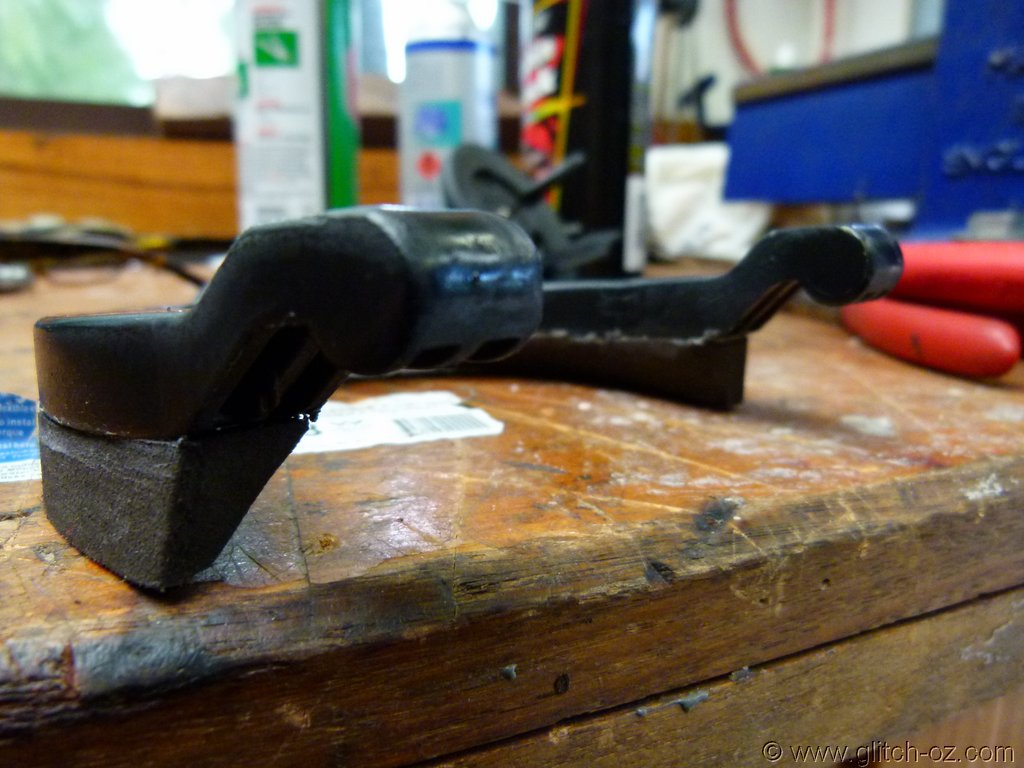
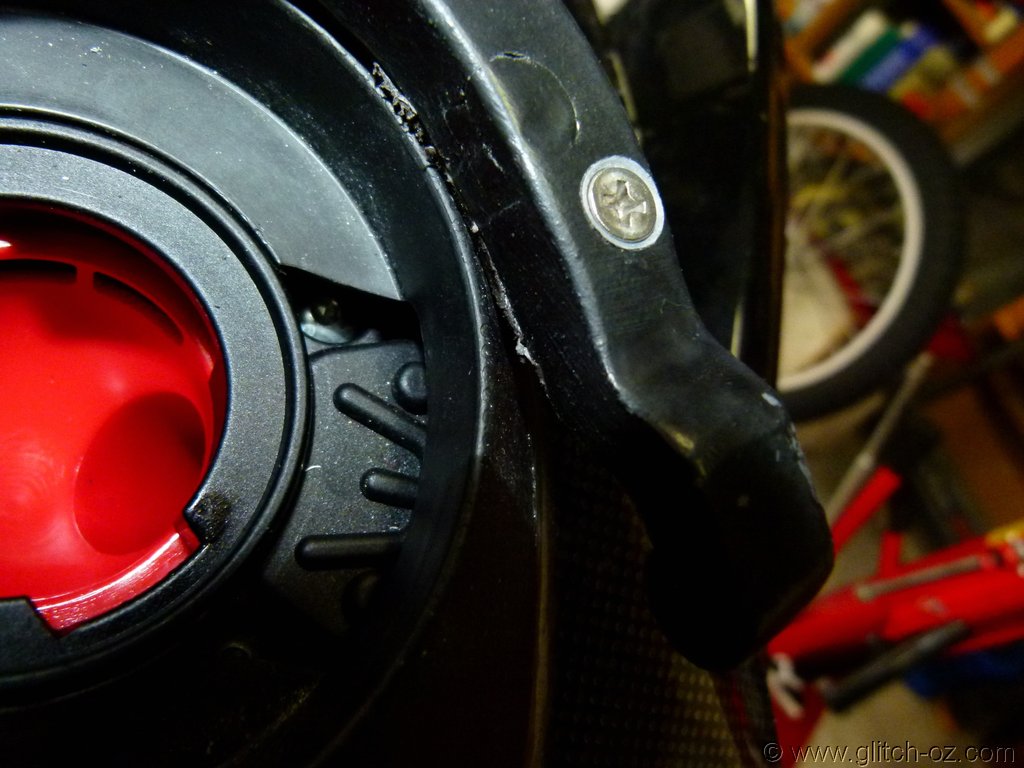
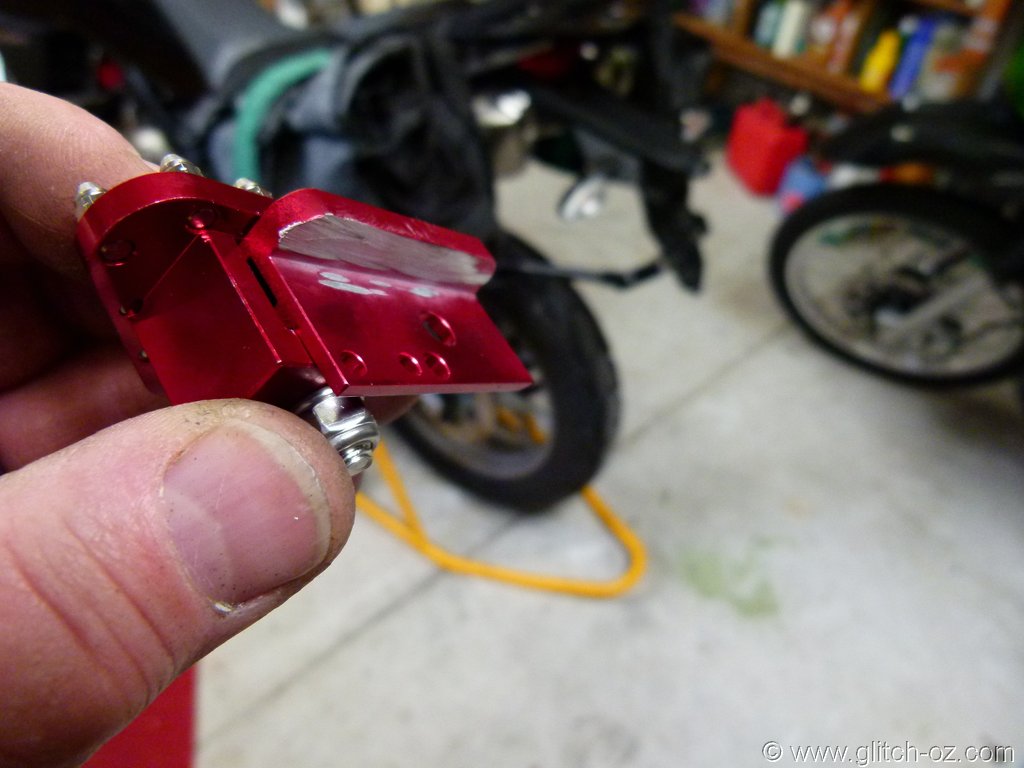
    4) That banjo fitting needs the raised "spout" removed and the bottom surface "dished" to mate with the existing factory flare of the brake-line...those 2 will have to make the seal!!
    Fitting in the vice, the spout is drilled away with a 5.5mm bit....then a 6mm bit cuts the first bit of a "dish" into the bottom....then a VERY CAREFULLY handled 8mm bit creates a deeper+ wider seat for the flare...WITHOUT NUDGING THE THREADED SIDES, destroying that neat 10x1mm thread.

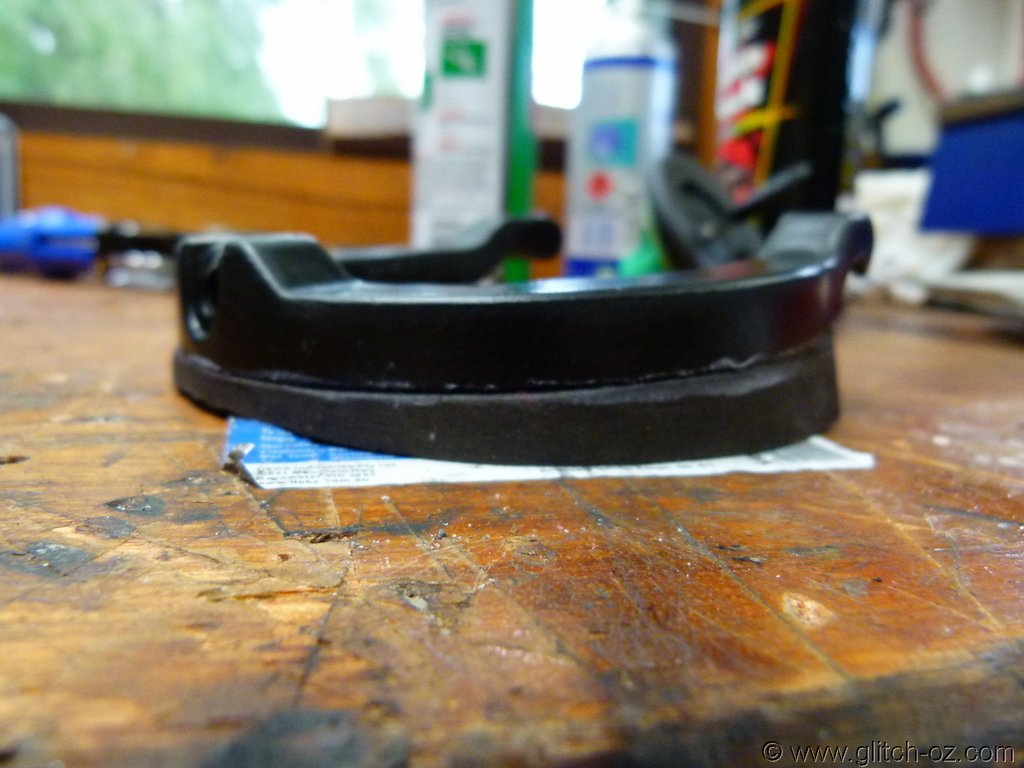
    Going very slow with the handheld drill and that 8mm bit, the actual surface ends up with tiny "bite"-marks of the drill bit's cutting edges...a short burst of medium speed to smooth out that surface.... then reverse the drill for the "polishing" action.

    Looks ok to me...


    [IMG]


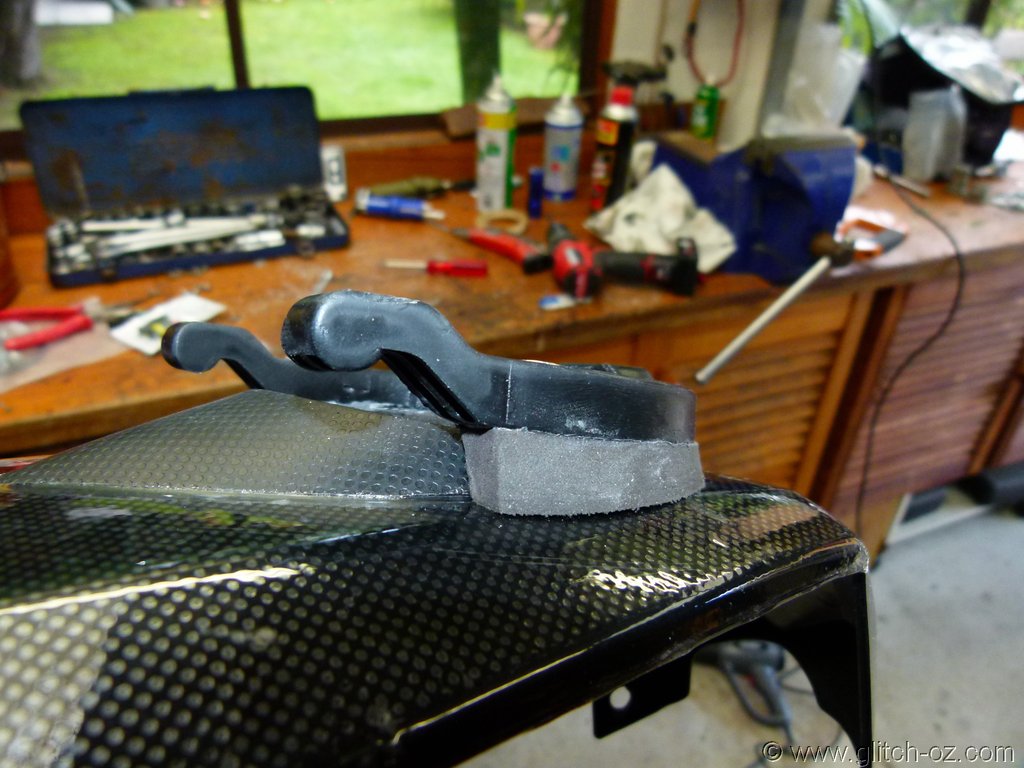
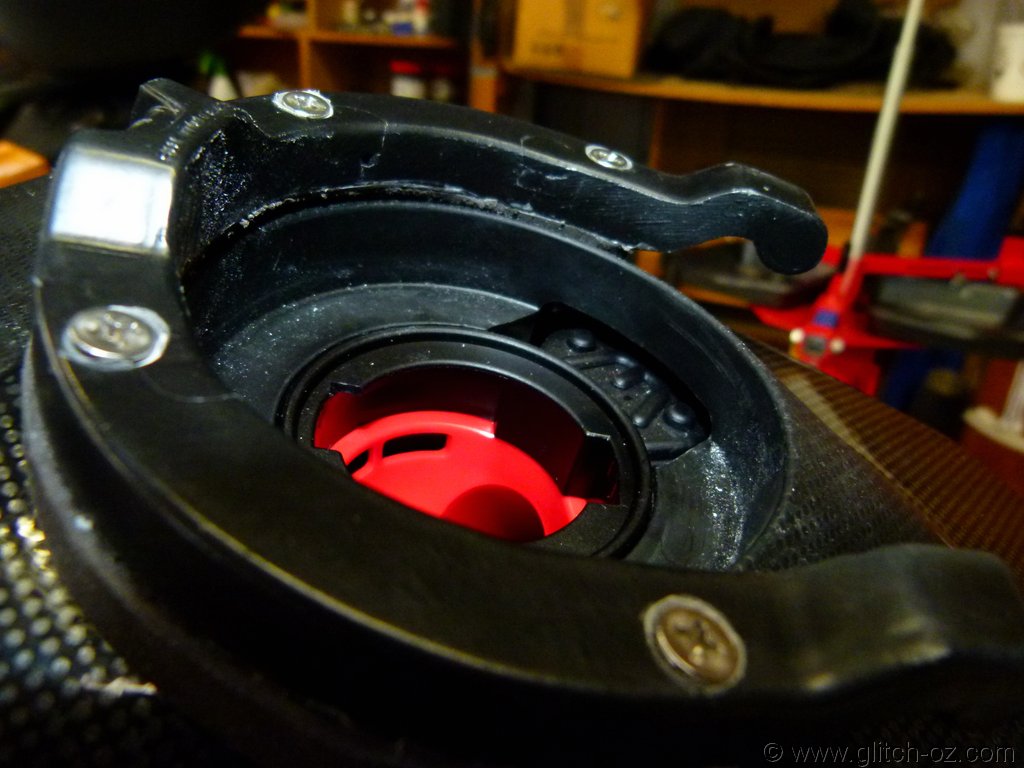
    One of multiple trial fittings, tubing needs straightening out.


    [IMG]


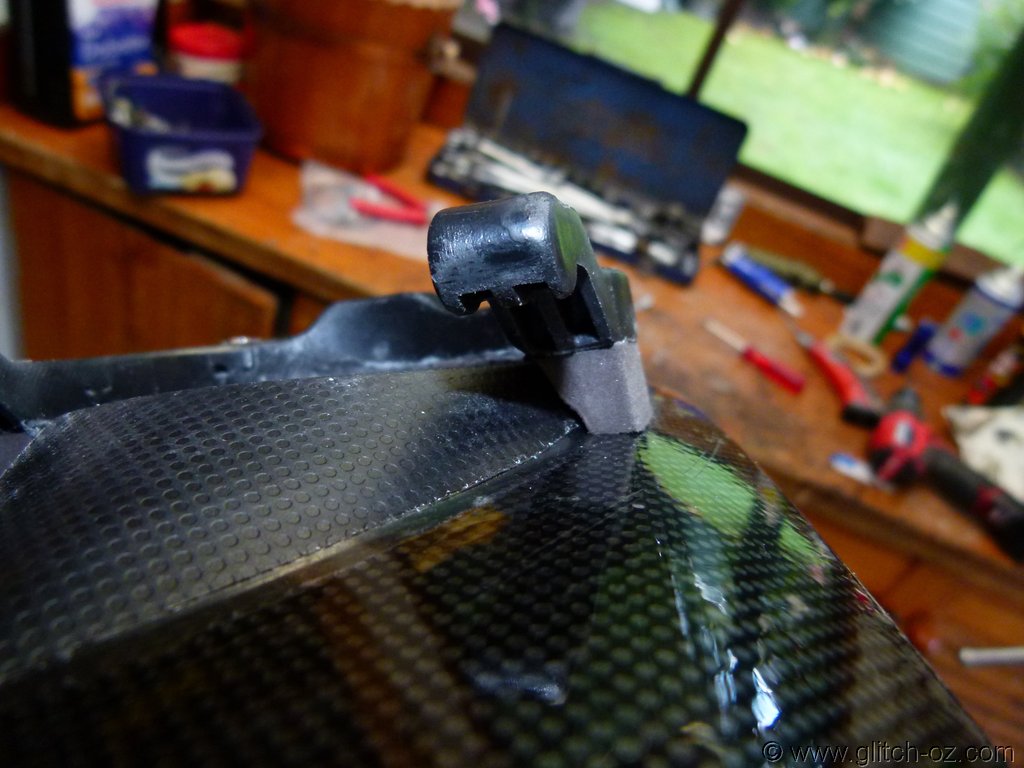
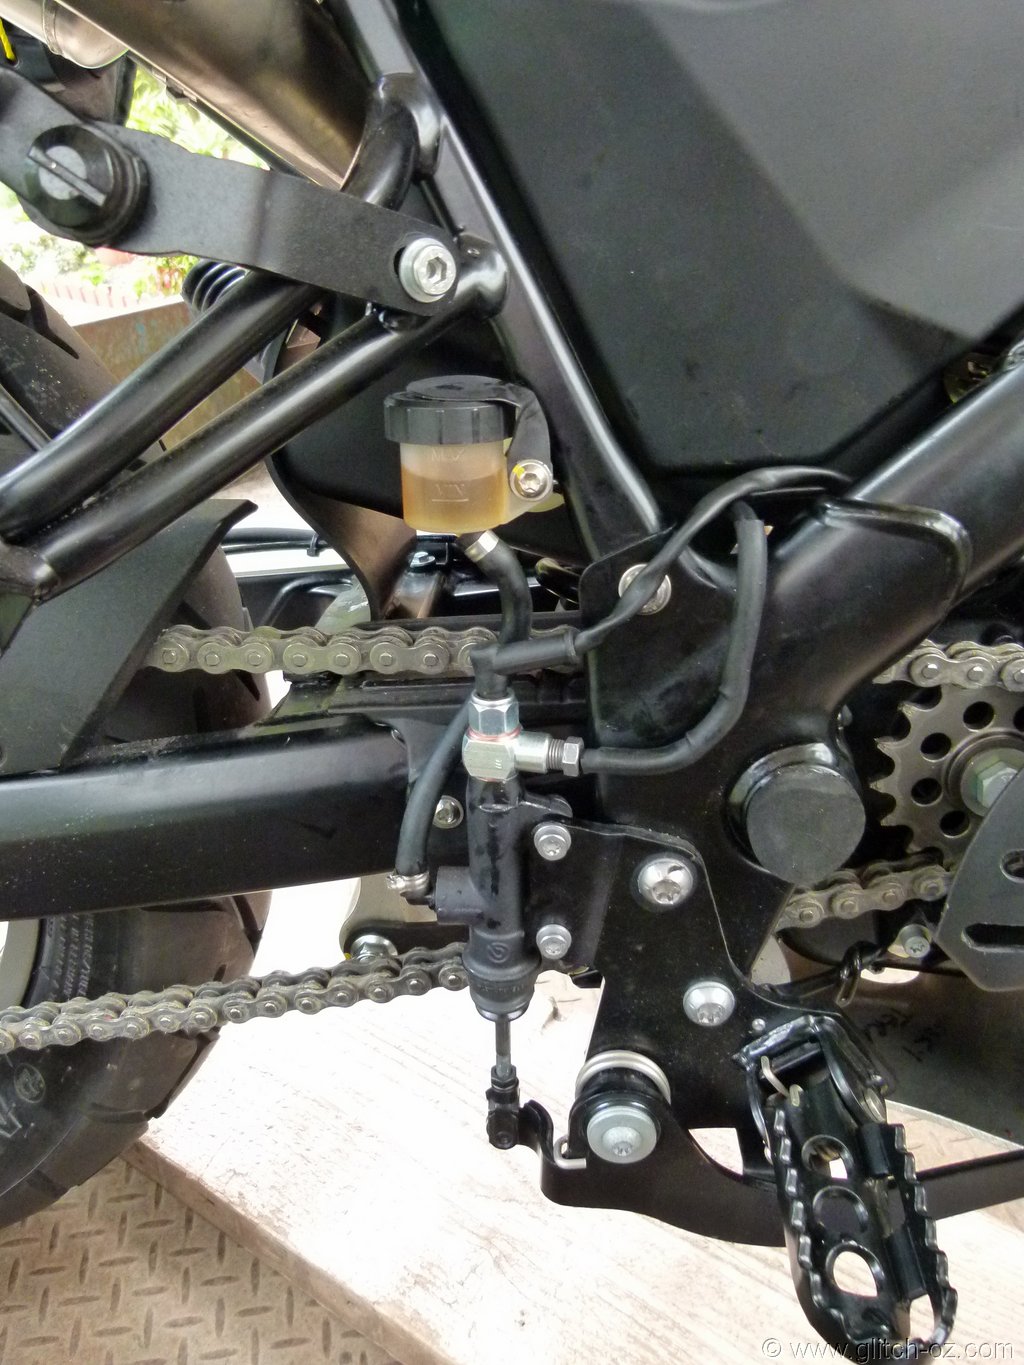
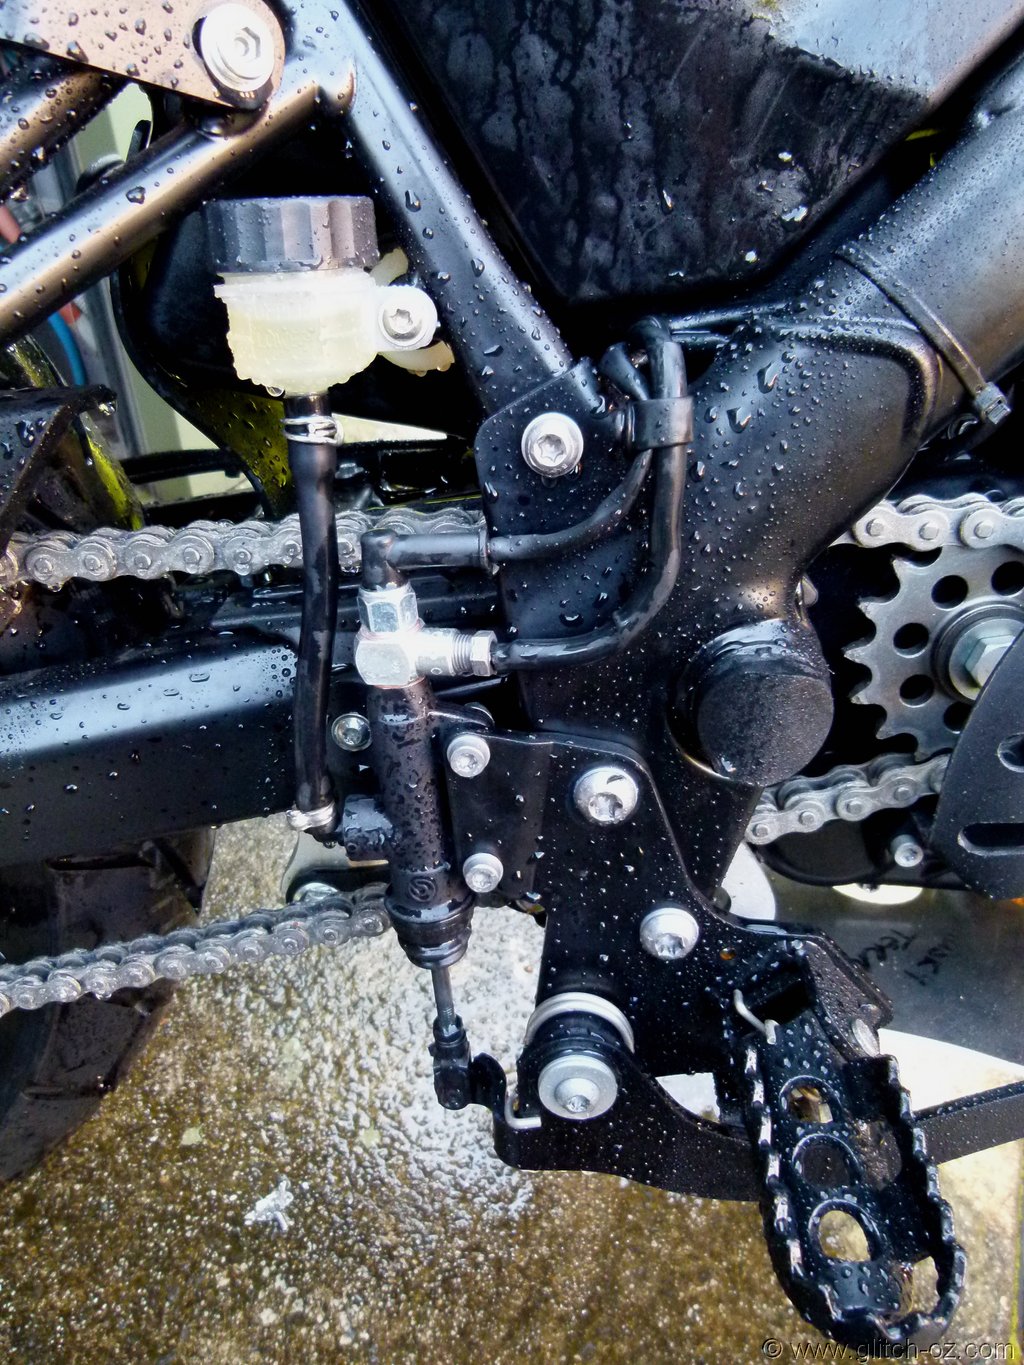
    With pressure switch fitted and another layer of heatshrink for protection.


    [IMG]


    All done, all tight, all dry, brakes bled.... just the wiring to go and some tidying up.
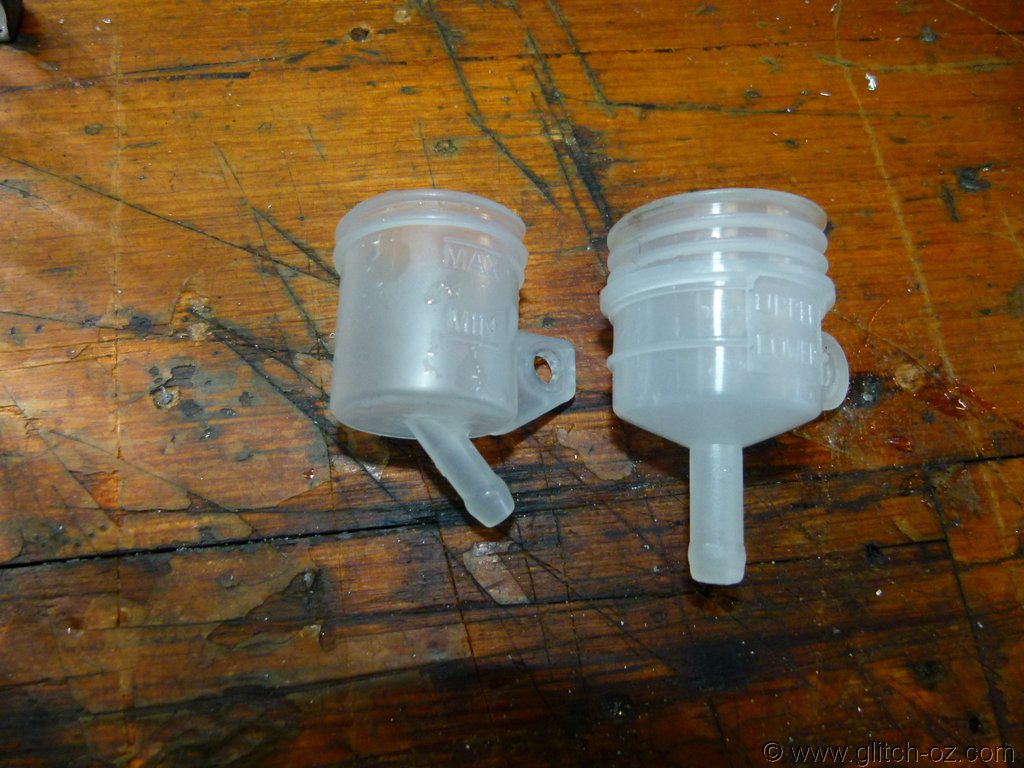
    New brake fluid reservoir ordered, one with a straight-down tube connector.
    The OEM unit necessitates the short rubber tube to fit behind the M/C and potentially rub on the swingarm.

    [IMG]


    $5 for the fitting, $8 for the pressure switch, $8 for the new reservoir, a few thimbles-full of brakefluid that needed changing anyway, coupla bux for the waterproof electrical connector....and a fearful afternoon of bending that tubing into shape and length while doubling the grey hairs.
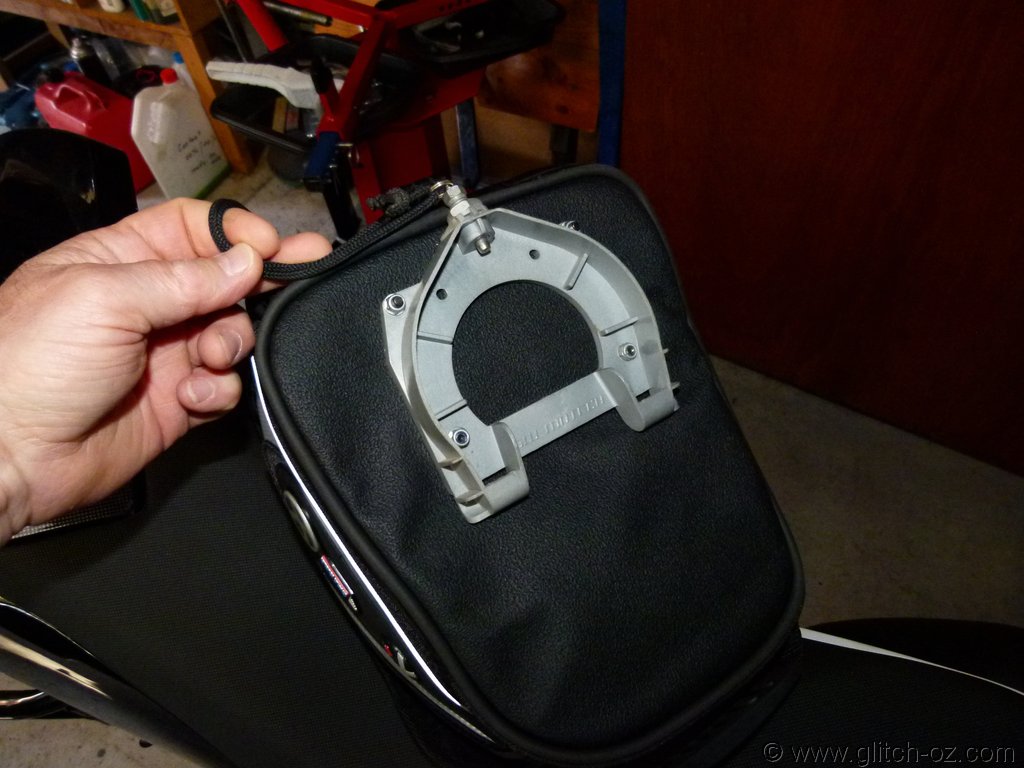
  9. glitch_oz Husqvarna
    Pro Class

    Location:
    AUS
    Husqvarna Motorcycle:
    Strada
    The Ebay-reservoir
    http://tinyurl.com/pzfhpmg
    turned out slightly bigger than the OEM.... which proves a blessing in disguise.
    The heatgun takes care of straightening the factory tubing and softening the end to squash that slightly bigger barbed end into.


    [IMG]


    The new reservoir now fits firmly into/ between the frame-rails, which act as a securing mechanism for the cap....even if it dedices to come loose, it's got absolutely no-where to go and HAS to stay on the thread.
    Since the cap/lid sits on the sealing rubber/ diaphragm, I also can't see any vibration-induced problems (splitting or cracking of cap or housing).
    And that's how the whole shebang should've looked ex-factory.


    [IMG]
    engineerk9 likes this.
  10. drzcharlie Husqvarna
    Pro Class

    Location:
    Fayetteville, Arkansas with my Redheaded Mistress
    Husqvarna Motorcycle:
    TR650 Terra
    Other Motorcycles:
    Burgman 650 (The Barcolounger)
  11. Greg Jetnikoff Husqvarna
    AA Class

    Location:
    Bundaberg Australia
    Husqvarna Motorcycle:
    TR650 Strada
    Other Motorcycles:
    BMW F80R
    Ok. It's possible that the ABS may screw this up but why not just put the pressure switch at the banjo fitting at the caliper end?
  12. glitch_oz Husqvarna
    Pro Class

    Location:
    AUS
    Husqvarna Motorcycle:
    Strada
    Don't think the ABS makes any difference, the pulsing in the line might make the brakelight flicker, but that's it, it's still a hydraulically closed system, pressure switch or not.

    As per reply here http://www.advrider.com/forums/showpost.php?p=24936274&postcount=4913

  13. Greg Jetnikoff Husqvarna
    AA Class

    Location:
    Bundaberg Australia
    Husqvarna Motorcycle:
    TR650 Strada
    Other Motorcycles:
    BMW F80R
    Ok I can live with that for a dirt bike. Might add a pressure switch ....at the caliper end. I ride in entirely on the road for the time being ( Strada with Michelin Pilot road4's) . Still , easy enough to make a shield to protect it for the dirt
  14. glitch_oz Husqvarna
    Pro Class

    Location:
    AUS
    Husqvarna Motorcycle:
    Strada
    Drilled the swingarm (as a precaution)
    Fixed fuel filler cap (as a precaution)

    Modded an Oxford X4 tankbag as it seemed to be the easiest since they come with a removable pouch full of magnets inserted
    between the zipped inner and outer 'floors' of the bag.
    Replaced the magnet- pouch with a piece of trimmed, stiffener sheeting (poly-prop) from an old soft-luggage tail-bag
    to use as a solid mounting base for the Quicklock mount.
    Drilled a few 5mm holes...and it all "clicks" now.


    [IMG]

    Another reason for the Oxford X4 (4litre/ ~1 gal) was the generous, soft map-pocket for this old's-cool GPS-rejector.;)
    It also acts as a rain cover.

    [IMG]


    [IMG]
  15. engineerk9 Husqvarna
    AA Class

    Location:
    Narrabeen
    Husqvarna Motorcycle:
    Terra 650
    Other Motorcycles:
    Kawasaki ZRX1100

    A 1.5 mm thick neoprene cover, fitted around the Petrol filler, slots around the air box, seems to do the trick of sealing the saw cut & dampening the noise a little
  16. glitch_oz Husqvarna
    Pro Class

    Location:
    AUS
    Husqvarna Motorcycle:
    Strada
    Thanks for the heads-up....got some of that stuff floating around, too!
    Not that noise has proven a problem , using that self-adhesive neoprene strip around the saw-cut (which, surprisingly, sticks pretty well).

    Checked the "pre-filter" (the pool-skimmer-sock around the former/ OEM air-filter frame) during the first service last week.
    This one seems to cop the lot, the pod-filter was mint and not a spec of dust in the airbox.
    A fresh sock with a spray of filter oil...and all buttoned back up again 5 mins later. This is working just sweet!
    engineerk9, nev.. and vodka like this.
  17. engineerk9 Husqvarna
    AA Class

    Location:
    Narrabeen
    Husqvarna Motorcycle:
    Terra 650
    Other Motorcycles:
    Kawasaki ZRX1100

    A great investment I feel, very pleased that I invested in mine
  18. engineerk9 Husqvarna
    AA Class

    Location:
    Narrabeen
    Husqvarna Motorcycle:
    Terra 650
    Other Motorcycles:
    Kawasaki ZRX1100

    Mine "dissolved" within a couple of months - not happy at all
  19. engineerk9 Husqvarna
    AA Class

    Location:
    Narrabeen
    Husqvarna Motorcycle:
    Terra 650
    Other Motorcycles:
    Kawasaki ZRX1100

    Absolutely, although like most of us had to modify the bike to suit individual needs.
    Now planning to for the Tanami, Alice Springs to Broome
    Purchased a Mefo Super Explorer 99 for the rear, still researching front tyres
    Added 3mm thick extra "Bump-stop" as the swinging arm bends & tyre contacts under the seat, on heavy landings
    Working out a way to move the air temperature sensor from the airbox to somewhere not so affected by engine heat
  20. glitch_oz Husqvarna
    Pro Class

    Location:
    AUS
    Husqvarna Motorcycle:
    Strada
    Sometimes you've gotta love rainy weekends...
    Another potential trouble-area out of the way.

    Just a quick "proto-type" battery-post cover made from some Poly-prop sheeting.
    Will use some ABS fairing scraps for the real thing.

    The OEM battery has a convenient, spare M6 thread.

    [IMG]


    [IMG]


    Held in place firmly by the wiring coming off the post....and an M6 Nylon screw courtesy of ebay.
    No "fried and frazzled ECU's" in this place :-)


    [IMG]


    [IMG]