-
Hi everyone,
As you all know, Coffee (Dean) passed away a couple of years ago. I am Dean's ex-wife's husband and happen to have spent my career in tech. Over the years, I occasionally helped Dean with various tech issues.
When he passed, I worked with his kids to gather the necessary credentials to keep this site running. Since then (and for however long they worked with Coffee), Woodschick and Dirtdame have been maintaining the site and covering the costs. Without their hard work and financial support, CafeHusky would have been lost.
Over the past couple of weeks, I’ve been working to migrate the site to a free cloud compute instance so that Woodschick and Dirtdame no longer have to fund it. At the same time, I’ve updated the site to a current version of XenForo (the discussion software it runs on). The previous version was outdated and no longer supported.
Unfortunately, the new software version doesn’t support importing the old site’s styles, so for now, you’ll see the XenForo default style. This may change over time.
Coffee didn’t document the work he did on the site, so I’ve been digging through the old setup to understand how everything was running. There may still be things I’ve missed. One known issue is that email functionality is not yet working on the new site, but I hope to resolve this over time.
Thanks for your patience and support!
- Husqvarna Motorcycles
- Husqvarna Motorcycles - Sweden
- Vintage/Left Kickers
- Vintage Restoration Projects
You are using an out of date browser. It may not display this or other websites correctly.
You should upgrade or use an alternative browser.
You should upgrade or use an alternative browser.
1977 360 Auto ressurection
- Thread starter ajcmbrown
- Start date

ajcmbrown
Husqvarna
Pro Class
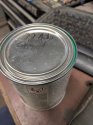
This may look very unorthodox, but I needed a solution to hold my centre case gasket in place until the gasket cement sets, I normally wouldn't use gasket goo on a centre case but the one I got from Dave at Tritrophy was so out of shape, there was no way it would go back together with the gasket sealing the cases.


DeathFromAbove
My Cat Says AREAR!
Looks good Tony, those paper gaskets shrink with age, i let them soak in water and they swell back up. Then assemble while stile moist.
ajcmbrown
Husqvarna
Pro Class
Why didn't I think of that Chris? The centre gasket was trying to curl up badly, but it's now in place.
Tomorrow I'll clean the grooves in the 2-3-4 shoes and install the transmission and clutch cover and sprocket cover.
I'm getting very impatient about my package from RTR Moto, last scanned in San Fran 11 days ago and no more progress since.
I still don't know why my pics from my phone end up rotated....
Tony.
ajcmbrown
Husqvarna
Pro Class
My next dilemma is fitting the main hub into the cases, is there a specific process for this? I've tried with the output shaft in and out, with both left and right covers removed, it just doesn't want to fall into place. If I try to fit it with the output shaft in place, my mainshaft will only go in so far, leaving a gap of around half an inch between the hub and crankcase, no amount of rotating the internals makes any difference, if I install with the output shaft out, it will go all the way home into the blind bearing on the opposite side, but then I am unable to fit the output shaft without 1/4 inch protrusion past the cases, I can install both clusters with both covers off, all gears seem to mesh, and both sit in what appears to be the correct position in relation to the covers and engagement tab but when I try to fit the output shaft cover it pushes the mainshaft back toward the left side cover, I've checked everything I can think of and still cant get this sucker in place. It came out very easily with a little jiggling so I didn't expect any issues fitting it back in.
I split the cases, checked the bearings, they were in nice shape, replaced the seals for the sake of it and it went back together really well.
Any help appreciated,
Tony.
I split the cases, checked the bearings, they were in nice shape, replaced the seals for the sake of it and it went back together really well.
Any help appreciated,
Tony.
DeathFromAbove
My Cat Says AREAR!
I think i had to tinker with mine too, I pretty sure you have to instal the primary shaft assy. first then the output shaft do you have the output plate off and like was said the engagement lever up, i think i remember that was where i had trouble, i's kinda funky to get the lever to fit where it is supposed to if i remember because of the engagement gear spring tension. Good luck You downloaded the auto stuff from Michel?
ajcmbrown
Husqvarna
Pro Class
Michel's information was great, the workshop manual doesn't mention anything about how to re-assemble the transmission, making me think it is a very straight forward job, but this one is being quite difficult. I've thoroughly checked the engagement lever but there does not appear to be any contact at all, I've tried installing with the sprocket cover off and on, clutch cover off and on, with first gear hub off and on and it just won't seat properly, I can get the two clusters to sit in what appears to be their correct postion, gears meshed evenly, but the sprocket side cover simply will not go on without pushing the mainshaft toward the clutch cover, I can see that the mainshaft is entering the needle bearing, I've taken a very short video of the engagement leverwhen the shafts seem to be in their correct position. I'll have another look at it tonight, but I just can't see any reason why it won't sit correctly. I thought maybe there was a known trick to get it in, bit it seems not.
View: https://www.youtube.com/watch?v=Ca5U3ueo1UE


DeathFromAbove
My Cat Says AREAR!
Did you make sure the 2,3,4,basket is all the way on the main shaft? Have you tried spinning the output shaft while pushing the assembly together? Have you put the main shaft in and the primary clutch on the crank, and install the cover then see if the output shaft will install while spinning? Just throwing crap on the wall, don't give up it came out, it will go back in. Chris
ajcmbrown
Husqvarna
Pro Class
Walked into my workshop tonight and it just fell into place, must remember how I was holding my tongue when I did it!View attachment 100982
ajcmbrown
Husqvarna
Pro Class
Thank you all for suggestions, as you can see it's now together, but I have a question regarding the spring cover, is it meant to be in contact with the springs or just clear them in the case of a breakage?
My cover is hard up against the springs and I tend to think the new new lateral load "could" contribute to spring breakage?
Can anyone either confirm my thoughts or put my mind at ease?
Tony.
My cover is hard up against the springs and I tend to think the new new lateral load "could" contribute to spring breakage?
Can anyone either confirm my thoughts or put my mind at ease?
Tony.
DeathFromAbove
My Cat Says AREAR!
Good job getting it together there Tony it's surprising when it just clicks together like that that spring retainer is not made for the 7677 autos it's made for the later models but I put mine in a brake and bent it out and test fitted a bunch of times until it was enough of a gap that I was happy so it wasn't touching the springs Good luck You're moving ahead Chris
DeathFromAbove
My Cat Says AREAR!
As for the sideways pics and videos, before you take the pic or video choose the auto rotation on your phone! Good luck, and so glad you got her together! Chris