• Hi everyone,

    As you all know, Coffee (Dean) passed away a couple of years ago. I am Dean's ex-wife's husband and happen to have spent my career in tech. Over the years, I occasionally helped Dean with various tech issues.

    When he passed, I worked with his kids to gather the necessary credentials to keep this site running. Since then (and for however long they worked with Coffee), Woodschick and Dirtdame have been maintaining the site and covering the costs. Without their hard work and financial support, CafeHusky would have been lost.

    Over the past couple of weeks, I’ve been working to migrate the site to a free cloud compute instance so that Woodschick and Dirtdame no longer have to fund it. At the same time, I’ve updated the site to a current version of XenForo (the discussion software it runs on). The previous version was outdated and no longer supported.

    Unfortunately, the new software version doesn’t support importing the old site’s styles, so for now, you’ll see the XenForo default style. This may change over time.

    Coffee didn’t document the work he did on the site, so I’ve been digging through the old setup to understand how everything was running. There may still be things I’ve missed. One known issue is that email functionality is not yet working on the new site, but I hope to resolve this over time.

    Thanks for your patience and support!

How to check your valve clearances pictorial

Well snap, let's try and confirm this! This would be good news for me, My KTM 950 uses the V-Rod shims (another big deal valve adjust on that sucker), so I have a handful on hand. Plus, they are readily available , dirt cheap and available in half sizes from your local HD dealer.

Somewhere in my research on the Terra, I book marked a 29mm shim kit. That sounds more KLR than Terra.

Does anybody know the answer?

I think the 29mm shims are what the old BMW 650 engines used before the twin spark head and switch to shim under bucket design.
 
Someone with low miles should check their clearances to see what they are set at from the factory. Who knows, maybe mine haven't moved that much? We'll just have to wait and see @12k miles.
 
Someone with low miles should check their clearances to see what they are set at from the factory. Who knows, maybe mine haven't moved that much? We'll just have to wait and see @12k miles.

Not sure that you can go by someone else's bike. I imagine that if the valves are within tolerance the bike goes out the door. I think that each bike varies.
 
... I also asked him about the dust problem, and asked if that would be under warranty. He said no because its the user's responsibility to make sure the filter is working.
I'll be damned.

I would tell him as the user, and purchaser, that you lived up to your responsibility and have determined that the filter is not working properly. NOW FIX IT!!!
 
In a mad rush between changing the oil in my wife's car, and welding on horse trailers this morning, I got the Terra somewhat put back together. While on the lift with no body panels, I put the computer back in and started it. It took a few cranks then slowly fired up. Not sure why it took a few seconds to start, but it is running again.

Now its off to work and a 4 day weekend in Tucson.

Next week will be time to for everything else: new chain, sprockets, rear tire, fix the front tube and finish fabbing up some racks.
 
Well, I was bored, I guess, and dismantled most of my bike to see what it's really like. I went as far as freeing the air box so that it was no longer connected to anything. That's a fair bit, but I didn't get into disconnecting anything from the engine itself. I wanted to get a good feel for it so I could make an educated decision later on whether to find a (distant) shop to do it, or try myself.

After getting far enough to disconnect the airbox from the frame, you really are hoping that the airbox can weasel its way out of there somehow. No can do.

So, I walked around the bike for a while and just contemplated how in the world did they assemble the thing, then?!

I think someone commented here that maybe the back subframe can pivot back and so I looked closer at that idea. Sure enough, I think it seems extremely plausible that it wouldn't be all that bad to make the subframe pivot with most everything in it.

First I looked at the bottom subframe mount. Notice how the shape of the main frame mounting point just so happens to facilitate pivoting here? Both sides are like this.

2013-07-26 at 02-28-33.jpg

Then I looked over everything and tried to figure out what all would have to be additionally finagled to spread her open.

I didn't find much.

A) Disconnect the exhaust just down stream of the oxygen sensor. Maybe you'd have to remove the exhaust on a Strada like mine because the ABS break lines look close, but I bet a Terra would be just fine.

2013-07-26 at 03-09-22.jpg

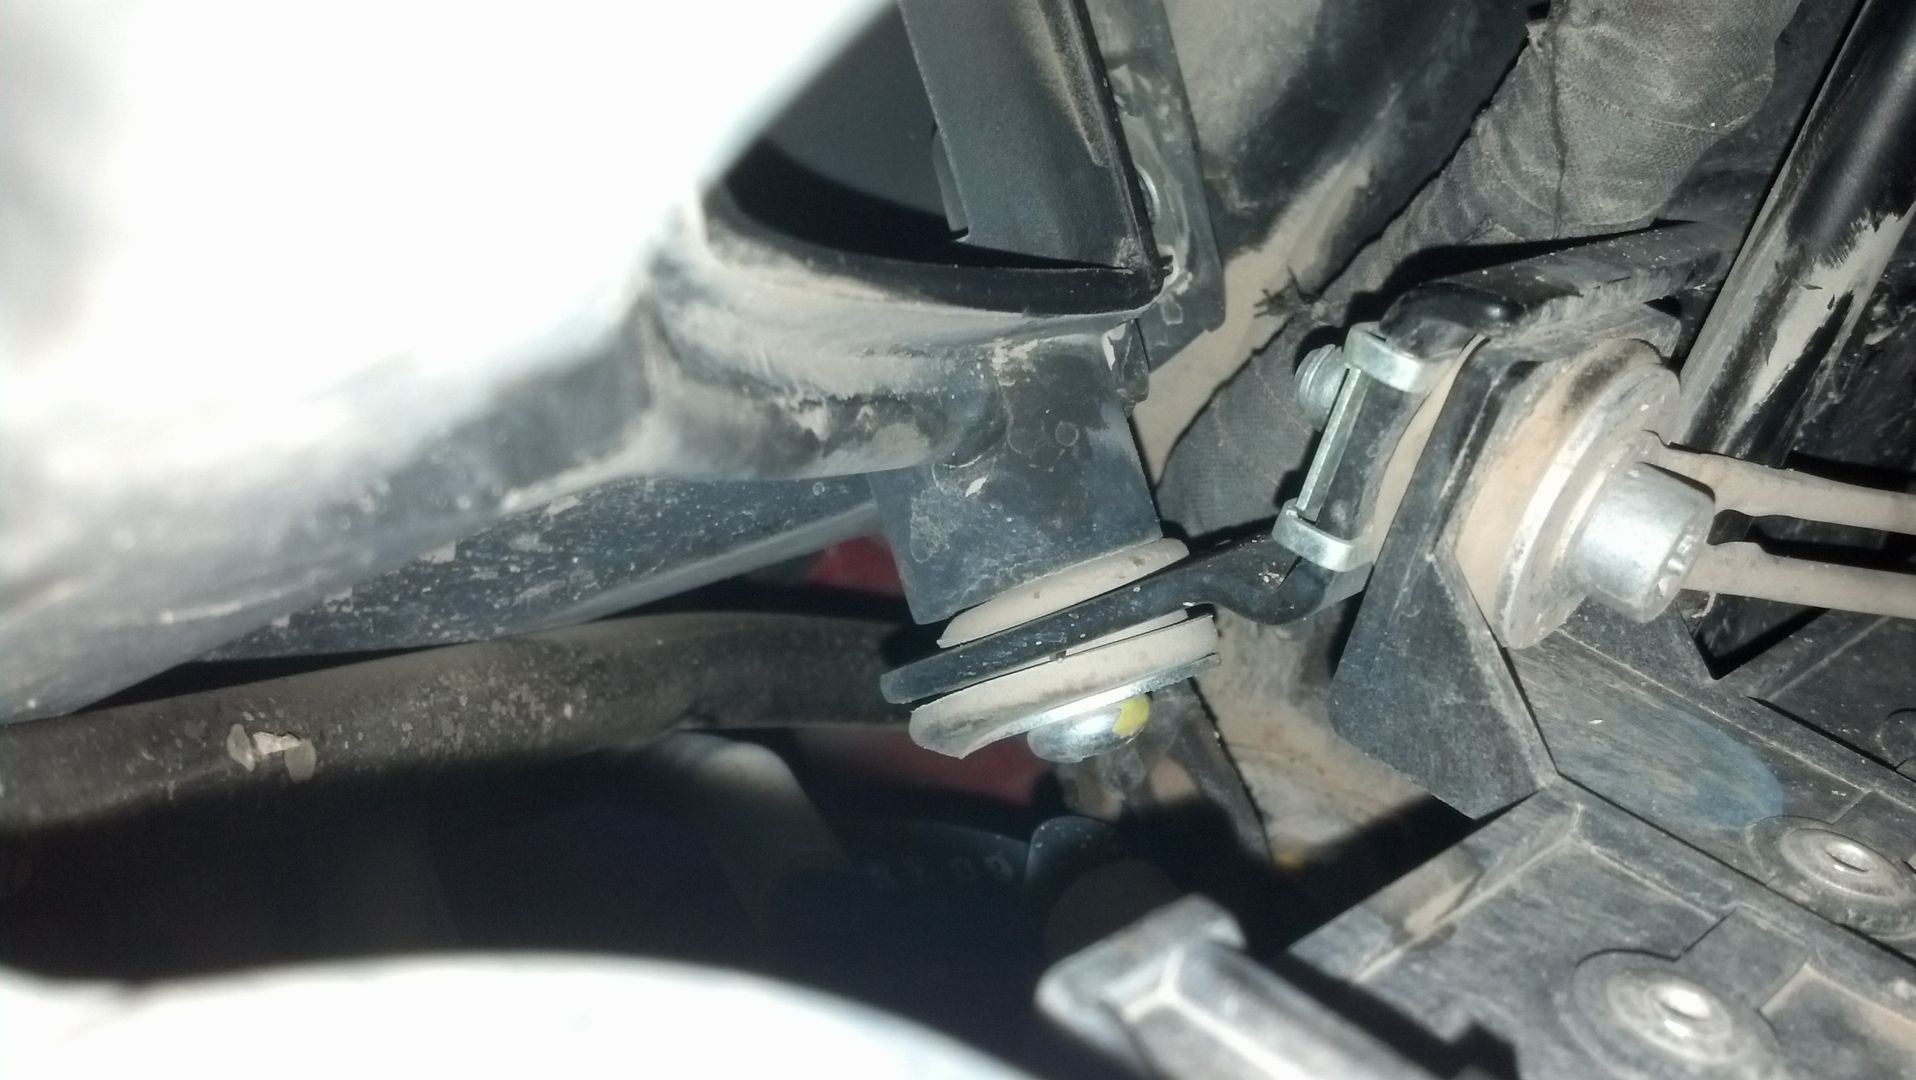
B) Disconnect the fuel line from the pump. I can't figure this connector out. Anyone know how this thing gets disconnected?

2013-07-26 at 03-10-12.jpg

C) Remove all the fuses, relays, ecu, etc, from their holding area so that the wiring harness can be finagled out while spreading open. This stuff is almost tool less, it's so easy. I think the ecu is the only thing actually screwed down.

2013-07-26 at 03-10-40.jpg

D) Remove the 2 upper subframe mounting bolts (1 each side), and the 2 bolts (1 each side) holding the fuel tank to the main frame on the sides.

(picture not allowed in the same message, but these 4 bolts are very obvious)

I think that would be it. Then, I bet, you could pretty simply pivot the subframe open, allowing the airbox to be removed easily. This is, of course, after you get to the point that the airbox is disconnected from its mountings.

I could easily see this being the method of assembly, and therefore the method of disassembly. I couldn't figure out the fuel line connector, or I may have tried to actually do it. Of course, the bike is still disassembled, so if someone knows how that fuel connector works, maybe I'll still have a go at it.
 
Just looking at it, and assuming that the white moulding to the right of the fuel line is an identical connector, then I'd say try turning the black ring counter-clockwise.

From the service manual:

Fuel supply hose inspection and replacement
- Remove the saddle as described in the relevant paragraph.
- Check fuel supply hose (1) conditions; if cracked, swollen, kinked, etc. it is
necessary to change it as follows:
- Press the ring nut (2) and unfasten the union (3).
- Open the clamps (4) and detach the pipe (1) from the unions (3) and (5).
During this operation, make sure that you do not damage the hose holder coupling on the throttle body.
- Replace the pipe (1) and close the clamps (4) on unions (5) and (3). - Refit the union (3) by pressing it down.

It makes a little more sense with the pics, but I'm posting from my phone... So it the best I can do. :)

Searching the service manual, it just completely skips removing the airbox.
Thank you all who are looking into this, we will all benefit.
 
- Press the ring nut (2) and unfasten the union (3).

Thanks, I didn't think to look in the service manual for that. They make it sound trivial. I was pressing that thing all sorts of ways with no progress. Looking at this picture it seems a downward press on 2 sides. I'll look at it again and see if anything happens.
 
Yep, press the ring nut and unfasten the union. I had a little difficulty pressing and pulling on the union at the same time and ended up using needle nose pliers to press on the nut easier with one hand so that my other hand could pull on the union. Ultimately, pretty easy. I'm just glad it doesn't take some specialty tool like I was thinking. Well, should I tackle that exhaust this weekend and see how hard that is?

EDIT: Easily done tool-less, no pliers required.

2013-07-28 at 13-20-30.jpg
 
So, basically here are the instructions for a valve clearance check.

  • Disassemble entire bike except engine
  • Take valve cover off, check clearance
  • Reassemble entire bike

They should put that in the service manual. It follows the spirit of the manual perfectly.
 
... The air box is held in place by a big Phillips screw located right behind the radiator:

IMG_20130721_110242_483_zps22e0ddaa.jpg


This single screw is the cause of several unnecessary steps. Once you do this part once, I recommend changing this screw to one with a hex head so a wrench can be used next time. I found a perfect replacement with a hex head at my local Ace in the standard bulk bins.
 
Back
Top